Big healthy balls

The original intent of this post was not to highlight men’s health. However, seeing as we are still in the month of November it does seem appropriate to touch briefly (yes, figuratively speaking) upon this subject. November is the chosen month of The Movember Foundation, a global charity that focuses on encouraging men to live longer, happier and healthier lives. Founded in 2003 and focusing on prostate cancer, testicular cancer, poor mental health and physical inactivity, they have raised over $685 million dollars. This has been through the growing of moustaches for thirty days in ‘Movember’ or something called MOVE. A thirty day physical fitness challenge. An awesome effort in my opinion.

Having witnessed the devastation that cancer can wreak and the heartbreak that suicide brings to all, I say ‘balls’ to the bad old days of men just ‘pushing through and getting on with it’. If you are a man, go get those regular doctors checks and let us all start more open dialogues regarding men’s health and mental well being. Discussing emotions and seeking professional help when needed, is not just for chicks. As my young lads grow into this world, we encourage them to talk about their feelings and try to convey to them that being a man, is not just about showing the world a tough exterior.

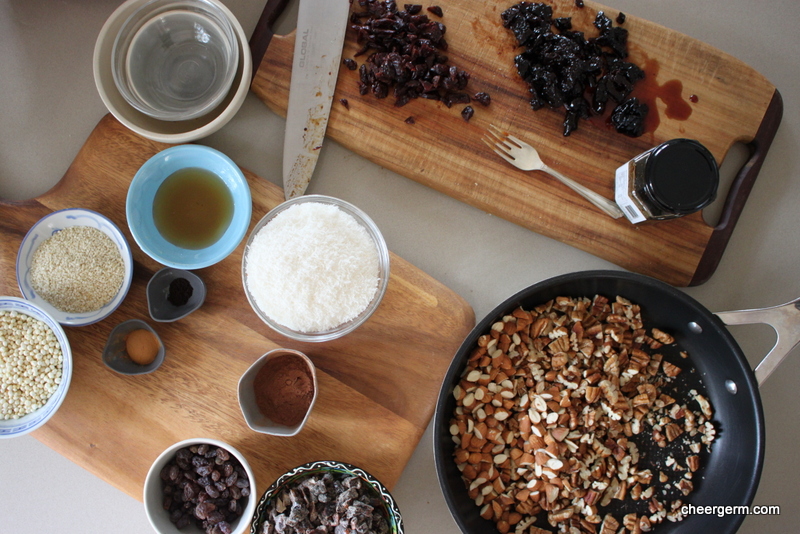
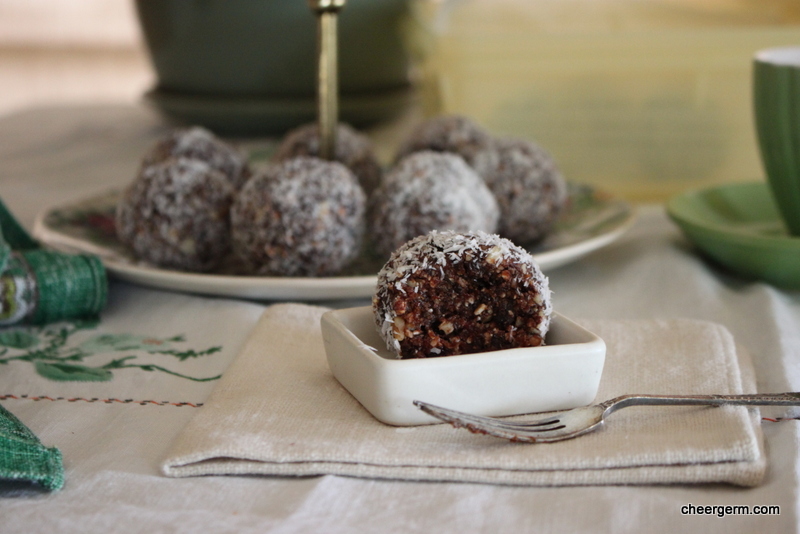
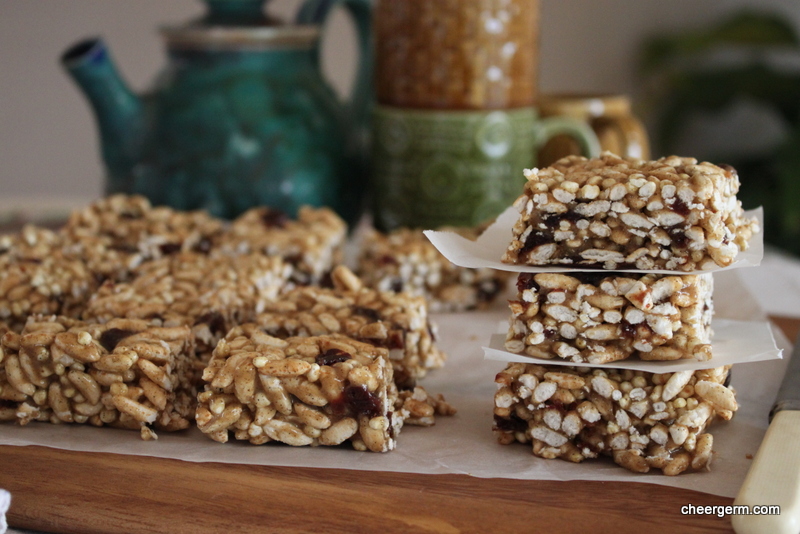
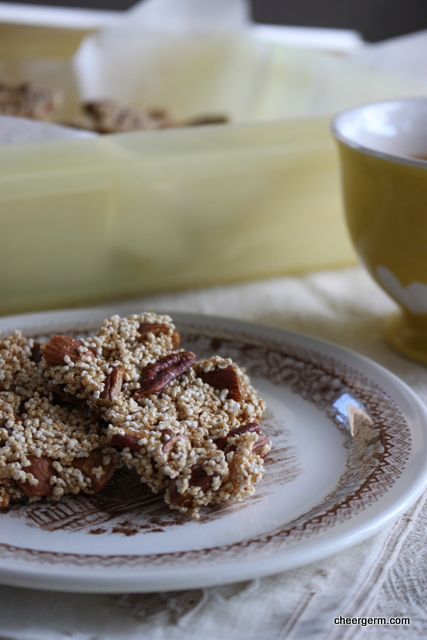
Back to the original topic. These date, nut and prune laden ovoid edibles are a delicious healthy bite for those peckish times. Based on a recipe that a friend has been making for a while, I must admit to feeling completely ripped off that they were not her usual scrumptious old school spherical butter, chocolate and biscuit goodies. However, as balls will do (on those of us who are male), they have grown on me.

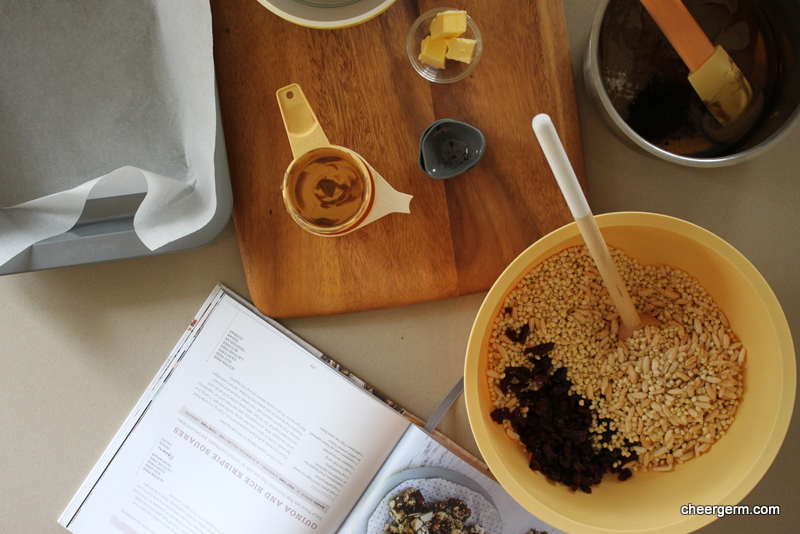
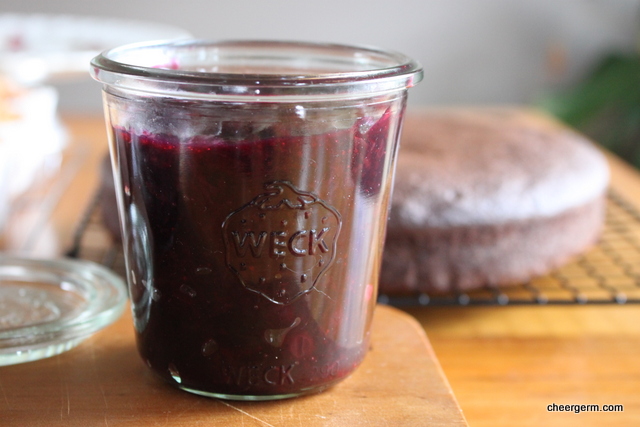
Adaptations include swapping the oats for gluten free puffed millet, using whatever nuts I had on hand and opening a jar of wondrous Prunes in Vinno Cotto (or vincotto) from the Western Australian Cape Farm Shop. (Given by the mothership after a recent sojourn she enjoyed there.) Vincotto is essentially a condiment made from unfermented grapes that are slowly cooked until they become thick and syrupy. These prunes added a sweet and almost musty piquancy to this unctuous mixture of nuts, fruit and cocoa. You can of course, use regular prunes if you have nothing similar.

Healthy balls, we all need them.

HEALTHY GLUTEN FREE DATE AND NUT BALLS

WHAT YOU NEED
1 2/3 cups pecans (original recipe called for 1 cup walnuts and 2/3 cup raw cashews)
2/3 cup 100g almonds (recipe asked for blanched I used regular almonds, skins on)
150g pitted dates, chopped
1/2 cup chopped pitted prunes (mine were in vinocotto)
1/3 cup sultannas
1/3 cup tart dried cherries (the original recipe called for 2/3 cup apricots chopped but I used sultannas and cherries)
1/2 cup puffed millet (puffed amaranth or rice would also work)
2 tbl sesame seeds
2 tbl cocoa powder
1 tsp cinnamon powder
1/4 tsp vanilla bean powder (or 1/4 tsp vanilla essence)
2 tbl honey
1 cup dessicated coconut

HOW YOU DO IT

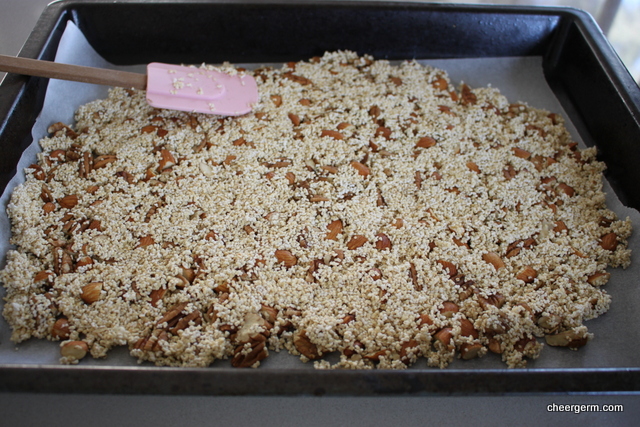
Place the pecans and almonds (or whatever nuts you have chosen) into a frypan and cook over a low to medium heat for 2-3 minutes until lightly toasted.
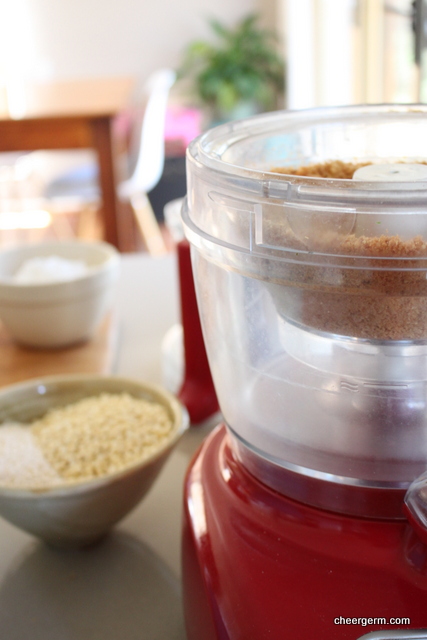
Using a food processor, process them until finely chopped.
Add the dates, prunes, sultannas, cherries, sesame seeds, cocoa powder, cinnamon, vanilla and honey into the food processor and blend for 2-3 minutes until the mixture forms a paste.
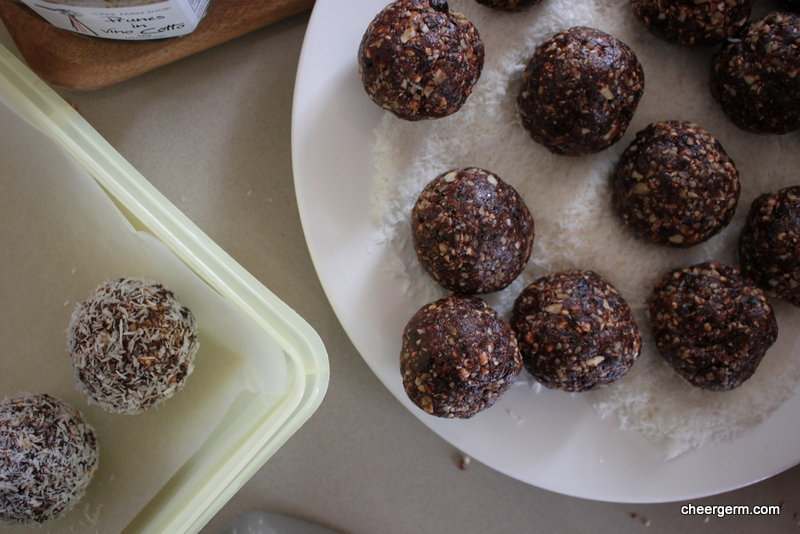
Divide the mixture into golf ball sizes (about 50g) and roll into balls. It helps if you lightly moisten your hands before rolling them.
Roll the balls in the coconut and serve.
Store in an airtight container, as we have had extremely hot weather, I refrigerated ours.
Makes 12 balls.

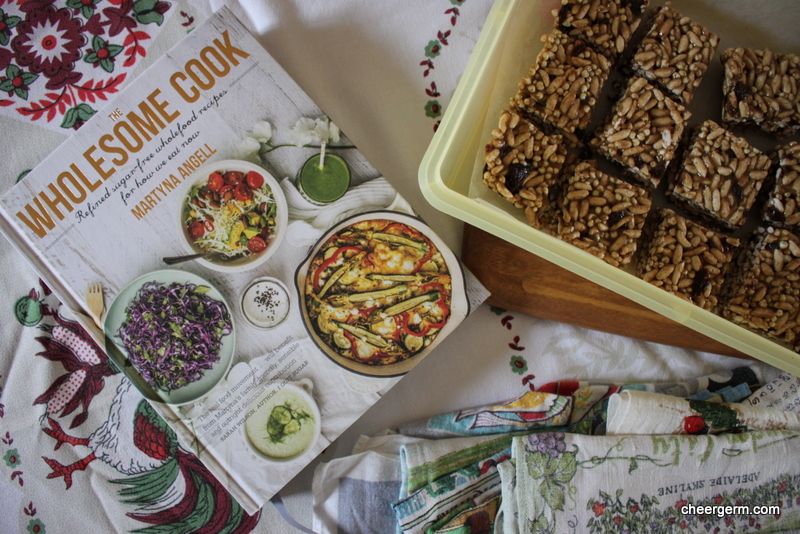
A Cheergerm adaptation of a Jill Dupleix recipe from the Delicious website,

https://au.movember.com/about/foundation

https://www.beyondblue.org.au

http://www.delicious.com.au/recipes/date-nut-beach-balls/67e3e391-4a01-4302-904a-d4583e26ca85

http://capefarmshop.com.au/category/recipes/page/2/


Black sesame chocolate cake, looking into the heart of darkness

A person with a vivid imagination could easily gaze into the inky black oil slick that is this cake batter and associate it with all that is dark and evil. Easy to do, in the distressing and challenging times we are currently living in. The portion of my soul that is part poet longs to wax allegorically. However, the pragmatist within, gave the poet inside, a short sharp slap around the chops. Serving as a stern reminder that this was merely a cake made of black sesame powder, given as a gift by a sweet friend. Pondering what to do with this bounty, there was certainly something fortuitous in the recipe that popped up on my Facebook feed a day or so later.

Black sesame seeds are rich in vitamin B and iron and the Chinese believe they assist in slowing down the ageing process. (Anti-ageing you cry! Be warned, they can also have a laxative effect so don’t start chowing down on them by the handful.) They contain nutrients that protect the heart, aid digestion and can assist in lactation. Quite the tiny powerhouse indeed.

Ground sesame has the aroma of a musty health food store but this rich dense cake ends up tasting nutty and earthy. The generous slathering of chocolate ganache atop this somewhat grim looking bake is a decadent and welcome addition. Maybe it is a cake perfect for a Halloween or Day of the Dead celebration. Our children were extremely fond of this toothsome dessert despite it’s subdued sweetness. To the point of asking for extra servings, repeatedly. And there certainly isn’t anything dark about that.

BLACK SESAME CHOCOLATE CAKE, GLUTEN FREE

WHAT YOU NEED
200g (1 1/3 cups) black sesame seeds (I used 1 cup ground sesame seed powder as that’s what I had.)
200g butter, chopped
3 eggs, lightly beaten
185g (1 cup) coconut sugar
100g (1 cup) almond meal
35g (1/3 cup) plain gluten free flour
1 tsp gluten free baking powder
Chocolate Ganache
200g dark chocolate, chopped
100 ml pure cream

HOW YOU DO IT
Preheat oven to 180C. Grease and line a 20cm square baking tin.
Grind the sesame seeds in a mortar and pestle or spice mill. (I didn’t need to as my seeds were already ground.)
Put the butter and sesame seed paste into a saucepan and cook over a low heat until melted.
Remove from heat and place into a large bowl, allow to cool down for ten minutes.
Stir the eggs and sugar into the sesame seed mixture.
Sift the almond meal, flour and baking powder into the sesame seed mixture and gently fold to combine.
Pour into the prepared tin and bake for 30 to 40 minutes until a skewer inserted into the middle of the cake comes out clean.
Allow the cake to stand in the tin for ten minutes before turning onto a cake tray to cool completely.
To make the chocolate ganache, combine the chocolate and cream in a saucepan over low heat and cook, stirring occasionally, until the chocolate melts.
Remove from heat and allow to cool for 15 minutes, until thickened.
Spread the ganache over the cake and allow to set. Cut into small pieces and serve.

Recipe from the SBS Food Website taken from Beautiful Food by Jody Vassallo, published by Harlequin.
http://www.sbs.com.au/food/recipes/black-sesame-chocolate-cake?cid=23230


A honey cake fit for a Pooh Bear

‘Pooh said goodbye affectionately to his fourteen pots of honey and hoped they were fifteen, and he and Rabbit went out into the Forest.’

Recently, I accidentally found myself with three kilograms of glorious honey. It may not have been Pooh’s fourteen pots but it did feel as if the gods of providence had smiled upon me.

This abundance of golden liquid ambrosia called for a honey cake. The weather had turned nasty so all and sundry were cooped up within the confines of the house. The Pied Piper smell of the melting honey, butter and sugar enticed lads of all sizes into the kitchen. ‘What is that smell?’ they whispered wondrously. This cake smelt of every good thing that ever existed.

The warmy woody spices balanced the cakes caramel like sweetness. Honey is a natural source of sugar but from what I have read, it isn’t necessarily a healthier sweetener when used in baking. However, when consumed in its raw and unheated state it contains antioxidants as well as anti-bacterial and anti-viral properties. Maybe Pooh Bear really was a bear before his time but I am also sure that he wouldn’t have turned up his nose at a little smackeral of this moreish cake. Particularly if it was eleven o’clock.

GLUTEN FREE HONEY CAKE

WHAT YOU NEED
250g clear honey and 2 tbls extra for glazing
225g unsalted butter, chopped
80g dark sugar
3 large eggs, beaten
300g gluten free self-raising flour (or regular SR flour)
1 tsp cinnamon
1/4 tsp nutmeg

HOW YOU DO IT
Preheat oven to 140C and grease and line a 22cm springform tin.
Place the honey, butter and sugar into a medium saucepan and melt slowly over a low heat. When the mixture looks quite liquid, increase the heat and boil for one minute. Remove from heat and pour the mixture into a large mixing bowl.
Let the honey mixture cool down, this prevents the eggs cooking when they are added. (This took about half an hour.)
Once cooled, beat the eggs into the honey mixture using a wooden spoon.
Sift the flour and spices over the honey and egg mixture and beat until you have a smooth and quite runny batter.
Pour the mixture into the prepared tin and bake for 50 minutes until the cake is risen well, golden and springs back to the touch. A skewer inserted into the cake should come out clean.
Let the cake cool for 5 minutes in the pan then turn onto a wire rack.
Warm the 2 tbl of reserved honey and brush over the top of the cake to give it a sticky glaze. Allow to cool. Then eat a smackeral around eleven o’clock in the morning. You won’t regret it.
Store wrapped, in an airtight container.

Cooking Notes
If you don’t require this cake to be gluten free, simply use the same amount of regular plain self-raising flour.

A Cheergerm adaptation a recipe from the BBC Good Food website. Link provided after photos.

http://www.bbcgoodfood.com/recipes/1840/devonshire-honey-cake

The leading quote comes from AA Milnes beloved and charming children’s novel ‘The House at Pooh Corner.’


Building windmills millet and rice puff squares

Me: I don’t like it, it’s new.

Kid 1: Stop building walls and build windmills.

I stare agog at this child of mine dispensing wise advice like a miniature life coach. This ‘set in its ways’ brain of mine has forgotten what ‘new’ thing I was alluding to. He was referring to an ancient Chinese proverb that goes ‘when the wind of change blows, some people build walls, others build windmills.’ Change is one of the few things in life that is constant. Having always thought of myself as someone adapts to change readily, I was somewhat taken aback. It would seem that ‘wall building’ creeps up on you. Not wanting to be the stubborn person who remains unresponsive to all that is new, I will have to remain vigilant. (In other words, I do not want to become what is commonly known as ‘an old fart’.) I am thankful (mostly), that my Anthony Robbins wannabe son will keep me on the straight and narrow.

One thing that has thus far remained constant, is my love of the ever changing world of food and the brilliant adventure of trying new recipes. My latest cookbook love is The Wholesome Cook, written by Martyna Angelas. The creator of an award-winning blog, her book is chock full of refined sugar-free wholesome recipes. It is a stylish tome full of inspiring photos and a wide range of nutritious and easy-to-prepare meals. Her sensible philosophy really resonates with me. She acknowledges that no single diet fits everybody the same and as our environments and bodies change, so should our diet. No wall building going on in this book. Some of my earmarked recipes include the Polish gingerbread cake, the double chocolate and caramel popcorn cake, kale and cashew pesto, the fennel, ginger and turmeric soup and the sweet and sour lamb riblets. My mouth is watering already.

This nifty little snack lives up to its promise. A few changes were made to the original recipe but this was merely due to the fact that I wanted to use whatever I had on hand. It is a grown up, healthy-err, gluten free version of salted caramel rice bar. The tangy fruit adds a zesty brightness to it. Moreish, chewy and a new favourite for the adults in our household.

MILLET AND RICE KRISPIE SQUARES, GLUTEN FREE

WHAT YOU NEED
3 cups gluten free crispy rice cereal (I used wholegrain brown rice puffs)
1/2 cup puffed millet (the recipe calls for puffed quinoa)
3 tbl dried blueberries or cranberries (I used tart dried cherries, chopped)
1/2 cup hulled tahini (I used unhulled as its all I had)
1/2 cup rice malt syrup
1 tsp vanilla powder
1 1/2 tsp salt (optional, I used 1 tsp, this gives it the salted caramel flavour, the recipe says its optional, I highly recommend going the salt route)
1 tbl (15g) raw cacao butter (I used unsalted butter)

HOW YOU DO IT
Line a 29cm square baking tin with baking paper.
Place rice cereal, puffed millet and dried fruit into a large bowl. Set aside.
Combine tahini, rice malt syrup, vanilla and salt in a small saucepan.
Melt, stirring gently over low heat until all ingredients are blended together. Do not boil. Add cacao butter (butter) and whisk until melted.
Pour warm mixture over rice cereal mixture and mix well. (Move fast while the mixture is still warm.)
Transfer to prepared tin and press into the base, corners and edges. I used my small off-set spatula to do this.
Refrigerate for 30-60 minutes before slicing into squares. We kept our squares refrigerated.

Recipe from The Wholesome Cook by Martyna Angell, published by Harlequin, October 2015

Quick and Easy Recipes


A messy life and a messy rhubarb and coconut slice

In our social media lives, we are inundated with beauty. Images of gorgeous food, people and places rain down upon us from our Instagram, Facebook and blogging feeds. This stuff floats my boat. It inspires and feeds the creative beast that lurks within. There is nothing wrong with beauty, with wanting to create it or own it. It lifts our spirits and soothes our eyes and souls when we are weary, low or merely bored.

Beauty lubricates life and is the grease that keeps my wheels turning. But there is a flip side to every coin and a ying to every yang.

When viewing these images, we can easily forget the chaos that goes on behind the scenes and that life is intrinsically messy. Children are, intimacy is, friendships and family can be. My hair is messy and curly, no matter how I may try to tame it. My house is a weird mixture of beauty, clutter and order. Work is not always straightforward, nor is writing a blog. It can be difficult to decide how much to reveal and how much to keep private. Disarray abounds.

This slice reminded me of that fact. Whilst trying to smooth the troublesome batter into the cake tin, the temptation of binning the entire bake was high. My fingers were steeped in a sticky blend of butter and flour and as the vibrant rhubarb poached, my temper rose to simmering point. The coconut crumble for the top resembled the surface of the moon and the resulting photos looked shambolic. The scrappy coconut playing havoc with my focus (both the cameras and my own.)

Don’t post, came to mind. Yet it tasted so very, very good. The jammy sweet and sour rhubarb was offset by a crunchy biscuity bottom and the textural tropical macaroon topping. The Yak was a very happy man, giving it the big coeliac thumbs up. He certainly didn’t give a flying fig how it looked.

So perhaps, loveliness is also in the mess. We were brought up to believe that beauty is only skin deep and what truly matters is depth of character. Something we try and relay to our own children. So much of the food we consume at home isn’t always picture book perfect but it certainly tastes darned good.

Beauty perhaps, truly is in the eye of the beholder.

GLUTEN FREE RHUBARB AND COCONUT SLICE

WHAT YOU NEED
150g butter, softened
1/3 cup caster sugar
3/4 cup gluten free plain flour
1/4 cup teff flour (or rice flour)
2 bunches rhubarb (I had one big bunch that weighed 550g) washed, trimmed and cut into 3cm lengths
1/3 cup water
1/4 cup caster sugar (to cook with rhubarb)

Topping
2 cups desiccated coconut
2 eggs, beaten
1/4 cup caster sugar

HOW YOU DO IT
Preheat oven to 160C and line a 3.5cm deep 16cm x 26 cm (base) lamington pan. I used a larger tin and spread the mixture out to roughly those dimensions.
Using an electric mixer, beat the butter and the 1/3 cup of sugar until well combined.
Sift the plain and teff flours into the butter mixture and mix well.
Using an offset spatula (the recipe suggests floured fingertips but I found it far too messy), press and smooth the flour mixture evenly into a pan.
Bake for 20 minutes or until golden. Cool down and increase the oven temperature to 170C.
While the base is cooking, combine the rhubarb, water and 1/4 cup caster sugar in a large saucepan. Stir until the sugar has dissolved and bring to a simmer. Cover and cook for up to ten minutes or until the rhubarb is tender. Let cool for about 30 minutes then spoon the rhubarb mixture over the cooled and cooked base.
Topping
Mix the eggs, sugar and coconut well, then spoon the mixture over the rhubarb. Press down and bake for 25 – 30 minutes until light golden. Cool in the pan and cut into squares or slices.

An adaptation of a recipe from the Taste website. Link to original recipe provided after the photos.

IMG_4719

http://www.taste.com.au/recipes/7676/rhubarb+and+coconut+slice


The siren call of the sunflower seed

Funny how life can come full circle. Things from childhood, that in your teens and early twenties seemed so passé, suddenly become desirable or enjoyable.

One particular blast from my past, has always left me stone cold. The sunflower seed and its hippy chicky cohort, the pumpkin seed or pepita, as it is also known. Mum tried to sneak those little buggers into everything. Little parcels of them appeared in our lunch boxes, whereas other lucky children may have scored a chocolate teddy bear biscuit. They also crept into cookies, cakes, salads, breakfast cereal (not really but I bet she would have if she thought she could have.) These wee kernels stood for everything that, at the time, I totally didn’t get. (Physically and metaphorically.) Homemade, nutritious food in abundance, when all I really wanted was a store bought white bread tomato sandwich. And a Mars Bar.

Our parents grew radiantly yellow sunflowers in our garden and we watched with fascination as they grew tall, blossomed and withered. We would watch their seeds darken, harden and grow as the flower matured. They also grew pumpkins, in varying shapes and sizes. Not even these living miracles convinced me it was natural to consume their kernels.

For many years I have staunchly withstood the squeaky siren call of the sunflower seed. Until that fateful day, when the decision was made to throw together a gluten-free granola for The Yak. Packets of those grey and green coloured things were purchased. After a good toasting, there was a tasting (because a good cook should) and guess what? I liked them. I really liked them.

Full circle. Sorry Mum.

This gluten-free recipe is from The Gluten-free Kitchen cookbook by Sue Shepherd. It is definitely what you would classify as a ‘health cake’ and The Yak (self-proclaimed taster) and cohorts have all proclaimed it as a toothsome and moreish concoction. Dense and fruity with an intense blend of cinnamon, nutmeg and cloves that will make your head spin. This cake is savoury, earthy and studded with a plethora of seeds and nuts. A small piece goes a long way and your body will thank you.

FRUIT, NUT AND SEED CAKE, GLUTEN FREE

WHAT YOU NEED
1/2 cup sultanas
1/2 cup tart dried cherries chopped, (or raisins, I like the sourness of these cherries.)
1/2 cup glacé pineapple (125g), chopped
1 tsp ground cinnamon
1/2 tsp ground nutmeg
1/2 tsp ground cloves
30g butter
1/2 cup caster sugar
140g brown rice flour
90g buckwheat flour
2 tsps gluten-free baking powder
1 tsp bicarbonate soda
1/4 tsp salt
1 tbl ground flaxseed or 1tsp Xanthum gum. Both are optional but I used flaxseed.
3 eggs, lightly beaten
3/4 cup pecans, chopped
1/2 cup sunflower seeds
1/2 cup pumpkin (pepita) seeds
3 tbls sunflower seeds, extra for sprinkling
3 tbls pumpkin (pepita) seeds, extra for sprinkling

HOW YOU DO IT
Preheat the oven to 160C. Grease a 20cm springform cake tin and line with baking paper.
Combine the sultanas, cherries (raisins), pineapple, cinnamon, nutmeg, cloves, butter and sugar and 1 1/4 cups water in a medium saucepan over medium heat. (Smells like Christmas when the fruit is cooking.)
Stir until the sugar has dissolved , then increase the heat and bring to the boil.
Boil for 1 minute, then reduce the heat and simmer for 2-3 minutes. Transfer the mixture to a large bowl and cool to room temperature.
Sift the flours, baking powder, bicarbonate of soda and flaxseed/Xanthum gum (if using ) into a bowl. Repeat this process three times to ensure they are well combined. Or whisk really, really well.
Add the eggs, pecans, sunflowers seeds and pumpkin seeds to the cooled fruit mixture, then stir in the sifted flour mixture.
Pour into the prepared cake tin and sprinkle the extra sunflower and pumpkin seeds on top. Cover with foil and bake 50 minutes, then remove the foil, rotate the cake tin and bake for a further 10 to 20 minutes or until a skewer inserted into the centre of the cake comes out clean.
Remove onto a wire rack, let the cake sit in the tin for 15-20 minutes, then remove carefully onto the wire rack and let cool completely.
Store in an airtight container.

COOKING NOTES
If allergic to nuts you could substitute the pecans with extra dried fruit and seeds.
Rotating the cake tin ensures more even baking.
I have also been reading about about grinding sunflower seeds in a spice blender or NutriBullet type doohickey, and adding them to baking. Kids, watch out.

Recipe from The Gluten-free Kitchen by Sue Shepherd. Published by Viking, Penguin, 2009. (With one or two minor changes.)


Gluten free lemon coconut fridge slice, a happy accident

This recipe was a happy accident. Others accidents I have experienced have been far less joyful. Take for example the time that I gained rather painful third-degree burns on a delicate part of the anatomy, upon backing into a wall heater. In my defence, it was a cold and wintery Melbourne morning and the heater was irresistibly warm. No cheer found there.

Then a few years ago, I boarded a train, holding Kid 2’s pram with one hand and attempted to open the train door with the other. Pushing the door with undue force, I overbalanced and slipped into the gap between the train and the platform. Dangling from the train door handle, I utilised my superhuman strength and propelled myself upwards. My shoulder was badly damaged but I did have the wherewithal to let go of the pram when I slipped. Could have been worse but again, not happy.

Or the time that I haphazardly found myself in the middle of a bar fight that had nothing to do with me and was punched in the face. That experience provided very little glee indeed.

This tasty no-bake slice is just as good using either gluten free or regular store purchased biscuits. The recipe required 250g of biscuits but my pantry only coughed up a mere 160g packet of gluten free Anzacs. What to do? With the temperatures set to unseasonally and prematurely soar to 37 degrees Celsius there was no way that I was getting in the car to go shopping. It was also a public holiday and lassitude ruled the day.

Necessity once again being the mother of invention, my beady eyes happened upon some bags of puffed amaranth and millet. A cup of each was added and Eureka! It worked.

Chewy, cold, buttery and sweet, this fridge slice is balanced by a superb lemony punch. A happy accident indeed and so much more enjoyable than a real punch in the face. Trust me.

GLUTEN FREE LEMON AND COCONUT FRIDGE SLICE

WHAT YOU NEED
1/2 cup sweetened condensed milk
125g butter
250g milk arrowroot biscuits gluten free or not ( Arrowroot work best but all I had was a 160g packet of gluten free Anzacs.)
1 cup puffed amaranth
1 cup puffed millet
1 tsp grated lemon rind (I used the rind of two small lemons)
1 cup desiccated coconut

Icing
1 3/4 cups icing sugar, sifted
3 tbl lemon juice
15g butter, softened
2 tbl dessiccated coconut

HOW YOU DO IT
Line a lamington tin with nonstick baking paper.
Place condensed milk and butter in a saucepan. Stir over gentle heat until the butter has melted and the mixture has combined.
Crush the biscuits very finely. (Either old school by placing them in a plastic bag and beating the stuffing out of them with a rolling pin or sensibly, as I did, by placing them in a food processor.)
Place the biscuits into a large bowl, add the lemon rind and coconut. Mix well.
Add the condensed milk and butter to the biscuit mixture. Mix well.
Press the mixture into the tin, my slice was about 1.5 cm thick and about 24cm long x 23cm wide, it didn’t use up all the tin. Refrigerate for one hour.
Icing: Combine the sifted icing sugar, lemon juice and butter in a bowl. Mix well until smooth. Spread over the chilled biscuit base and sprinkle with the coconut.
Refrigerate until the icing is set, cut into small squares.

A Cheergerm adaptation from a recipe found on the Allrecipes website.

http://allrecipes.com.au/recipe/12464/lemon-coconut-slice.aspx


Crackers about gluten free Parmesan crackers

Personally, this Cheergerm has always thought you must be crackers to make your own crackers. No, not really, it’s just that writing that sentence was too good an opportunity to pass up. Upon reading the savoury biscuit blog posts of far less lazy cooks than myself, my admiration and envy has only grown. Many is the time I have murmured in a soft and sibilant whisper, ‘one day I will get off my behind and attempt to scale the lofty heights of cracker cooking.’ (The family no longer looks askance at such utterings, they are used to it by now.)

Just because I enjoy a challenge, it had to be a crisp biscuit that provided a punch of flavour and was also free of gluten. These are made with almond meal so sorry to say, out of the question for those with nut allergies.

Fortuitously, in attempting to dip my toe into these treacherous waters, I perchanced upon an easy (highly important) recipe from the marvellous SBS food website. Get Ye Splendid Selves Over to Thee Magnificent SBS Foodie Website and Ye Shall Be Richly Rewarded. (But if you don’t mind, please finish reading this blog post first, thanks, thanks kindly.)

These lightly bronzed tidbits were sharply piquant, nutty and went wonderfully with a gin and tonic. A few days later, I reheated the remainder in a low oven and they crisped up beautifully. I may have come late to the foray of savoury bikky baking but I am here to stay.

GLUTEN FREE PARMESAN CRACKERS

WHAT YOU NEED
200g (2 cups) almond meal
150g (1 1/4 cup) Parmesan cheese finely grated, do use the good stuff and you will be highly rewarded in the flavour stakes plus extra finely shredded to sprinkle
1/4 tsp cayenne pepper (I used 1/8 tsp of super hot chilli powder)
1 egg
2 tbsp olive oil and extra to brush on the biscuits

HOW YOU DO IT
Preheat oven to 200C (180C fan forced) and line two trays with baking paper.
Combine the almond meal, Parmesan and cayenne pepper in a medium size bowl.
Whisk the egg and olive oil together then add to the almond meal mixture, use your hands to mix into a soft dough.
Divide the mixture in half, place one portion in between two sheets of non-stick baking paper and roll to a 5mm thickness. Use a sharp knife or pizza cutter (I used a pizza cutter) to cut into 5cm squares (mine were not exact) and place on the baking paper. I used a nonstick spatula to do this.
Repeat with the remaining portion of the dough and re-roll the cut offs. (If you so desire, I did and you get a lot more bikkies.)
Lightly brush the biscuits with a little extra olive oil and sprinkle with a little finely shredded Parmesan.
Bake for 10-15 minutes swapping the trays halfway through or until the biscuits are crisp and golden. Cool on the trays.
Store in an airtight container. I made about 40 crackers, by using all of the scraps.

Cooking Notes:
The crispier and golden they are, the better they are. After a few days, they do soften just a tad so I like to crisp them up in the oven for five minutes or so on 160C. Let them cool and they willmbe super nice and crunchy again.

Find the original recipe here:
http://www.sbs.com.au/food/recipes/gluten-free-parmesan-crackers

https://stonepinedistillery.com.au


Amaranth and nut crunch, gluten free

This crunch is a healthy-err version of a peanut brittle or muesli bar. Don’t feel tied down by the nuts in your pantry. (And certainly, never let a nut tie you down in the pantry.) Whilst the recipe called for cashews, there was nary a one to be seen in my household. I used what nuts I had, almonds and pecans. Walnuts or hazelnuts would also be totally ace.

Generally speaking, eating a handful of nuts a day is not a bad thing. They are chock full of healthy fats and can assist in lowering cholesterol. Anyone with nut allergy issues may like to try substituting the nuts with a combination of pumpkin seeds, sunflower seeds, flaxseeds and hempseeds.

Alongside all of this nutty goodness, there is the addition of the quite excellent gluten-free crazy perfectly sphere shaped grain, amaranth. This grain can be traced back to ancient Aztec times. (Nothing like a spot of cereal when you have just finished sacrificing someone.) In the gluten-free grain stable, it is a winner. High in protein, iron, the amino acid lysine, magnesium calcium and fibre. Amaranth is also low in carboyhydrates.

This super poppy, crispy snack is akin to a light rice bubble bar and is a little bit sweet, a little bit savoury. It is the perfect crunchy tidbit to quell those afternoon hunger cravings.

Thanks to my dear friend N, who passed on this recipe. This post is dedicated to all the nuts in my life. Including myself.

AMARANTH AND NUT CRUNCH

WHAT YOU NEED
2 cups popped amaranth
1 cup roasted unsalted cashews (I used pecans), roughly chopped
1 cup almonds, roughly chopped
25g butter, melted
2 tbl rice malt syrup
1 tbl honey
A drizzle of vanilla essence (or 1/4 tsp vanilla bean powder)
Big pinch sea salt

HOW YOU DO IT
Preheat an oven to 150C and line a large baking tray with non-stick baking paper.
Place all of the ingredients in a large bowl and stir until they are well mixed and wet. They won’t really stick together.
Pat the mixture onto the tray.
Place in the oven and cook for 20-25 minutes until golden.
Let the mixture cool on the tray then snap into shards.
You will have trouble stopping yourself from eating it all.
Store in an airtight container.

Recipe given by a friend, no idea where it came from before that.


Blueberry sauce and a baking competition

So, the opportunity arose to partake in a baking competition. The event was being held to raise money for a sensory room at the school where the Mothership teaches. The idea being that your baking would be adjudicated by a panel of expert judges (in other words, people who liked food). The entered goodies were then to be sold at a big bake stall. How could I turn down the opportunity to raise money for a great cause? To me, it’s never been about the winning, it’s always been about the participating. It’s about ‘the taking part’, ‘giving it your best shot’ and all that guff important stuff.

Who am I kidding? I wanted to win. Big time.

The things that this Cheergerm has won in life (if you don’t count the esoteric crap such as true love, two great kids, friendship, good looks, talent) are few and far between. I do remember winning a puzzle once. It wasn’t even a particularly good puzzle.

What to bake, what to bake. It had to be my never fail flourless chocolate cake recipe. But it needed to be elevated and given an extra touch that could really wow them. Basically, it had to be something that could be placed into my new German jars (that I am currently obsessed with). That way, if my cake sucked, the judges would be so blinded by my quality glassware they would hand me the win.

With a few fresh blueberries left and some good quality (as in they won’t poison anyone) frozen ones in the freezer, the idea of a blueberry sauce popped into my mind. A recipe was found, a few adjustments made and Bob was my uncle. Sweet, tart and wonderfully gloopy, this fruit sauce was the perfect accompaniment to the rich, dark cake. We ate the leftovers as jam.

Wonderfully, a decent amount of dosh was raised. Did I win? Sadly not but the runner-up sash and smaller, far less sparkly tiara were mine. My cake and sauce were pipped to the post by mini cheesecakes. Damn those tiny rounds of baked cheesy goodness. Damn them.

BLUEBERRY SAUCE

WHAT YOU NEED
2 cups blueberries (I had 1/2 cup fresh and 1 1/2 cups frozen)
1/3 cup sugar
1/2 cup water
1 tbl lemon juice
1/4 tsp vanilla bean powder or 1/2 tsp vanilla bean essence
1 tsp cornstarch mixed with 1 tbl water
Zest of one lemon (about 1 tbl)

HOW YOU DO IT
Place the blueberries, sugar, water, lemon juice and vanilla into a medium saucepan,
Over a medium heat, bring the mixture to a low boil, stirring regularly.
Add the cornflour (that has been dissolved in water) to the saucepan slowly. Be careful not to squish the blueberries.
Simmer the sauce until it reaches the consistency where it coats the back of a spoon, this takes about 5-10 minutes.
Stir in the lemon zest. Taste it, you may want to add another dash of lemon juice. I did.
Put the sauce into a pretty jar and serve with flourless chocolate cake, with lemon muffins, ice-cream, spread on toast or just eat it with a spoon. You may just win a prize.

Recipe slightly adapted from My Baking Addiction blog. See link below.

http://www.mybakingaddiction.com/homemade-blueberry-sauce-recipe/