An homage in the shape of a gluten free apricot slice

If people could be a fruit, my maternal Nana Dorothy would have been an apricot. Our grandparents owned an orchard in the Central Otago region of the South Island of New Zealand. Pop’s apricot trees were special, as was the fruit they produced. They tasted of sunshine with a hint of savoury tartness. My memories of Nana are inexorably woven together with this small pale golden orange fruit. The blushing velvety exterior of an apricot still reminds me of her luminous complexion and whilst she was warm and kind, Dorothy also had a sharp wit and tongue when it was required.

If I close my eyes and remember those visits, I think of rosehips and grey wild thyme, whispering pines and the muted golden browns and tans of the surrounding craggy Central Otago hills. Tartan woollen blankets, bountiful stone fruit, apples, pears and the low rocky walls made of the unique local schist stone of the region. I can see Pop on the tractor amongst the variegated foliage of the fruit trees. I can hear the ear splitting bark of the cherry gun and watch the frost pots being readied when temperatures were set to drop.

Dorothy was a good cook and baker. How very grown up I felt when helping her carry the wicker baskets laden with a morning tea of something homemade down to the workers. I can see and almost smell the fat juicy sausages that Nana served with her homemade, piquant apricot sauce. Her baking tin always contained a slice or cake. She was generous with food, with her love and with her particularly joyously infectious laugh that I can still hear in my head.

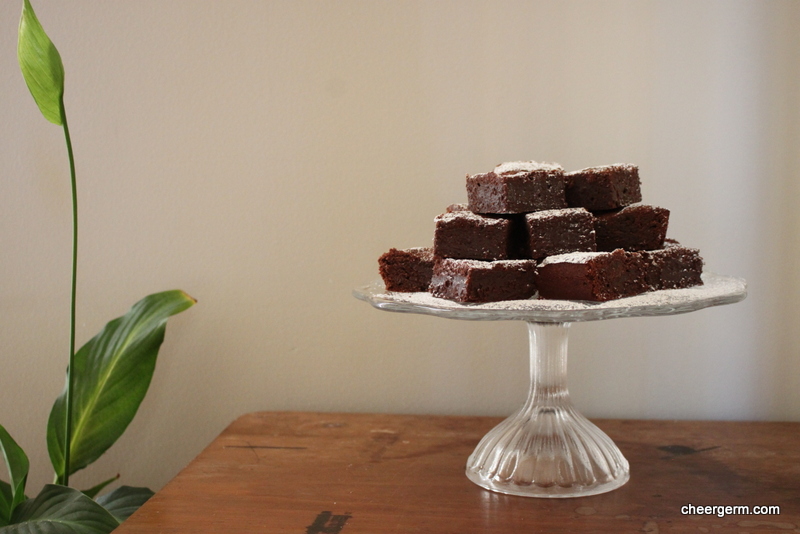
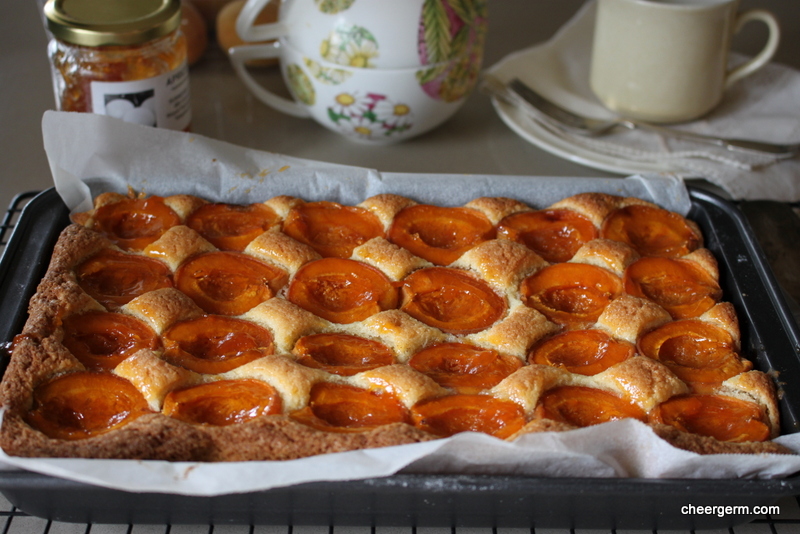
This apricot slice is my homage to her. Sweet, buttery, tropically coconut and vanilla; beautifully offset by the faintly tart fruit. The apricot and almond meal are happy bedmates. I wish she was still with us so I could serve her a generous portion alongside a cup of tea and hear her laugh, just one more time. If you were a fruit, what fruit would you be? I think I too, would be an apricot.

GLUTEN FREE APRICOT SLICE

WHAT YOU NEED
185g butter, room temperature
3/4 cup caster sugar
2 eggs
1 tsp vanilla essence or 1/2 tsp vanilla bean powder
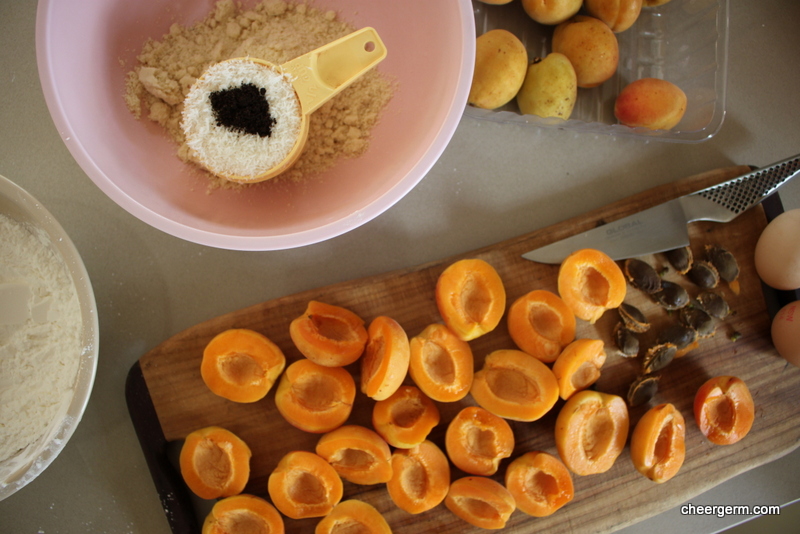
100g almond meal
135g gluten free self-raising flour
1/2 cup dessicated coconut
12 fresh apricots (500g), halved and de-stoned
1 heaped tablespoon Apricot jam to glaze

HOW YOU DO IT
Preheat oven to 180C (170C fan-forced) and line a 18cm x 28cm lamington tin with baking paper.
Using a hand mixer or stand mixer, beat the butter and sugar until light and fluffy.
Add the eggs one at a time, beating well after each addition. Add the vanilla.
Sift the almond meal and self-raising flour into a bowl, then stir in the coconut. Gently fold the flour mixture into the butter mixture.
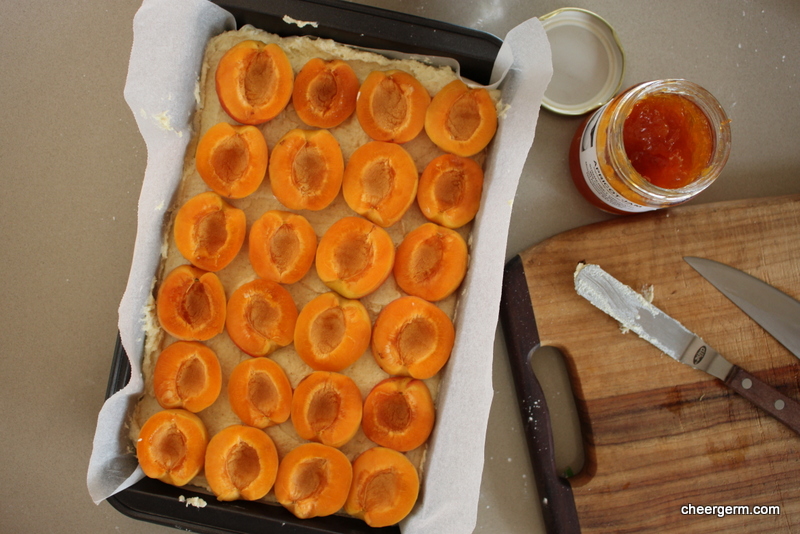
Spread the mixture evenly over the base of the prepared pan.
Arrange the apricot halves cut side up on the cake batter, pressing them in slightly.
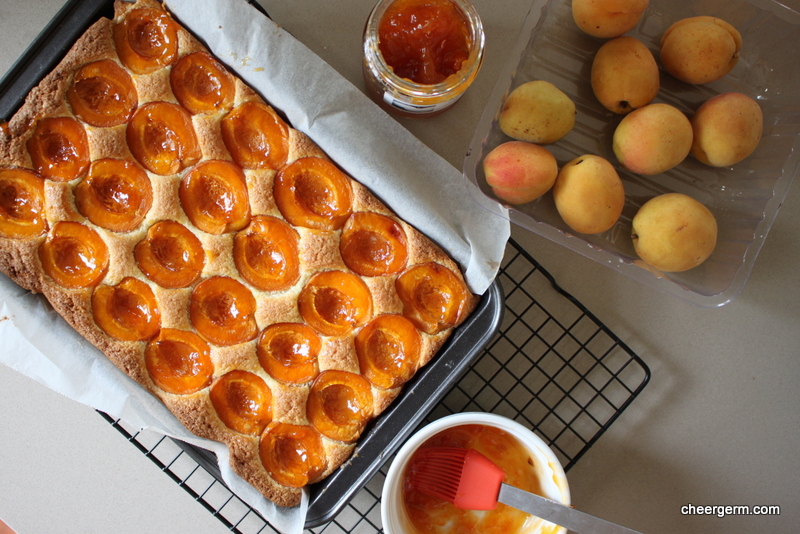
Bake for 35 to 40 minutes or until a skewer inserted into the middle of the slice comes out clean.
Whilst the cake is still hot, heat the apricot jam and brush it over the apricots.
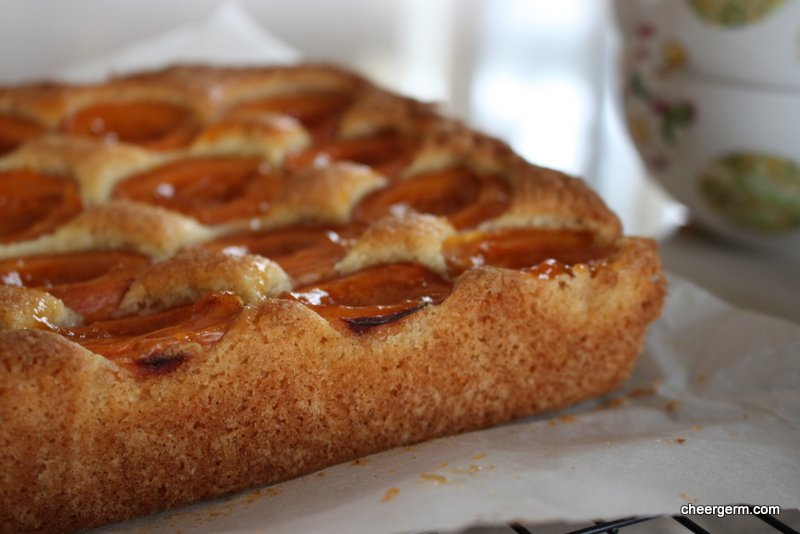
Cool completely in the pan, then cut and serve.
Cooking Notes: this can also be served hot as a dessert with ice-cream, yoghurt or mix a tablespoon of honey into mascarpone or ricotta.

A Cheergerm adaptation of two recipes from the Taste Website. Links after photos.

I

image

http://www.taste.com.au/recipes/26489/coconut+apricot+slice

http://www.taste.com.au/recipes/347/apricot+and+almond+slice


Quick pickled baby cucumbers, Japanese style

Kid 1 and I were watching the lovely Rachel Khoo on her BBC cooking show when I asked him, ‘Rachel is your type, isn’t she?’ Kid 1 replied, ‘I don’t have a type, all girls are my type.’

Ummm. Think we are in trouble.

Back to food. I am on a pickling rampage. Well, that is a slight exaggeration but quick refrigerator pickles are somewhat of a revelation. If it ain’t tied down, I will pickle it.

QUICK PICKLED BABY CUCUMBERS JAPANESE STYLE

WHAT YOU NEED
350g baby cucumbers
3/4 cup Rice wine vinegar
1/4 cup water
2 tbl granulated sugar
1 1/2 tsp Sea salt
1 tsp fresh ginger, finely grated
1 tsp gluten free soy sauce
1/2 tsp Sesame oil

HOW YOU DO IT
Trim any stalks off the baby cucumbers and wash and dry them.
Pack them into a medium sized jar that holds about 500ml liquid.
Combine the rest of the ingredients in a small saucepan and cook over a medium heat.
Bring to the boil, stirring occasionally until the sugar has dissolved.
Remove from the hear and let it cool down for 10 to 15 minutes.
Pour the brining liquid into the jar, covering the cucumbers.
Let the pickles cool down to room temperature then cover the jar and shake or rotate the jar gently to distribute the ginger throughout the jar.
Refrigerate the pickles for at least one day before serving, they can last up to five days in the refrigerator.
These teeny pickled cucumbers are magnificent with a cheese platter and go really well with my Miso Glazed Eggplant and Tofu Agedashi. Add to burgers, sandwiches and they are super nice when sliced and added to the top of a taco. Failing that, there is nothing wrong with eating them straight from the jar.

A Cheergerm creation


A gluten free brownie

Valentine’s Day is not a big deal in our household. Total respect to all you V-Day fans, we are simply just not that into it. However, I am not adverse to the idea of cooking or baking something delicious for your beloveds on this non-public holiday. (Be they lover, spouse, friend, child, sibling; you get the drift.) Creating something delicious to eat with your own mitts, is a great way of avoiding rampant heart-shaped commercialism and giving a little something of yourself to those whom you adore. (Much like making a beautiful card, something this craft-challenged Cheergerm is unable to do.)

This is a fudgy, dense, yet surprisingly melt-in-the-mouth brownie. Intensely chocolatey, decadent and not for the faint of heart. We all tussle for a piece of this on the rare occasions it is baked and every time we eat it, perhaps we love each other just a little more. (At least until the sugar high wears off.)

GLUTEN FREE CHOCOLATE BROWNIES

WHAT YOU NEED
200g unsalted butter, chopped
200g dark chocolate, broken into pieces (I used 72% cocoa content)
1 cup brown sugar
3 eggs, lightly beaten
1 tsp vanilla extract (or 1/4 tsp vanilla bean powder)
3/4 cup gluten free plain flour
2 tbl cocoa powder

HOW YOU DO IT
Preheat the oven to 190C (180C fan-forced) and line a 5cm deep, 18cm square cake pan with non-stick baking paper.
Place the butter, chocolate and sugar in a saucepan over low heat and stir constantly, until melted and smooth.
Pour the mixture into a heatproof bowl and set aside to cool slightly. (About 15 minutes.)
Add the eggs and vanilla to the chocolate mixture and mix well.
Sift the flour and cocoa over the chocolate mixture and stir to combine.
Pour the brownie mixture into the pan and bake for 20 minutes or until just set. Let completely cool in the pan.
Once cooled, lift the brownie out, wrap in plastic wrap and place in an airtight container. Stand for 1 day then cut into pieces and serve.

Recipe by Alison Roberts from Super Food Ideas, March 2005.


Quick pickled radishes

The word ‘pickle’ tickles my fancy. For starters, it rhymes with ‘fickle’, ‘trickle’ and ‘sickle.’ (Not a word that I have had many chances to use, up until now.) Its origin appears to derive from the Dutch word ‘peckel’ which historically referred to a vinegary brine or spicy sauce, not an actual pickled vegetable. In Britain, a pickle is a relish made of chopped veggies or fruit preserved in vinegar. In the US and Canada, a pickle is widely thought of as a cucumber preserved in brine. In these here parts and in much of my foodie reading, we now seem to refer to pickles as any vegetable that has undergone the pickling process.

Getting ‘pickled’ also alludes to partaking of too many alcoholic beverages resulting in inebriation. Finally, all of this pondering leads me to the delightfully old-school sounding idiom ‘in a pickle’. Meaning to find oneself in a quandary, difficulty, tight spot or jam. (Now this is getting confusing.) Certainly a state that all of us who are undertaking the human experience, find ourselves in at one point or another. When I find myself in a pickle (the idiom, not swimming in a giant bowl of vinegary liquid), nothing soothes my troubled soul as much as spending quality time in the kitchen. Making your own preserves is a highly satisfying process. The radish and myself are good friends. This crisp, peppery root vegetable adds zing to my salads and is a favourite snack when sprinkled with a smidgen of salt. It is also delicious when pickled.

This is a quick pickle, meaning you do not need to sterilise the jars and process them in a boiling water bath to ensure shelf stability. They need to be refrigerated and are at their best when eaten in the first few days after making. These rosy-hued radishes sing with a gentle hum of chilli heat and an earthiness from the Indian spices. To add freshness and zing, pop them in salads, sandwiches, tacos or burgers. Also delicious as a condiment with cured meats, cheeses and alongside curries and casseroles.

QUICK PICKLED INDIAN STYLE RADISHES

WHAT YOU NEED
1 bunch radishes
1/2 cup sherry or red wine vinegar
1/4 cup water
2 tbl granulated sugar
1 1/2 tsps sea salt
1 tsp whole coriander seeds
1 tsp whole cumin seeds
1/2 tsp brown mustard seeds
1/2 tsp whole black peppercorns
1/4 tsp chilli flakes

HOW YOU DO IT
Wash the radishes then remove the green leafy tops, the bottoms and any hairy bits. Using a sharp knife or a mandolin (please use the guard and watch your fingers!), slice them very finely and pack them into a jar. I used a medium sized Weck jar that takes about 500ml of liquid.
In a small saucepan, combine all of the other ingredients and cook over a medium heat. Bring to the boil, stirring occasionally until the sugar has dissolved. Remove from the heat and let it cool down for about ten minutes.
Pour the brining liquid into the jar, ensuring that the radishes are covered with the liquid.
Let the pickles cool down to room temperature then cover, shake or rotate the jar gently to ensure that the spices are coating all of the radishes and refrigerate the pickles for at least 1 day before using.
They can last up to five days but they are at their best and crunchiest for the first few days.
Serve on a salad, alongside curries, as an extra taco condiment, with burgers, as part of a sandwich filling or alongside a sandwich.

Cooking Notes: it is important to use pure sea salt and not table salt as additives can make the pickling liquid cloudy.

A Cheergerm adaptation of a bunch of different recipes.