Gluten free ginger crunch and Original Thought

Recently, Kid 2 (who is 7 years old) was rolling and generally lollygagging around on the floor. He pipes up.
‘I have never had an original thought in my life.’

He didn’t appear perturbed, upset or even surprised at this revelation. The kid has a point. Is there really anything new under the sun? I am no philosopher but it is hard to believe that in the billions of thoughts that have existed in our space-time continuum, that a truly ‘original thought’ exists.

During a search on ‘t’internet’ for a quote on the theory of original thought (just to highlight how erudite and intellectual this Cheergerm can get), I got bored and started looking at photos of cats performing amazing ridiculous feats. Next, I googled ‘space-time continuum’ because, well, that’s how my brain works. (I use the word ‘works’ loosely.) I stumbled/googlebumbled upon the following quote, which has nothing to do with original thought at all. Or, does it?

‘The whole fabric of the space-time continuum is not merely curved, it is in fact, totally bent’. This quote harks from the novel The Restaurant at the End of the Universe’, by Douglas Adams of ‘Hitchhikers Guide to the Galaxy’ fame. One of my favourite all time authors.

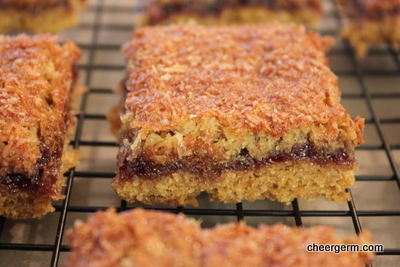
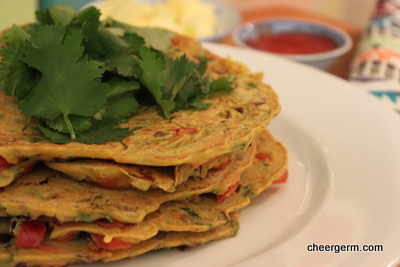
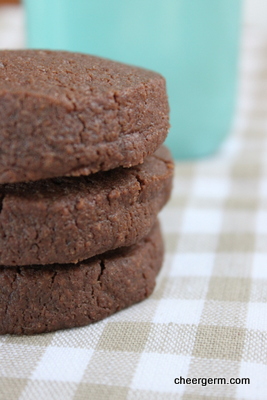
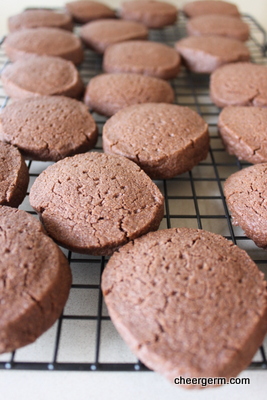
By now you may be screaming asking politely, ‘what was the bloody point of all that?’ Bear with me folks. This spicy and delicate recipe is a gluten free re-work of a favourite old school New Zealand slice. Whilst I am certainly not claiming it is an original, there is a small point of difference in the use of buckwheat, sorghum and teff flours. However, I am sure that somewhere in this bendy, curvy universe of ours, somebody else has already thought of it before.

GLUTEN FREE GINGER CRUNCH
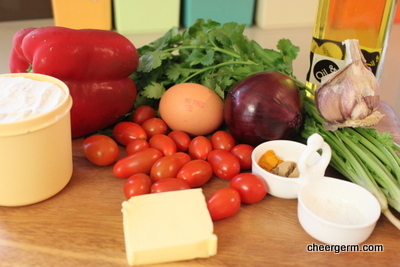
WHAT YOU NEED
Base
80g brown sugar (or coconut sugar)
100g gluten free plain flour
50g teff flour
40g almond meal (if you can’t use nuts you can substitute for buckwheat flour)
2 tbl psyllium husk (about 10g)
1 tsp ground ginger
1 tsp gluten free baking powder
1/4 tsp salt
115g butter, room temperature

Icing
55g butter
1 tbsp golden syrup
2 tsp ground ginger
55g icing sugar (make sure it’s pure icing sugar and gluten free)

HOW YOU DO IT
Base
Preheat oven to 180C and line a shallow 30 x 21cm tin with baking paper.
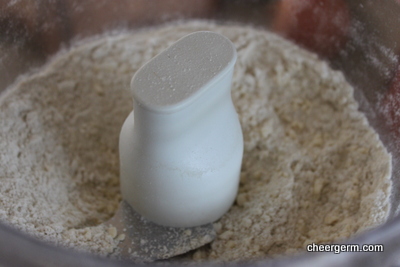
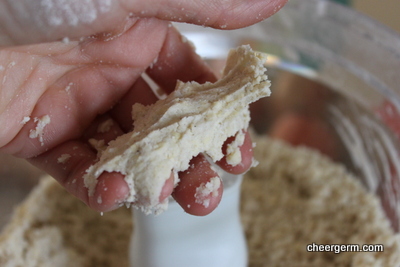
Put all the dry ingredients into a food processor and pulse briefly to combine them. Drop in the butter and process just until the mixture forms fine crumbs. (You can do this all by hand, rubbing the butter into the flour but machine mixing is easier!)
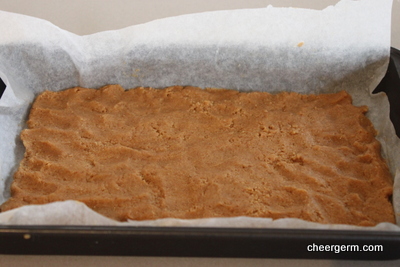
Pour the crumbs into the tin, spread them out evenly and press down firmly using your fingers to compact them slightly. They will stick together properly as they bake.
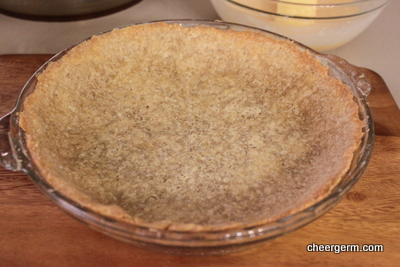
Bake for 20 – 25 minutes until the mixture is a pale golden brown.

Icing
While the base is cooking, put the butter, golden syrup and ginger into a saucepan and heat gently, stirring. When they are melted and combined, tip in the icing sugar mixture and mix to a fairly runny consistency.
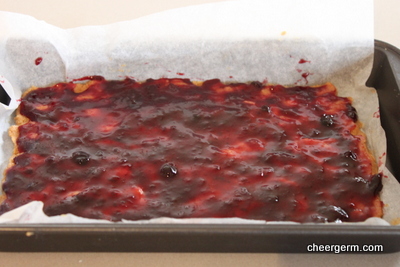
Remove the base from the oven and immediately pour on the icing. Spread it evenly over the surface with a spatula.
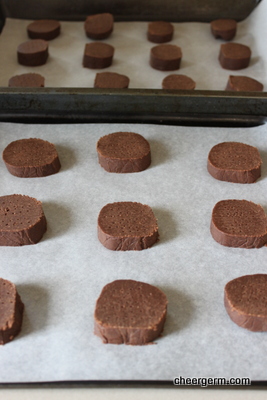
Cut the mixture into fingers or squares, leave to cool then break it apart along the cuts and store in an airtight container.
Makes 12 squares or more fingers.
Recipe Note: I usually double those recipe and just use a 32cm x 24cm baking tray.

A Cheergerm adaptation from Ladies, A Plate by Alexa Johnston

Postscript.
It desperately occurred to me that the word ‘googlebumbled’ may be a truly ‘original’ Cheergerm thought or creation. As I had never heard it before, what choice did one have but to google it? It thus far appears to have never been googled as an actual ‘word’.

Just saying.

Go here for the non-gluten free version, Ginger Cat Crunch Slice
https://cheergerm.wordpress.com/2014/03/30/ginger-cat-crunch/


Why is there a bicycle pump in our bedroom and Louise Cake

Living with small children means that you may find particular accoutrements of childhood in your bedroom.

Definition of a grown up bedroom : The place where the so called ‘magic happens’. (Yeah right.) A serene escape from the world, lush with soft furnishings in soothing contemporary prints. Flickering soy candles abound and the room is resplendent with enough Europeans pillows to well, make a European happy. (Not a husband as they will defiantly and often state ‘I hate all these cushions, they have no effin point anyway.’)

In our boudouir today I found:

A bicycle pump, a small soccer whistle, a paint with water book, a pretend plastic childrens winner medal, one grotty little boys sock and a teeny tiny plastic toilet.

The magic that happens in our bedroom is ‘how the hell did this crap get here and why?’

The other magic that happens in our household is how quickly tasty treats can be gobbled up by said small children. Especially Kid 1 who eats as if he is part of a family of ten and is afraid of missing out on his fair share.

This slice is one of those goodies, an old school New Zealand classic comprising of a thin layer of biscuity cake (or is that a cakety biscuit?), a sandwich layer of tart jam, topped off with another thin layer of coconut meringue. I have no idea who Louise was but man, that chick had it going on in the ideas department.

My memory could be playing tricks but a hazy recollection of this slice oozing with homemade apricot jam in the middle, is knocking around the old brainbox. The original recipe has been slightly cheergermed by using wholemeal spelt flour, raw sugar and knocking back the sugar quantity a tad.

Unfortunately, the cupboard was bare of home made jam, hence, store purchased jam was used. Some of Mums homemade stuff would have been like, totally ace. (Mum??)

LOUISE CAKE

WHAT YOU NEED
Base
70g butter, room temperature
55g sugar (panela, raw caster sugar, rapadura)
2 egg yolks
1 tbsp lemon juice
150g wholemeal spelt flour
1/2 tsp baking powder

Topping
4 tbsp raspberry or tart red jam
2 egg whites
80g sugar (I used organic panela, an unrefined sweetener made from evaporated sugar cane juice)
55g desiccated coconut
Extra coconut for sprinkling

HOW YOU DO IT
Preheat oven to 170 and line a shallow 30 x 21 cm or 12 x 8 inch tin with baking paper.
Cream the butter and sugar together until light then beat in the egg yolks and mix thoroughly.
Add the lemon juice, then sift in the flour and baking powder and mix to a firm dough.
Press the dough evenly into the prepared tin and spread over the jam. You don’t need a thick layer.
Beat the egg whites until stiff then gently fold in the caster sugar and the coconut using a metal spoon. Spread carefully over the jam, trying to keep an even thickness. Sprinkle with a little more coconut.
Bake for about 25-30 minutes until the coconut is just turning a golden brown. (As I used raw sugar, it does get a bit browner.)
Remove from the oven and cut into squares whilst still warm.
Store in an airtight container, makes 12 squares.

Recipe slightly adapted from ‘Ladies: a Plate.’ By Alexa Johnston


Husbands don’t listen and gluten free buckwheat omelettes

The other day I was crapping on talking to my wonderful husband about something inane very important. The following conversation ensued.

Me: Do you sometimes wish you hadn’t married me?
Yak: Yeah.
Me: What?
Yak: What did you say?
Me: I just asked, do you sometimes wish you hadn’t married me and you said yeah!
Yak: Oh, I wasn’t listening.
Me: Are you embarrassed now?
Yak: No, I’m just normal.

Despite many conversations like this, I continue to feed my vegetarian coeliac husband. (I know, I am an awesomely forgiving and kind human being). This ain’t my recipe folks. Straight up. It’s borrowed, stolen, nicked, knocked off from the wonderful Sneh Roy and her Cook Republic blog. Hence, I have provided my photos then linked to her fabulous recipe afterwards.

These buckwheat omelettes are pancake like and have an Indian twist. They are a well tasty brunch, lunch or light dinner option. We adore the fresh and light coriander burst they provide.

Many of you may already be aware of this but I just wanted to share a wee cheffy hint given to me many moons ago by a real life cheffy type person. When dicing, chopping, crushing, squashing, pestle and mortaring garlic, always add a big pinch of salt to help ‘bring the garlic down’. (By this I don’t mean to depress the poor member of the onion family with pithy and personal put downs. ‘Yeah garlic, you are so much more stinky than your other close relatives’.) Adding the salt helps the garlic to release it’s delicious oils and also stops it sticking to your knife.

Cheergerm adaptations to this excellent recipe include bumping up the salt to 1 tsp sea salt, using 1/2 teaspoon ground ginger powder as I had no fresh ginger, adding 1/4 diced red pepper and 100g cherry tomatoes (as I didn’t have any big tomatoes) Also, as we didn’t have fresh chilli, I used sweet chilli sauce and tomato sauce mixed together as the accompanying sauce.

Here are my photos, I have given a link to the recipe at the end. Once you have visited Cook Republic, you may never leave.

http://www.cookrepublic.com/journal/savoury-buckwheat-omelettes-a-newspaper-column-and-the-title-of-my-first-cookbook/


Gluten free onion and mushroom tart. Nudge, nudge, wink, wink.

A tart by any other name is simply a topless pie. My goodness. This is all sounding a tad x-rated.

Gluten free pastry has, thus far, felt somewhat beyond me. Having enjoyed some perfectly lovely gluten filled pastry bakes in my past, a reluctance to stuff up gluten free pastry has always felt a bit too, well, potentially painful.

This bake was a game changer. Yeah baby. Well, kind of.

Starting at 5pm on a Saturday afternoon was probably not the best choice. Bite the bullet I told myself, now or never. Carpe diem, momentous self-help talk, yada, yada, yada. Snoreworthy.

After dicking messing around with the recipe, (it’s a medial condition), the recipe called for the pastry to rest for at least one hour. Here is the (pastry) rub. I knew it wasn’t right the minute I took it out of the food processor, but I ignored my gut instinct. Then, as I went to roll it out. The pastry completely fell apart…Arggghhhhhh…my nightmare was coming true.

However, a tad more iced water, a quick knead and it came together. With no time to waste, I rolled it out between two sheets of baking paper, blind baked it, filled it and baked it again. A millennium later, Bob was your uncle . (By this time the Yak had passed out on the floor from utter hungation.)

It turned out a treat. Second time around, I added just a tad too much water to the pastry. So it took a little more blind baking to dry it out. The moral of this story? Don’t be afraid if things go slightly wrong, you can usually fix them.

Love, love this sexy little tart. (Wink, wink, nudge, nudge, say no more…) The filling is based on a French provincial classic. Caramelised onions, earthy mushrooms, floral thyme with some hacked up greens. Be inventive with the greeny bits. There was kale in the fridge but baby spinach, silverbeet, rocket or parsley would be just as good.

It is rich, filling and would be awesome cut with a sharply dressed salad. (By this, I don’t mean a bespoke suit with a french cuffed shirt and a pair of brogues.) When I asked The Yak if was it too rich, his reply? No way, are you kidding, I want chips with it. Sigh.

The crust is buttery, crunchy and this cheergerm don’t miss no gluten. The Yak went into raptures (as much as an Northern English born lad is able to.)

This pastry is a more ‘wholegrain’ adaptation from the Simply Gluten Free blog. I have provided the link below, it contains some fantastic pastry baking tips.

GLUTEN FREE ONION AND MUSHROOM TART

THE FLOUR MIX
3/4 brown rice flour
1/4 buckwheat flour
1/4 cup sorghum flour
1/4 cup tapioca flour
1tsp xanthum gum

Whisk this together, this leaves you some flour for rolling the pastry out on. You use one and 1/4 cups of this flour for the actual tart base.

THE TART CRUST
1 1/4 cups flour blend (see above)
1 tsp sea salt
1/2 tsp sugar
125 grams cold cold butter (pop in freezer 15 minutes before using)
5 to 6 tbls iced cold water (put ice cubes in cold water)

WHAT YOU DO
Place flour, salt and sugar into a food processor and pulse 5 times to combine.
Add the butter and pulse 6 or 7 times until the mixture resembles coarse breadcrumbs with some pea size butter pieces.
With the processor running, add the water 1 tbl at a time until the mixture just clumps together. (This is the tricky bit, don’t go nuts with the water.)
Wrap (using a plastic bag for this step is a good idea) and rest in the fridge for at least 1 hour. This allows the water in the pastry to redistribute.
Whilst pastry is resting, preheat oven to 180C and make the filling. (See below)
Bring pastry back out and let it sit for 5- 10 minutes.
Roll between two sheets of baking paper dusted with remaining GF flour mix.
Place pastry a pie/tart tin (I used a glass Pyrex) that has been buttered.
Blind bake 20 mins. (This means lining the pastry with baking paper and using dried kidney beans, dried soup mix (as I did) or blind baking stones.)
Remove baking paper and beans, gently prick the base of the tart with a fork and bake for another ten minutes.
Remove tart pastry, strew the onion filling over the base of the pastry, gently pour the egg, cream and parmesan mixture over the onion mixture stir through carefully, not touching the pastry.
Bake at 180 for 30 to 40 minutes until the top is golden and puffy.

THE FILLING
3 large sliced onions
2 tbl olive oil
200g mushrooms, sliced
5 leaves of kale finely sliced
1 tsp dried thyme (or 1 tbl fresh chopped thyme)
Splash white wine
3 eggs
100 ml cream 1/4 to 1/2 cup
2 tbls grated Parmesan cheese
Salt and pepper to taste

WHAT YOU DO
In a large frypan heat the olive oil then add the onion. Cook on a low to medium heat until the onion has begun to caramelise. This takes about 30-40 minutes.
Add thyme, mushrooms and kale. Stir through. Turn to medium heat
Add a splash of white wine and stir until all of the liquid has evaporated, season with pepper and salt and set aside to cool.
Whisk the eggs, cream, salt and pepper together. Stir the parmesan through this mixture.

Crust recipe adapted from Simply Gluten Free blog. (The link is provided after the photos.) The filling is a Cheergerm creation.

http://simplygluten-free.com/blog/2013/11/perfect-gluten-free-pie-crust-recipe.html


Chocolate ginger spelt shortbread

Kid 2: I am bad at smelling things but really good at hearing.
Kid 1: I am good at everything except doing the splits and things like that.

Me, I am good at baking shortbread at Christmas time. (I am not good at the splits and things like that either.) The kids had been asking for shortbread a lot lately. Being the kind and doting parent I am, I acquiesced and thought I would bake them some.

The idea of spelt shortbread has been creeping and a crawlin around the deep dark recesses of my brain box for quite a while now. A little flavour experimentation was in order. (Cue mad scientist laughter.) Then it dawns on me. Chocolate and ginger. A culinary match made in heaven. (They got married quite a while ago but nobody asked me to the wedding.)

These biccies give you a punch of bitter chocolate with a peppery ginger hum in the background. Kid 2 loved them, Kid 1 wasn’t a fan. All other grown up human beans who consumed them were enamoured. You be the judge.

Chocolate and ginger spelt shortbread

WHAT YOU NEED
1 cup spelt white flour (I use an organic brand of spelt flour)
1 1/2 cups wholemeal spelt flour
1/4 cup rice flour
1/4 cup cocoa powder
3 tsps ground ginger (seems like a lot but you need it to get past the chocolate)
250g butter, room temperature (but not too soft)
1/2 cup raw caster sugar

HOW YOU DO IT
Preheat oven to 180C.
Line 2 baking trays with baking paper.
Sift the spelt flours, rice flour, cocoa powder and ginger into a large bowl.
Cream the butter and add the sugar gradually, beating until the mixture is light and fluffy.
Work in the flour gradually and with a light hand, knead to form a dough. (I do this in the bowl.)
Divide the dough in half, roll each half out to a 3-4 cm log. Wrap in clingwrap and refrigerate for half an hour.
Slice the logs into 1-2 cm thickness, depending on your fancy, place 10mm apart on a baking tray and prick each piece all over with a fork.
Bake for 15-20 minutes until crisp. It is a bit tricky telling when chocolate shortbread is ready. Also, because of the wholemeal spelt, hese little beauties needed a little more time in the oven than regular Joe shortbread.
Cool on a wire rack.

Makes about 20-25 pieces.

A cheergerm adaptation from a Margaret Fulton shortbread recipe


99