Gluten Free Mac n Cheese – Rick Stein stylin

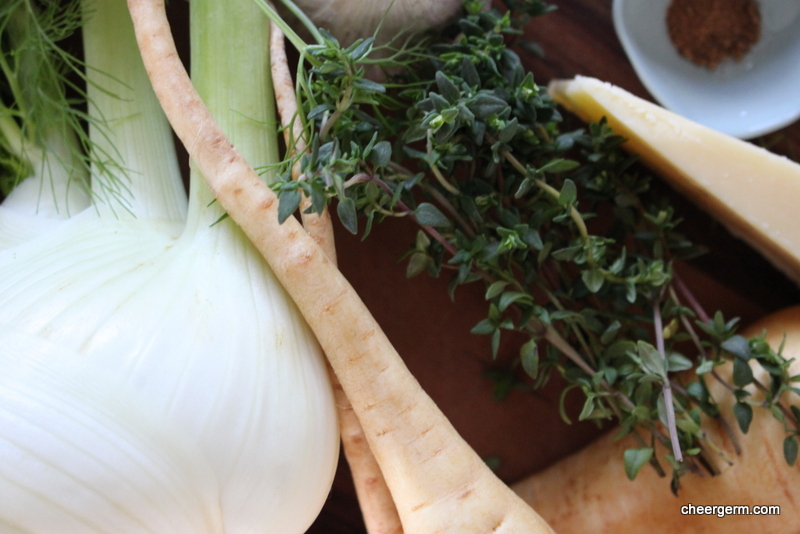
In an attempt to involve our kidlets in the cooking and ‘not just eating process’, a decree has been passed in our household (royally of course) that ‘each child shall take turn-a-bout choosing and cooking Sunday’s dinner with their Mum’. We took a respite from this over the Christmas and school break but once those holiday shenanigans ended we began again. This mother of two boys is determined to ensure that our lads eventually leave home (albeit in their early thirties) with the ability to cook a decent repetoire of dishes.

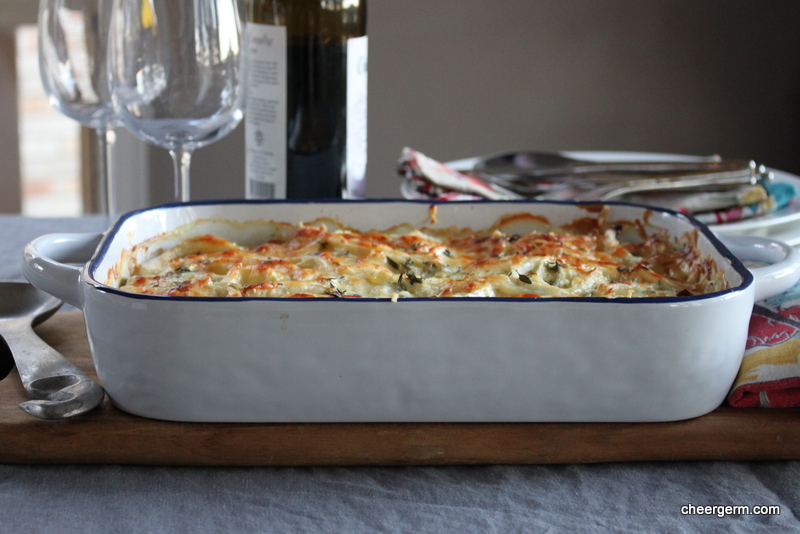
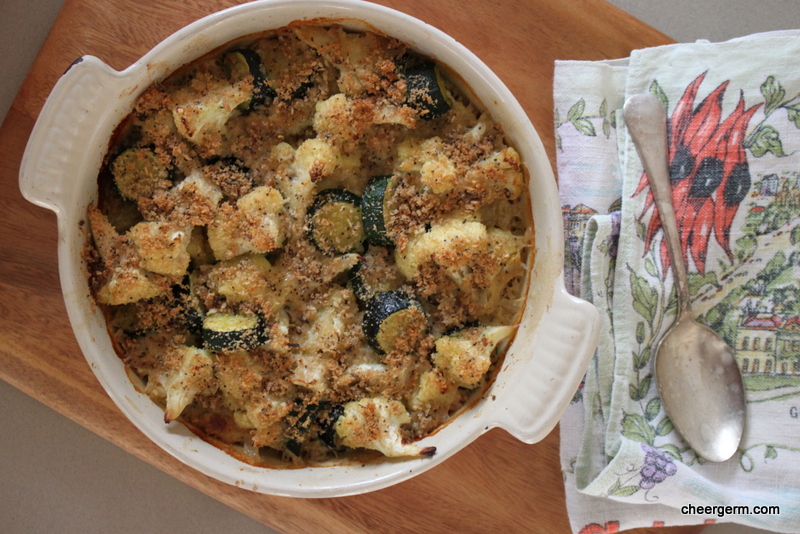
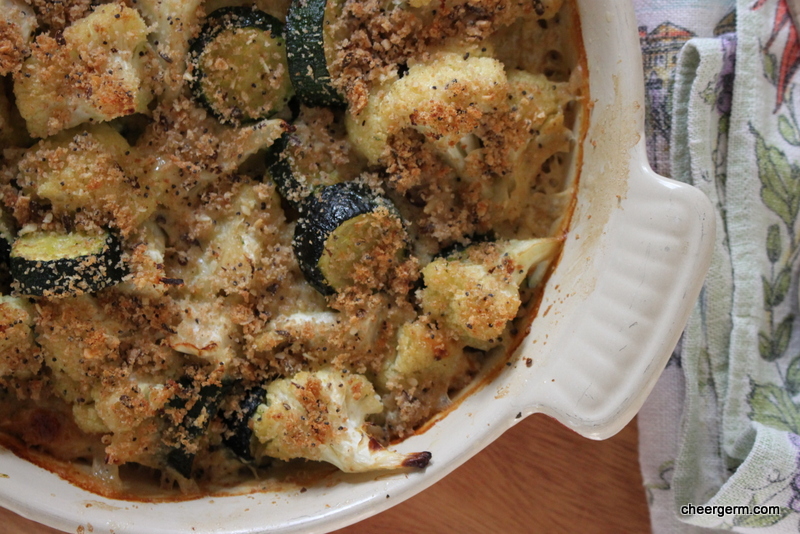
Kid 1, on the cusp of turning 14, decided that after watching Rick Stein cook up a decadent version of Mac n Cheese (Macaroni and Cheese for those that may not know), that this would be the dish for him. We have since renamed it ‘Heart Attack on a Plate.’ But my, how very delicious it was. To save precious energy (I am old and he is, well, an adolescent), we decided that the dish had to be entirely gluten free and vegetarian. Frankly, we couldn’t be arsed bothered making two different versions. And guess what, none of us cared.

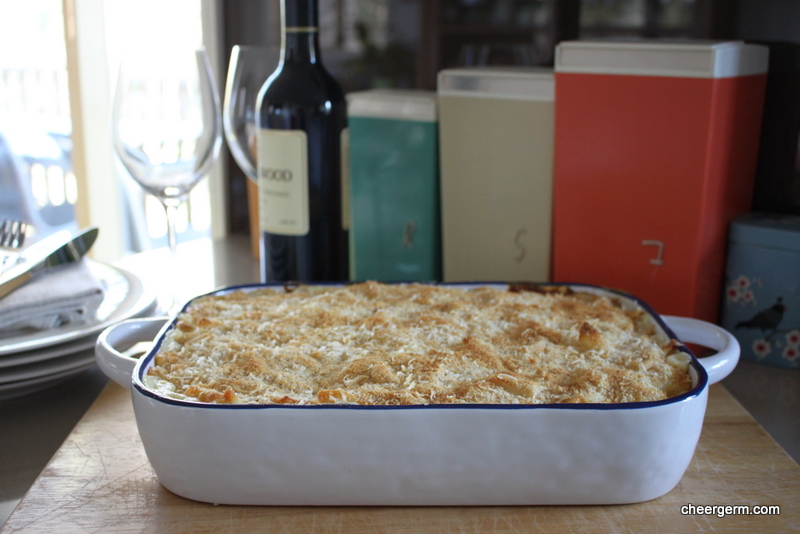
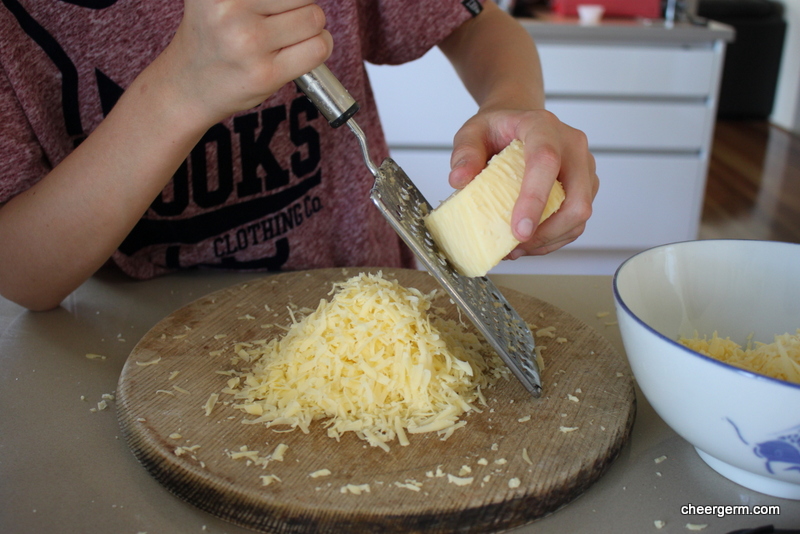
Well, The Yak actually cared a great deal as he truly loved this old school classic. I mean, really, dangerously, intimately loved it. Hence, we cannot make it again for a very long time. Our parental ageing bodies cannot take this amount of saturated fat too often, even if the youngsters can. However, if you are looking for a moreish, autumnal or winters, tasty, zingy, creamy, monstrously wonderful comfort dish, this is it. Don’t baulk at the amount of cheese, keep grating. Its a veritable mountain but it is required. (The next Mac n Cheese I make will be a healthier version, you will hear the complaints globally but that’s the way the cheese grates, or well, doesn’t.)

GLUTEN FREE MAC N CHEESE

WHAT YOU NEED
100g butter
100 g gluten free flour
1 tsp Dijon mustard
1.2 litres milk (I used low fat but the orignal recipe calls for full fat)
75 ml double cream
1 bay leaf
400g mature cheddar grated
Pinch freshly grated nutmeg (or dried if you don’t have fresh)
500g of your favourite gluten free dried macaroni
60g gluten free breadcrumbs
50g Parmesan
Salt and freshly ground black pepper

HOW YOU DO IT
Preheat oven to 200C (or 180C fan-forced) and grease a 35x20cm ovenproof dish.
Melt the butter in a medium size saucepan then stir in the flour and cook for two to three minute until the mixture (roux) starts to bubble.
Add the mustard and remove the pan from the heat, add the milk, cream and bay leaf and quickly whisk together.
Return the pan to a medium heat and continue to stir constantly until the mixture starts to thicken and boil.
Remove the saucepan from the heat, remove the bay leaf and add the cheddar. Stir until the cheese has melted then season well with black pepper and nutmeg.
Bring a large pan of salted water to the boil and cook the macaroni until al dente as per the packet instructions, usually around 8-10 minutes. Drain and add the pasta to the sauce.
Pour the mixture into the ovenproof dish. Mix the breadcrumbs and Parmesan together and sprinkle over the top.
Bake for 30-40 minutes until golden brown and bubbling and serve immediately.

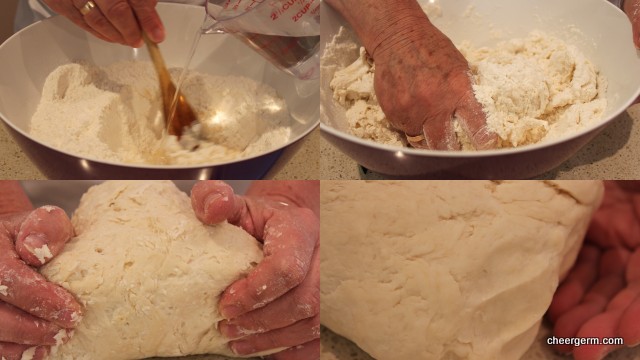
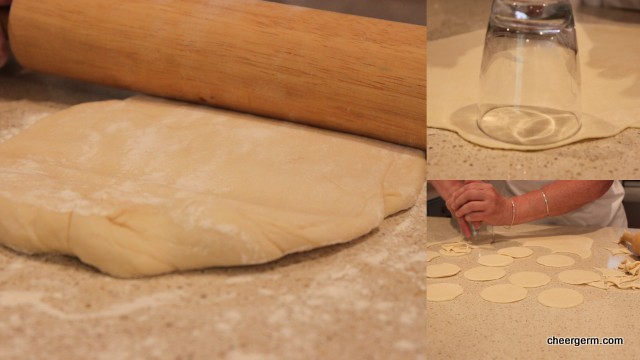
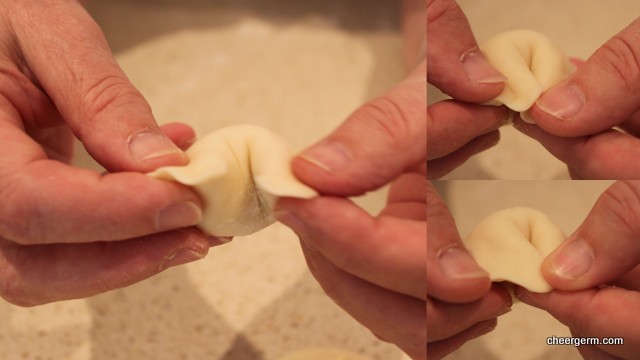
Cooking Notes: Choosing a decent gluten free pasta is a veritable minefield, to avoid too many white starchy carbohydrates I will often use a buckwheat pasta for The Yak. For this recipe we used a generic supermarket brand corn and rice pasta which was actually OK but that was only because the people in my life cannot follow a simple shopping instruction. Thus far, the best ‘most like wheat based pasta’ gluten free pasta I have ever purchased, is the fairly new gluten free Barilla pasta range. I am not paid to say this, nobody pays me to say anything, although I wish they would. I would also happily be paid not to say anything at all. I am open to all offers.

A slight adaptation of a Rick Stein recipe. Go here for the original non-gluten free and non-vegetarian recipe for those of you who don’t have to care.

Rick Steins Mac n Cheese

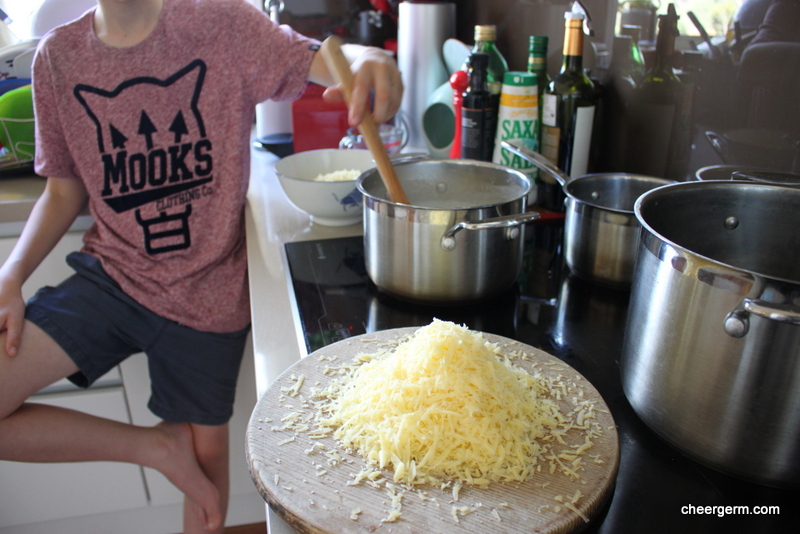
I never usually comment on my photos but I had to state that this photo cracks me up. Our lad is standing in exactly the same way that I often do. It is also the same way that my physio has told me off for as it is not good for your spine alignment. It seems to be that very little in this post is actually ‘good for you’ but frankly, cest la vie!


Thai green curry paste or, some like it hot

This curry paste is hot and spicy, no two ways about it. ‘Some Like It Hot’ is also the title of the 1959 gender-bending farcical movie starring the luminous Marilyn Monroe alongside the actors Jack Lemmon and Tony Curtis masquerading as slightly less than easy-on-the-eye women.

Recently, I was attempting to explain to our twelve year old lad, how it would be great if males found words other than ‘hot’ or ‘sexy’ to describe the appearance of a woman. Intrinsically, I was stating that these words can objectify women. (He hadn’t actually used those words but we heard them on a television show and I couldn’t resist an opportunity to rant impart my wisdom to my offspring.)

He thought for a moment and asked ‘But why is it OK if a woman sees a man and calls him chunky?’ This stopped me in my tracks, I looked at him. ‘Do you think you might mean hunky’? ‘Well’ he replied, ‘I knew it was ‘unky’ with something at the start’.

Many eons ago, before I had children to amuse me, many happy hours were spent traversing through Melbourne’s Asian groceries and Indian spice shops. All in an effort to source the more exotic ingredients required for blending and making my own curry pastes and curry powders. My senses were overwhelmed with citrusy lemongrass, stinky shrimp paste, the vivid colours of green and red chillies, peppery galangal, earthy turmeric, too many dried spices to list and the floral polarising scent of fresh coriander.

Whilst searching through some of my cookbooks recently, I happened upon The Hot and Spicy Book by Charmaine Solomon. She has been dubbed the ‘queen of Asian cooking in Australia’. This book, alongside her iconic tome, The Complete Asian Cookbook first published in 1976, were wonderful guides as I embarked upon my adventure into Asian cookery.

With progeny in tow (who are far less amusing when you have to shop with them), we set off to source the bits and bobs needed to make Solomon’s Thai Green Curry Paste. Sadly, we couldn’t find fresh or dried galangal so I used fresh ginger. As The Yak is vegetarian, the best substitute I have found for shrimp paste is fermented bean paste. (This is sourced from most larger Asian grocery stores.) Blend the heck out of this until it is no longer chunky and you will have a very satisfying, bloody hot, spicy, punch in the face curry paste. No objectification intended.

THAI GREEN CURRY PASTE

WHAT YOU NEED
4 large or 8 small green chillies
1 medium onion, chopped
1/2 cup fresh coriander, well washed including roots, stems and leaves
1/4 cup finely sliced lemon grass (or thinly peeled rind 1 lemon)
1 tbl chopped galangal fresh or bottled (I had to use fresh ginger as I couldn’t get my hands on any galangal, it’s not the same but it is an OK substitute)
2 tsps ground coriander
1 tsp ground cumin
1 tsp black peppercorns
1 tsp ground turmeric
2 tsps fermented bean paste (or 1 tsp dried shrimp paste if you don’t want it to be vegetarian)

HOW YOU DO IT
Wearing rubber gloves, remove stems and roughly chop the chillies.
Put the chillies into an electric blender with the remaining ingredients and purée.
Add a little water if necessary to help the blending process.
Store any paste that you don’t use in a clean, dry glass jar in the refrigerator or do what I do and divide into convenient portions and freeze. Ready to use in your next curry, soup, stir-fry or marinade.

Recipe from The Hot and Spicy Book by Charmaine Solomon, published 1995 by Mandarin a part of Reed Books Australia.

3


Potato, parsnip and fennel bake

Kudos to the maitre d’ at a local restaurant. Upon being seated, we noticed our water glasses were dirty and had red lipstick marks upon them. After politely asking him for clean vessels he picked them up, examined them closely and as he walked away loudly announced, ‘Sure, well Holy Rats Arse!’

My friend and I looked at each other. ‘Did he really say that?’ I asked. ‘Yes’, said my friend, ‘Yes, he did.’ We are open minded people yet this unwaiterly proclamation managed to surprise, horrify and strangely, delight us. Hilarity ensued and we continued to repeat this phrase (quietly) throughout the surprisingly delicious meal.

Upon finishing, we walked to the front to ask if we could split our bill. He did, albeit begrudgingly and his farewell response to us was, ‘Rock on ladies.’ This bloke is taking customer service to another level. Not necessarily towards the lofty echelons of fine dining but to a very special and individual level nonetheless.

This is surely The Year of the Gratin. I am a woman obsessed. As this dish was baking; giant cheesy, thyme-scented metaphorical arms reached out from the oven and hugged me close. Whispering in bubbling, soothing tones, ‘There, there, everything will be allright.’

Aniseed fennel, slightly spicy parsnip, creamy potato and herbaceous, sweet grassy cheese. This is a wondrous combination. It’s a dish that may even cause you to utter a colloquialism that involves the sacred posterior of a rodent. If one was so inclined.

POTATO, PARSNIP AND FENNEL BAKE

WHAT YOU NEED
4 potatoes, peeled and finely sliced (600g)
4 medium size parsnip, peeled and finely sliced (500g)
1 medium size fennel bulb, finely sliced
300 ml cream (you can use 250ml of cream and 50ml of sour cream for extra tang)
1/4 cup milk
2 garlic cloves, crushed very finely
1 tbl fresh thyme, picked
A dash of nutmeg
150g Gruyere cheese, grated (I used the wonderful Heidi Gruyere from Tasmania for a bit of a treat)
Salt and pepper to season
Extra thyme

HOW YOU DO IT
Preheat the oven to 180C and use butter or oil to grease a large baking dish.
Layer the potato, parsnip, fennel and season with salt and pepper then sprinkle on half of the cheese. (Leaving enough cheese to sprinkle on the top.)
Place another layer of potato, parsnip and fennel and season with salt and pepper again.
Warm the cream, milk, garlic, thyme and nutmeg in a small saucepan over a low heat for five to ten minutes until the flavours are infused and the cream has thinned a little. Seasons lightly and gently pour this mixture over the vegetables.
Sprinkle the remaining cheese over the top of the gratin and chuck a few extra thyme leaves over the top.
Cover with foil loosely (making sure the cheese doesn’t touch the foil) and bake for 50 minutes.
Remove the foil carefully (watch that precious cheese) and bake for another 40 minutes or until the vegetables pierce easily with a knife and the top is golden brown and bubbly.
Remove from the oven and let it sit for ten minutes to allow the gratin to settle before devouring.

A Cheergerm recipe based on a few hundred million different gratin recipes


Cauliflower and zucchini gratin

Is it wrong to love someone simply because you return home at midnight from a girls night out, on a cold winters eve, to discover that your other half has thoughtfully left your side of the electric blanket switched on? You can keep your Tiffany’s, Cartier and Harry Winston. It’s the small thoughtful actions that float my boat and whilst diamonds may be a girls best friend, they can’t keep you warm on a chilly evening. (Not like an electric blanket does. Oh, and a Yak of course.)

My way of showing The Yak love, is to cook hearty vegetable dishes that involve cheese. This little recipe is a take on a dish from the excellent ‘The Wholesome Cook’ by Martyna Angeles. It is a smidgen lighter than a heavier cream-based gratin. The sharp cheese, nutty cauliflower and golden crust has ensured that this gratin will be on steady rotation for the remainder of winter.

CAULIFLOWER AND ZUCCHINI GRATIN

WHAT YOU NEED
2 tbl oil (I used grapeseed oil)
300g cauliflower, cut into small florets
3 small zucchini (300g), sliced into 1 cm chunks
Black pepper
Sea salt
1/2 cup milk
100g Comte, Gruyere or Taleggio cheese, diced
1/3 cup breadcrumbs of your choice, I used gluten free sourdough buckwheat crumbs). The original recipe uses almond meal.

HOW YOU DO IT
Preheat oven to 180C and grease a 20 cm gratin dish.
Heat the oil in a medium size frying pan and saute the cauliflower and zucchini over a medium heat for about ten minutes, until they start to colour and soften. Season generously with black pepper and add a big pinch of sea salt.
Add the milk and cheese and stir for one minute until the cheese starts to melt. Check the seasoning then pour into the gratin dish.
Sprinkle with the breadcrumbs or almond meal and bake for 30-40 minutes until golden brown.
Serves 2-4 people.

Cooking Notes: I have added a few pinches of nutmeg before which adds a bit of something nice, also the original recipe uses 3 yellow squash instead of zucchini; Taleggio instead of Comte and states to sprinkle 2 tbl of chopped parsley over the gratin with the breadcrumbs before baking.

Recipe only slightly adapted from The Wholesome Cook by Martyna Angeles, published by Harlequin, October 2015.

Go here for a Cheergerm post about The Wholesome Cook book and a millet and rice puff square


Lentils, slow roasted tomatoes and goats cheese

Most of you would have heard the saying ‘you don’t make friends with salad.’ The underpinning sentiment being that salad is not worth eating. Personally, I try to avoid eating anything or anybody that I have made friends with. However, if we were ever to find ourselves in an extremely desperate survival type situation, who knows what may happen. (Having read the book ‘Alive’ based on the 1972 Andes flight disaster where sixteen survivors survived only by deciding to eat pieces of their dead friends, I have been forever haunted by the choices they made. Would I, wouldn’t I?)

Ponderings on cannibalism aside, salads these days are mega interesting and worthy of being elevated to ‘main course’ status. Yotam Ottolenghi, the British chef, cookery writer and TV presenter could easily be hailed as the ‘King Of Delicious and Fascinating Salads.’ Having been lucky enough to procure another smattering of delicious cherry tomatoes from the local Growers Markets, the idea of slow roasting them popped into my brain box. Trawling through my cookbooks I came across this salad from Ottolenghi’s book ‘Plenty’ and did a bit of re-jigging. The lentils have a toothsome nutty bite, the thyme perfumed tomatoes are unctuously sweet, the melting red wine vinegar onions and bright herbs add a zingy lift. The nuggets of goats cheese provide an extra creamy tart surprise.

Salad may not be ‘my friend’ but it is certainly a very tasty acquaintance.

LENTILS, SLOW ROASTED TOMATOES AND GOATS CHEESE

WHAT YOU NEED
1 small red Red onion, very finely sliced
1 tbsp red wine vinegar
1 tsp sea salt
250g lentils (I used a french style fine green lentil from Mount Zero, Ottolenghi used castelluccio lentils or you could use French puy. The lentils need to hold their shape once cooked.)
3 tbsp extra virgin olive oil
1 garlic clove, crushed
4 tbl parsley, chopped
1 tbl oregano, chopped (note, Ottolenghi’s recipe used 3tbsp chervil or parsley, 3 tbsp chopped chives, 4 tbsp chopped dill but I didn’t have these so just made do with what I had)
80g goats cheese (or Gorgonzola, or feta)
Black pepper

Slow roasted tomatoes
400g mixed cherry tomatoes, washed
2 tbl olive oil
1 tbl caramelised balsamic vinegar
8 sprigs of thyme
Extra sea salt

HOW YOU DO IT
Start by making the slow roasted tomatoes. Preheat the oven to 100C. Place the cherry tomatoes and thyme sprigs onto a baking tray lined with baking paper. Drizzle over the olive oil and balsamic vinegar, sprinkle with some salt and gently toss to coat. Roast for one hour, turning once or twice in that time.
Remove the tomatoes from the oven, discard the thyme and allow them to cool.
Meanwhile, place the red onion in a medium bowl, pour over the red wine vinegar and sprinkle with the salt. Stir, then leave the onions to soften.
Place the lentils in a pan of boiling water (the water should come three centimetres above the lentils) and cook for 20-30 minutes or until tender.
Drain the lentils in a sieve and whilst still warm, add them to the sliced red onion. Next, add the extra virgin olive oil, garlic and some black pepper. Stir to mix and leave aside to cool down.
Once cool, add the herbs and gently mix together. Taste and adjust the seasoning.
To serve, pile up the lentils on a large plate or bowl, integrating the goats cheese and tomatoes as you build up the pile. Drizzle the tomato cooking juices on top and serve.

A slight variation on a Yotam Otteolenghi recipe from ‘Plenty’ published by Edbury Press, 2010


Green lentil dal, a curry, not the author

How could I not use this recipe as an excuse to wax a wee bit lyrical about one of my favourite authors, Roald Dahl?

Easily, you may say but then, that is how I roll. Expect the unexpected, I never promised you a rose garden and all that. (Whatever the hell that means, seriously, what does it mean?)

As a child, my fervent reading habit encompassed the works of Roald Dahl. His books were devoured as readily as any white bread that I was able to get my mitts on. (Back in the day, Mum baked homemade bread or we ate brown bread. This once painfully fussy eater hankered after a slice of white bread something fierce.)

Favourite Dahl tomes included the hippy trippy delicious adventures of Charlie and the Chocolate Factory, closely followed by Charlie and the Great Glass Elevator and of course, James and the Giant Peach. These books were read cover to cover and more than once. They were then followed by the rest of his children’s novels and poetry. In my later teenage years, I encountered his more grown up ‘Tales of the Unexpected’ in which a story about screaming plants was inked indelibly onto my mind and psyche. To read Dahl is to go on an adventure and end up in a place you never thought you would go.

Indian food is a little like a Roald Dahl tale, an exciting and exotic journey into a diverse world of spice and many varying ingredients. Each bite can reveal a different flavour and aroma. Every spice brings something new to the party. This curry consisting of deep green legumes is gently earthy, with a delicate creamy blend of heat and richness. It is a wonderful addition to an Indian banquet or just as pleasantly, scoffed alone with a heft serving of basmati rice.

On that note, I leave you with my one of my favourite Roald Dahl quotes. (And of course, the recipe.)

‘And above all, watch with glittering eyes the whole world around you because the greatest secrets are always hidden in the most unlikely places. Those who don’t believe in magic will never find it.’

GREEN LENTIL DAL

WHAT YOU NEED
250g green lentils, washed
1 onion, roughly chopped
2 garlic clove, roughly chopped
5 cm ginger, roughly chopped
1/4 cup oil
1 tbl ground cumin
1 1/2 tsps ground coriander
2 tsps salt
1/4 tsp chilli powder
2 tbl garam masala
1/4 cup cream

HOW YOU DO IT
Put the lentils in a large saucepan and add 6 cups of water and bring to the boil. Reduce the heat to a simmer and cook for about 45 minutes to one hour or until the dal feels soft.The lentils will start to split a little and that is fine.
Drain and reserve the cooking liquid.
Blend the onion, garlic and ginger in a food processor to form a paste or finely chop them together with a knife.
Heat the oil in a medium size saucepan and fry the onion mixture over a high heat, stirring constantly until golden brown.
Add the cumin and coriander and fry for two minutes.
Add the lentils and stir in the salt, chilli powder and garam masala.
Pour 310ml (1 1/4 cup) of the reserved lentil liquid into the pan, bring to the boil, then reduce the heat to medium and simmer for ten minutes.
Just before serving, check for salt then stir in the cream and simmer for another 2 minutes to heat through.
Serve alone with steamed basmati rice or as part of a feast.

A Cheergerm adaptation from the The Food of India: A journey for food lovers by Murdoch Books. Recipes by Priya Wickramasingh and Carol Selva Rajah.


The Way of the Pierogi

IMG_7782

Before the Lovely R departed back to Poland, I was lucky enough to experience a hands on pierogi lesson. Pierogi is a Polish style dough dumpling stuffed with various fillings. R’s English is pretty darned good, despite her insistence that it isn’t. It is miles better than my Polish. (Ummm, non-existent.) As our lesson progressed, I tried to ask if she ever eats the pierogi straight after being boiled or does she always let it sit, then pan-fry and eat it. As we did on our lovely Polish picnic day.

Using her English/Polish dictionary, I found the word ‘boil’ and pointed at the translation. Horrified, the Lovely R vehemently shook her head and exclaimed ‘No, no!’ We spent a good few minutes, toing and froing, trying to understand what the other was saying. I showed her the dictionary again, this time, my finger was no long blocking the second meaning of the word ‘boil.’ It turns out that the first meaning had been an actual ‘boil’ that appears on the skin, a somewhat unsavoury medical condition.

Much laughter ensued.

This is one picture heavy post. I really tried to capture the intricacies of this process and I hope I have done the Lovely R justice. You can make the dough first then prepare the filling whilst the dough rests. R will often make the filling the night before then make the dough the next day. The dough also freezes well. She works fast. It is harder than it looks to make the dough stick, you must use all of your finger strength. No namby pamby weak fingers please. (Which obviously mine are.) The lovely R’s advice. ‘Practice will make you a master and Be Strong.’

For that is The Way of the Pierogi.

PIEROGI

WHAT YOU NEED
Pierogi Dough
1 kilo plain flour
400ml boiling water and extra ready if needed
1/3 cup Olive oil
1 tsp Salt

HOW YOU DO IT
Add oil to the flour then add the water gradually, you may not need all the water, or you may need a dash more. We used all 400ml and added another 3 tbl boiling water.
Bring the mixture together in the bowl then turn out onto a floured bench or board and knead until the gluten is activated, approximately 5 minutes.
Cover the dough in clingfilm and rest for half an hour minimum, up to one hour maximum at room temperature .
Flour a tray to place the pierogi on, and flour your workspace.
When the dough is soft and springy it is ready. Take a large ball of dough, around the size of a large orange.
Using a rolling pin, roll the dough, moving the dough regularly to avoid sticking, R worked it quite hard and it is quite elastic. Roll to approx 1mm thickness.
Using a glass or cutter about 8cm to cut out the pierogi shapes.
Use the scraps and add back into the dough.
Place a large teaspoon of filling onto each round of dough. (R works quickly.)
To shape the pierogi, pick up one pierogi and fold in into a crescent shape, press filling into the dough all the way and start to crimp around the edges.
As R says, Be Strong! Then turn over and crimp the other side. If there is too much filling, press it in with your index finger before crimping.
Don’t be afraid to pull the dough out as you crimp, you must have a good space between the filling and the dough so the two sides stick together without filling getting in the way. Again, Be Strong!
This filling used up about half of the dough made, we rolled out another batch once the first dough was used up. You can freeze leftover dough.

Filling
WHAT YOU NEED
3 potatoes, cooked and mashed
1 tbl oil and 1 tbl butter
1 medium onion, finely diced
300g-350g farm style cottage cheese, similar to Polish cheese. (Approximately the same weight of potatoes as cheese, with a tad extra cheese. Cheese must be slightly sour.
1 tbl Veggie stock powder (this is not mandatory)
1 1/2 tsp dried marjoram
Salt to taste, (more if not using vegetable stock)
Pepper to taste

HOW YOU DO IT
Cook onion in oil and butter until golden brown. Cool slightly.
Grate the cheese then add the cheese, stock powder (if using), marjoram, salt and pepper to the potato mixture.
Add half of the onion mixture to the cheese and potato mixture and mix well. R used her clean hands. The other half of the onion mixture is sprinkled on top of the cooked pierogi.
R usually makes the filling the day before or makes the filling whilst the dough is resting.

To cook pierogi
1 tsp salt
2 tbl oil
Fill a large saucepan over half way and bring to the boil.
Add about 8-10 pierogi at a time. When they float to the surface and have cooked for about 3-4 minutes, and feel tender, they are ready.
Meat pierogi take a bit longer, about 4-5 minutes.
You can eat them straight away topped with fried onion or refrigerate and pan fry on each side later in butter and oil, then top with the onion. (Which answered the infamous ‘boiling’ question, you can eat them straight away or wait and pan-fry them later. I have even re-poached them to keep them as softer type dumplings. It’s up to you!)

COOKING NOTES
If you are not cooking the pierogi straight away, cover the tray with a tea towel until ready to boil. It is ok if they get a bit drier and with a bit of air, it means they are less likely to stick.

Different filling ideas include a sweet variation of fresh blueberries. Do not add any sugar as it will bring out the juices and the pierogi will collapse. Serve them with a a sugar and butter sauce and sweet whipped cream.

Another popular vegetarian filling is finely chopped sauerkraut, dried mushrooms and onion. Meat fillings include ground lamb, pork and beef variations. When making meat pierogi, make the crescent shape then bring it around to the corners and squeeze into a tortellini shape. (See the photos at the very end. )

We did experiment with a gluten free version which was pretty darned tasty, however, it requires a tad more refining, so stay tuned.

Cheergerm Feb 1510

IMG_7792