Market love

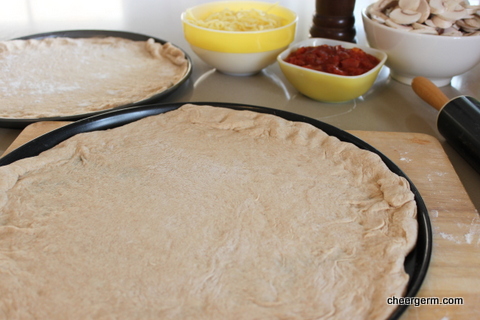
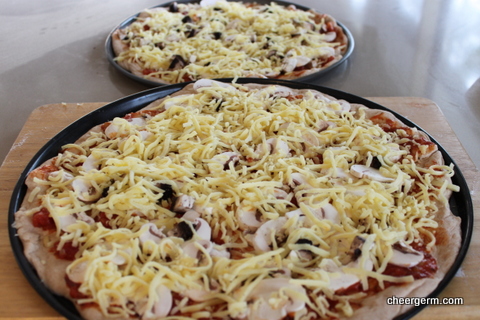
We are lucky enough to have a thriving local Growers/Food Market round these here parts. Look at all the beautiful goodies I scooped up today!

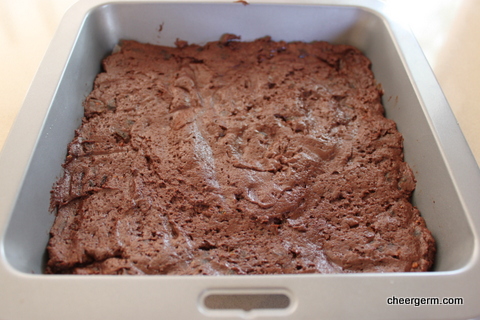
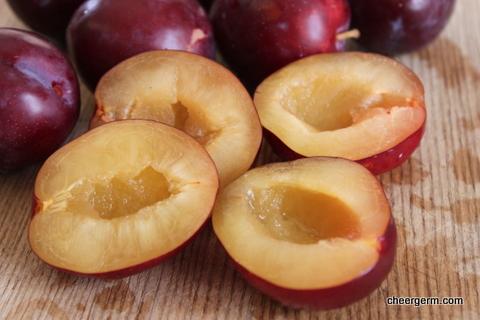
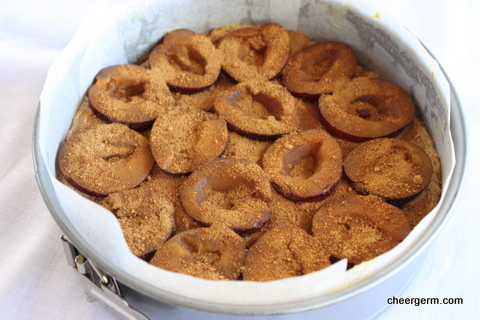
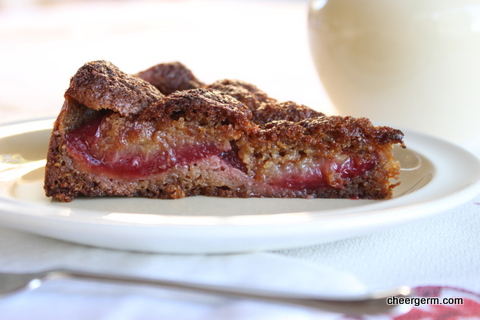
What floats my boat the most about these kind of markets? Methinks it’s the endless possibilities, the excitement of seeing vibrant fresh fruit and vegetables in season. The ‘what can I cook for dinner tonight?’ Perusing beautiful sourdough artisan breads (including gluten free), handmade cheeses and raw organic honey. A pear is no longer just a pear. It could become a caramelised pear cake or sliced, doused with lemon juice and thrown into a walnut and goats cheese salad. Pear, honey and pecan muffins anyone?

As a regular market goer for a number of years, I was asked to participate in a wee interview the other day by the Hornsby Market peeps. The lovely Jane sent me a few questions which I happily answered. If you would like to take a squiz, click on the link are the end of this post that will take you to the Organic Food Market blog.

I don’t feel entirely comfortable with throwing questions out into the blogosphere (the possibility of not being answered seems a tad, ummm, sad). However, I got my ‘market on’ today and I would love to hear from you about your fave growers/farmers market experiences. Do you have one near you, what do you like to buy and what is one of your fave recipes using a market ingredient?

If no-one answers, it’s cool. I will be at the Hornsby Market filling my belly with the scrumptious pancakes made by the cute French guys.

http://hornsby-markets.blogspot.com.au/2014/04/sharing-some-hornsby-market-love-with.html?spref=fb


Green beans in olive oil (Loubyeh bi Zaht)

A standard purchase from our local Hornsby Growers Market is a bag of green beans. Sometimes they are added to a curry, sometimes they are blanched and tossed together with fennel and orange to make a vibrant salad. Sometimes I will just stare at them for hours at a time, pondering the true beauty of their verdant, glossy, bean-like attributes. But mostly likely, they will end up in this dish.

I like to fancy that I am a teeny part Lebanese, not through blood but through osmosis. A dear friend (who’s hubby is of Lebanese origin) gave me Abla Amad’s cookbook, ‘The Lebanese Kitchen’ about 12 years years ago. Abla started her restaurant in 1979. It soon became a Melbourne dining institution and is still serving simple, traditional style Lebanese food today. Having never eaten there, it is definitely on my list of things to do. Anyhoo, it has been a pleasure to trawl through this book and experiment with the variety of tasty dishes that grace the pages.

My next Middle Eastern connection was making friends with yet another amazing chick through mothers group. Our sons were born around the same time and she is also of Lebanese heritage. The tip of caramelising the onions for this dish came from her mum. (Just saying, but this good friend has yet to cook me a Lebanese feast…..I am still waiting.)

The Yak and myself love this dish served with baked or roasted potatoes and veggie burgers. It’s equally good with kafta (lamb mince patties), grilled chicken or haloumi. Other great pairings include quinoa dishes, stuffed eggplants or capsciums and flatbreads. It is equally yummy served hot, cold or warm.

Mopping up the velvety sauce at the end with whatever carbohydrate you fancy is the best bit.

Green beans in olive oil (Loubyeh bi Zayt)

YOU NEED
1/2 cup olive oil
1 large onion, finely diced
500g green beans, top and tailed and cut into 2cm length
1 1/2 tsps ground allspice
1 tin (400g) diced tomatoes
1 tsp salt
1/4 tsp ground black pepper

HOW YOU DO IT
Heat oil in a saucepan, add onion and sauté the onions until they are a dark golden brown. Cook over medium heat, this takes about 10-15 minutes.
Add beans and stir, then add allspice and cook for 1 minute, stirring constantly.
Add tomato, salt and pepper.
Replace lid and cook for 30 minutes over low heat, cooking until beans are tender. (I usually take the lid off for the last 10 minutes). I taste for seasoning about half way through, you may need a touch more salt.

You can make this dish without tomatoes but I never have. I love allspice but if you are unsure, try 1 teaspoon to start with. Seriously folks, take the time to caramelise the onions. It adds a depth of flavour that was missing when I used to sauté the onions lightly.

Adapted from The Lebanese Kitchen by Abla Amad


Ginger cat crunch

Kid 2: In the olden days did they use to eat ginger cats?
Me: Ummm no, dear, why?
Kid 2: Oh, what about when they needed ginger?
Me: Well, ummm, actually, ginger is from a plant.

His relief is palpable. For those of you who were also concerned as to the true origin of ginger, you can all breathe a sigh of relief.

The lads adore this Ginger Crunch. A crisp and crunchy biscuity slice topped off with a spicy thin layer of icing. I have made two small changes to a recipe from a beloved cookbook that the mothership once gave me. The book, ‘Ladies: A Plate’ is a gorgeous conglomeration of classic New Zealand baking recipes.

Ginger Cat Crunch

WHAT YOU NEED
The Base
80g coconut sugar (or raw caster sugar, rapadura)
200g wholemeal flour
1 tsp ground ginger
1/2 tsp baking powder
115 g butter

Icing
55g butter
1 tbsp golden syrup
2 tsp ground ginger
55 g icing sugar, sifted

HOW YOU DO IT
Base
Preheat oven to 180C and line a shallow 30 x 21 cm tin with baking paper.
Put all the dry ingredients into a food processor and pulse briefly to combine them. Drop in the butter and process just until the mixture forms fine crumbs. (You can do all this by hand, rubbing the butter into the flour but this is easier!)
Pour the crumbs into the tin, spread them out evenly and press down firmly using your fingers to compact them slightly. They will stick together properly as they bake.
Bake for 20 – 25 minutes until the mixture is a pale golden brown.

Icing
While the base is cooking, put the butter, golden syrup and ginger into a saucepan and heat gently, stirring. When they are melted and combined, tip in the icing sugar mixture and mix to a fairly runny consistency.
Remove the base from the oven and immediately pour on the icing. Spread it evenly over the surface with a spatula.
Cut the mixture into fingers or squares, leave to cool then break it apart along the cuts and store in an airtight container.
Makes 12 squares or about 16-20 fingers.

Note, to make it really crunchy you can make it thinner than I did. My mixture didn’t quite fill the whole pan so the slice was more, ummm, slicey than super crunchy.

Recipe slightly adapted from ‘Ladies: A Plate. Traditional home baking.’ By Alexa Johnston

Please note, no ginger cats were harmed in this recipe


Cinnamon tea cake

Whilst reading a lovely blog the other day, I was reminded of a wee poem I used to have attached to my fridge. It was a cartoon accompanied by the saying:

‘I don’t think I shall ever see, a poem as beautiful as a cup of tea.’

The cartoon has long since been lost but still I carry that saying in my heart. This wee cake is a smashing accompanient to a good, strong cuppa. As a young lass, I remember happily scoffing down hot toast slathered with butter and liberally sprinkled with cinnamon and sugar. This tea cake replicates the aromas and tastes of that very same warming little snackle.

This recipe was passed on by a friend and I have tinkered with it (just a little) to provide a gluten free version for the good ole Yak.

Why use sorghum flour? Firstly, it is gluten free and my brief research shows it is high in protein, iron and dietary fibre. The starch and protein in sorghum take longer than other similar products to digest. Unlike rice flours, it isn’t gritty and helps to add a smoother texture to baked goods. This is always a wondrous thing when baking GF. I used the Bob’s Red Mill ‘sweet’ white sorghum flour but I also read that it can be purchased from Indian stores labelled as Jawar Atta. Just make sure it’s truly gluten free before purchasing it.

A quick mention of Xanthum gum, a product made from fermented corn sugar. I generally don’t use it a lot but it’s used in GF cooking as an emulsifier and thickener. You don’t need much, just a tad. I trialled the first recipe without it then used it on the 2nd attempt. It did make for a more spongy and cake like consistency.

For those of you who would like to use regular flour, I have provided the ingredients (see below). The method is still the same.

Cinnamon tea cake, gluten free

YOU NEED
60g butter, softened
1/2 tsp vanilla bean paste or 1 tsp vanilla
1/2 cup caster sugar (I used white to give it a light texture)
1 egg
1 cup gf plain flour
1/4 cup ‘sweet’ white sorghum flour
2 tsps baking powder
1/4 tsp xanthum gum (if you don’t have it, try without!)
Pinch of salt
1/3 cup milk

Topping
10g butter, extra melted (once cake is baked)
1 tsp cinnamon
1 tbl caster sugar

HOW YOU DO IT
Preheat oven to 180C.
Grease and line a 20cm round cake pan.
Sift the plain flour, sorghum flour, baking powder, xanthum gum and salt into a bowl.
Beat the butter, extract, sugar and egg in a bowl until light and fluffy.
Stir in flour and milk.
Spread mixture into tin (it’s quite thick) and bake for 25-30 minutes until it springs back to the touch.
Stand 5 minutes in tin, turn onto rack.
Brush cake with melted butter sprinkle with cinnamon and sugar mixture.

A cheergerm adaptation from a recipe a friend gave me

In case you were wondering, take a peek at the blog I was referring to
http://peakperspective.wordpress.com

Old school cinnamon tea cake

YOU NEED
60g butter, softened
1/2 tsp vanilla bean paste or 1 tsp vanilla
1/2 cup caster sugar
1 egg
1 cup self raising flour
Pinch of salt
1/3 cup milk

The topping and method is exactly the same as the gluten free version. Enjoy!


The danger of eating chimichurri

The modern woman faces many challenges and hidden dangers. Point in case, a friend recently rushed home from work to get ready for a girls night out. She had 15 minutes to do so. Hair, done. Makeup applied, she was ready for the final touches of a finishing translucent powder to her face. As us ladies know, there is nothing worse than a shiny fizzog (face.)

She took her makeup brush, hurriedly swiped it across the product and diligently applied it vigorously to her forehead, chin, nose and cheeks. She put down her brush. Time to go, she thought and did a final check in the mirror. Staring back at her, other than the usual visage of loveliness, she now resembled a two year old who had gotten into her mothers makeup. Her entire face glowed like a red emergency beacon bobbing up and down in the ocean. It appears she had mistakenly applied her blush/rouge instead of the powder. Must wash face and start again, she sighed.

We were at a girly dinner the evening our friend recounted this story to us. That same night, another friend turned to me and said ‘you have something stuck between your teeth.’ Ahh, yes, I was encountering yet another hidden danger. The old ‘herb wedged in the dentures drama.’ Nothing quite completes a well put together look like a huge chunk of parsley stuck between your choppers. It says ‘class’. It says ‘look at me’. It says ‘you know I got it going on ‘. At this point, we rely on family, friends and sometimes embarrassingly, the kindness of strangers to point out our herbivorous shortcomings.

If you are willing to accept all the adventure and danger that freshly chopped herbs can bring you, I can’t think of a more exciting way to spark up grilled vegetables, meats, haloumi or eggs than chimichurri. I am currently addicted to this zingy, herbaceous South American condiment. Used as a sauce or a marinade, there are many variances between recipes. Some contain oregano, some use no vinegar. The beauty is that you can tinker around until you discover how you like it best.

But I beg you. Please let me know if there is something lodged between my pearly whites.

Chimichurri
This makes a large squodge of sauce and keeps well for 3 days in a well sealed container in the fridge. I found this on a website (see link below) and have made it over and over again.

YOU NEED
1/2 small red onion
3 cloves of garlic (if you like it really garlicky, add an extra clove or 2)
2 cups of well packed parsley and coriander. (I use a half/half mix. If you hate coriander, use parsely and a bit of fresh oregano.)
1/2 cup extra Virgin olive oil
2 tbl red wine vinegar
1 tbl lime juice
Sea salt and pepper

HOW YOU DO IT
In a food processor, pulse the onion and garlic together until finely chopped.
Add the herbs and pulse briefly until finely chopped.
Put the herb and onion mixture into another bowl and stir in the olive oil, vinegar, lime juice and season with salt and pepper to taste.
Refrigerate until ready to serve.
It can also be used as a marinade.

Go here for the original recipe:
http://southamericanfood.about.com/od/saladssidedishes/r/chimichurri.htm


Hard knock life spelt pizza

Kid 1 has a hard life. He thinks he has it tougher than little orphan Annie ever did. The following conversation we had recently, highlights this.

Kid 1: I think Kid 2 should start learning his timetables.
Me: But you just started learning them recently yourself, and you are almost 10. He only just turned 7!
Kid 1: Yes mum, but I want him to have a better life than me. Can’t you see I’m going nowhere fast?

Yes, we can see why he has lost all hope at the ripe old age he is. ‘How about we have homemade pizza for dinner?’ I ask. ‘Yeah!’ he cries. It’s a surefire way to cheer up a hard knock life child like Kid 1.

This pizza uses a mix of wholemeal spelt flour and a strong, high protein flour that is used for bread or pizza. It’s a great workout for the arms. The crust has a moreish nutty flavour but is still light from the pizza flour. I am a bit of a minimalist topping kind of chick but you can use whatever toppings float your boat. We are big fans of mushrooms. If you have never made your own pizza, go for it. Get your kidlets to help, if you can.

YOU NEED
Pizza dough
220g strong flour
200g wholemeal spelt flour (if you don’t have spelt, use plain wholemeal flour)
2tsps (7g) dried yeast
1 1/2 tsps salt
320 ml lukewarm water
2 tbl olive oil

Pizza sauce
1 tbl garlic oil
1 tbl olive oil
1/2 onion finely diced
1 tin chopped tomatoes
Salt and pepper
1/2 tsp dried basil
Splash of caramelised balsamic vinegar or 1/2 tsp brown sugar

Toppings
400g mushrooms, finely sliced
250g shredded/grated mozarella
Fresh basil leaves to garnish (I had run out)

Equipment
2 large pizza pans (mine are 40 and 30cm). I prefer the ones with holes as they work better in a home oven, letting hot air onto the bottom of the pan and making the base crispier.

HOW YOU DO IT
Dough
Sieve the flours and salt into a large mixing bowl.
Dissolve the yeast in a little of the lukewarm water, then stir in the remaining water and add the oil.
Make a well in the centre of the flour mixtures, pour the liquid into the well and gradually work the flour in from the sides.
Remove the dough from the bowl and place onto a board that is sprinkled with flour.
Knead (use those muscles!) for about 5 minutes. (You may need to add more of the pizza flour if it’s too wet.)
Put the dough into a clean and slightly oiled bowl, cover with a damp cloth.
Leave the dough to rise in a warm place until it has doubled in size.

The Sauce:
Whilst your dough is proving (rising), make the sauce. Sauté the onions in the oils for a few minutes until translucent.
Add the tin of tomatoes, basil, salt and pepper, balsamic vinegar or sugar.
Cook on low to medium heat for about 20 minutes until it has reduced and thickened to a spreadable consistency.

Now you are ready to assemble the pizza!
Once you are ready, knock back the dough ( basically squash it), divide in half and roll out thinly on a well floured board. Place on your 2 pizza pans and add your toppings.
Cook 20 to 30 min until cooked. (I always check the bottom of the pizza to make sure it is cooked.)

(The dough quantity makes 2 large pizza bases.)

A cheergerm recipe

Why spelt? Why not? Seriously, this ancient grain contains 50% more protein than wheat flour. It also contains quite a lot of different vitamins and minerals. This cheergerm believes it is beneficial to eat from a wide variety of food sources. Please note, it is NOT gluten free.


Hey dude, don’t call me dude corn fritters

Buying a new computer sucks. No matter how crap your old one is, it’s somewhat akin to ending a destructive intimate relationship. You may have to come to loathe them, yet you know their foibles and quirks. You keep coming back for more, even when they continue to let you down.

Hence, shopping around begun. The first two young men, at two different mega stores, were 20 something self professed computer nerds. (I prefer to call them enthusiasts.) Both had super long hair, tied back and both were battling errant flakes of dry scalp that adorned their tresses like fake snow at Christmas. (Bless them). They were fountains of information and happy to hear what I wanted and what my opinions were. (Even though my eyes were rolling back in my head due to a total lack of comprehension.)

Young guy No 2, in his excitement at explaining a new space age laptop and it’s amazing abilities, exclaimed to me ‘it has 12 gigabytes, dude!’

Dude!? I have always thought of myself as non-conformist and reasonably ‘hip to the jive’. Whilst I found this moniker slightly amusing, I had to admit that the inner Victorian within (lace stays and corsets done up tightly) was a little taken aback. Not being an actual ‘dude’ and all that. Let alone the fact that the normal sales assistants that one encountered, did not usually call their customers dude.

So, off to the third unnamed mega store. This third much, much older guy, allowed me to briefly explain my needs. He then condescendingly, proceeded to tell me what I needed. I dared to asked him a question at the end of his diatribe. His reply? A brusque ‘come back when you are ready to buy and I will tell you the answer.’

In the light of guy number 3, I was forced to reconsider my opinion. I think that now, I am more than happy to be called dude. I also know where I won’t be buying my new computer.

Enjoy this recipe dudes. (I imagine this may be a dish that those totally awesome computer dudes would enjoy). These fritters are a fab light, vegetarian (and gluten free) dinner.

Dude, don’t call me dude corn fritters

YOU NEED
1 small red onion, finely diced
1 corn cob, kernels cut off
1 cup besan (chickpea) flour
1 egg
1 tbl chopped fresh coriander
1 tsp ground coriander
1/2 tsp ground cumin
1/4 tsp ground ginger
1/4 tsp ground turmeric
1/4 tsp salt
1/4 tsp ground chilli powder
Few grinds black pepper
Up to 1/3 cup water
2 tablespooons rice bran oil or vegetable oil

Place all the ingredients except the water in a large bowl.
Add the water slowly and mix to form a batter. You may not need all of the water, I used the 1/3 of a cup but it will depend on your chickpea flour.
Heat the oil in a large non-stick frypan over medium heat.
Add ungainly large spoonfuls of the batter to the frypan. Cook 4 to 5 minutes until just turning golden, flip carefully and transfer onto a tray lined with baking paper.
Once they are all pan fried, transfer the fritters into the oven and cook 8- 10 mins until golden and crispy.
Serve with whatever you want. We enjoyed it with a dollop of plain yoghurt mixed with sweet chilli sauce and a simple rocket salad.

Makes about 9 – 12 depending on the size you make them!

A cheergerm recipe


What, me, an award? You shouldn’t have…

I am chuffed, my first award….I would like to thank the Academy, hang about, it’s not the Oscars. It’s better! (Anyone can act.) I have always thought versatile was my middle name.

Thanks so much to the very funny naptimethoughts for this award, she cracks me up.
http://naptimethoughts.wordpress.com

The rules for acceptance of this award (in naptimethoughts words) are this:

1. Thank the person who nominated you for your new fancy schmancy award, and be sure to include a link back to their site in your acceptance speech. You know, thank all the little people.
2. Share 7 random facts about yourself
3. Pass on the award to 13 other versatile bloggers.

So, here goes:

1. I am not tall.
2. I have been know to snort when I laugh but I do it gracefully.
3. I may have once almost (key word) started to melt my tool kit on a hot oven top years ago. It could potentially have burnt the training kitchen down at the cookery school I was attending. (But it didn’t.)
4. I can bust some severe MC Hammer dance moves.
5. I used to play in a rock n roll band. I never got famous. I am not bitter.
6. I sleep like a ninja with one eye open since having children, ready to defend my family at the first sign of attack.
7. I was involved in a flesh burning incident in my 20’s that involved a dry cold morning, an extremely hot gas wall heater, an emergency doctors visit, third degree burns and not being able to sit down for a very, very long time. That’s all I will say.

There are so many fantastic bloggers out there, one could go nuts. Here they are:

http://tabithasglutenfreedishes.com/
http://lizard100blog.wordpress.com
http://raincoaster.com/
http://tasteofcolours.wordpress.com
http://www.francesays.com
http://forayintofoodstorage.com
http://teaandsesame.wordpress.com
http://thechefandthewaitress.wordpress.com
http://americanfoodieabroad.wordpress.com
http://gfbakingbys.wordpress.com
http://teaandsesame.wordpress.com
http://raquelgriffindor.com
http://sugarstuff.wordpress.com

Of course you don’t have to do this, but go on, I know you want to.


Healthy err gluten free brownies

First things first. Today marks the start of Coeliac Awareness Week in this vast land of thongs and Vegemite.  I for one, am very aware. The Silly Yak seemed to lack some awareness yesterday, when he ordered some salads for his lunch and one of them was couscous. (He has made a mental note to himself, couscous contains gluten, I must not eat gluten). Have a happy coeliac kind of week! 

Back to the healthy err brownie. Don’t get me wrong, I love a decadent chocolate brownie. Loads of butter, unctuous dark melted chocolate, a caramel swirl, a sprinkle of sea salt…burble…stay tuned for that recipe folks.

However, sometimes the inner health food hippy wins out. (That hippy would also like me to dress in long tie-dyed swirling skirts, multiple jangly bangles and a braided leather head band but I keep a sartorial lid on her, mostly.) 

These brownies are dialed back in the fat and sugar content and the addition of dates adds some texture and natural sweetness. It is a gluten free adaptation of a fave little Bill Granger recipe I have been using for a few years. No nuts have been used so the Kidlets can still take them to school. Try changing the dates to apricots or figs if you are not a fan of the date. (Don’t blame yourself if you aren’t, we all have our little oddities). 

They are actually better the next day, you know, a little more moist and all that.
 
Healthy err chocolate brownies

YOU NEED
60g (1/2) cup cocoa powder
1/2 cup gluten free plain flour
1/4 cup buckwheat flour
1tsp baking powder
1/4 tsp xanthum gum
50g (1/3) cup coconut sugar or brown sugar
100g (2/3 cup) chopped dried dates
90g unsalted butter, melted
80ml (1/3 cup) low fat milk (or whatever milk you got)
2 eggs
1/2 tsp vanilla paste (1 tsp vanilla extract)

METHOD
Preheat oven to 160C
Lightly grease and line the base of a 20cm square non stick baking pan.
Sift the cocoa powder, gluten free and buckwheat flours, baking powder and xanthum gum into a large mixing bowl.
Whisk together the butter, milk, eggs and vanilla.
Add the wet ingredients to the dry ingredients and stir until just combined.
Spread the mixture (it’s quite thick) into the tin and bake for 15 minutes or until just set.
Cool in the tin before cutting into squares. Dust with icing sugar (or don’t). (I did).

Adapted from Bill Grangers Healthy Chocolate Brownie recipe


Goodbye Ruby Tuesday

So, we just finished watching the Rolling Stones Sweet Summer Sun Live Hyde Park concert on the tele. Filmed in 2013, it commemorated 44 years after their legendary free concert in July 1969. The Stones song, Goodbye Ruby Tuesday was written in 1966. A fitting musical backdrop to an era of free love and bell bottomed trousers.

I try not to roll in the field of regrets overly much. However, some small sorrow exists at never having seeing the Stones live on stage. This ‘once upon a time almost rock chick’, can only imagine how it must have felt to play in front of a crowd of that magnitude.

One of the highlights of my own rock n roll past, was keeping a close eye on drunk 20 something’s swaying dangerously close to the sound equipment with beer in hand. Death by electrocution was bound to be my somewhat ignominious end.

Having made it through those dark rock n roll days, I dedicate this ruby red studded plum cake to the Rolling Stones. Super inspired by the amazing Sierra plums at our local Growers Market, I felt the need to bake something sweet. Gluten free of course, gotta keep The Yak in cake.

This recipe is based on the wonderful Smitten Kitchen version. (You can see the link below for the full story). This cheergerm adaptation uses gluten free flours (as well as a few other minor changes.)

Like many gluten free baked goodies, this cake is extremely delicate so be careful when moving and cutting it. Tart and toffeeish with an almost pudding like texture, it would be ace served as a dessert at your next dinner party.

I am sure that if Mr Mick Jagger ever came for round for tea, he would totally enjoy a slice.

Gluten Free Plum Cake

1/2 cup gf plain flour
1/4 cup teff flour
1/4 cup almond meal (if wanting nut free substitute with 1/4 cup of extra gf plain flour)
1 1/2 tsp baking powder
1/4 tsp Xanthum gum
Pinch of salt
115 g unsalted butter, softened
1/4 tsp vanilla paste
1 cup coconut sugar (or rapadura, or raw caster sugar)
2 large eggs
8 Sierra plums, cut in half and destoned

1 tsp cinnamon
1 tbl coconut sugar

Preheat oven to 175C.
Grease and line with baking paper a 23 cm springform tin.
Sift gf plain flour, teff flour, baking powder, xanthum gum and salt into a bowl. Stir in the almond meal.
In a separate bowl or stand mixer, beat the butter, vanilla paste and sugar until fluffy and light in colour.
Add the eggs one at a time, scraping down the bowl.
Add the flour mixture and mix until just combined.
Spread the batter into the prepared cake tin and gently press the plum halves, cut-side up into the batter.
Sprinkle with the sugar and cinnamon mixture.
Bake for 45 to 50 minutes, until golden brown. Cake is cooked when a skewer comes out clean. (You may have to cover it with foil towards the end if it starts to get too brown.)
Let cool in the tin before removal. Smitten Kitchen recommends leaving overnight to let the plum juice soak in, a grand idea but The Yak needed cake, and it was good.

Go here for original Smitten Kitchen recipe, I warn you, this glorious website is addictive.

http://smittenkitchen.com/blog/2013/10/purple-plum-torte/