Long walks in the rain and restorative vegetable soup

Hi, my name is Cheergerm, I like long walks in the rain. (This sounds like the introduction to a personal ad on a dating website.) Actually, I was under the impression I liked long walks in the rain.

After a lovely and filling lunch at Mum’s house, a forty minute walk home seemed like a good idea. The offer of an umbrella was denied. ‘No thanks, I have my rain coat, that will do thanks.’ The first five minutes of light drizzle were delightful. I felt alive, exuberant, all English-like and Mary Poppinsy. Trip trapping down the road like one of the Three Billy Goats Gruff, cool mist enveloping me.

Then the rain got heavier. Rain coat zipped up, hood on. This wasn’t going to dampen my spirits, so to speak. Did the intrepid explorer Sir Edmund Hilary turn back when things got a bit hairy climbing Mt Everest? Never! With nothing to protect my face and glasses, large drops began to drip down, obscuring my vision. A pair of teeny tiny windscreen wipers would have been great. This genteel walk was becoming somewhat unpleasant.

The rain deepened, as did my mood. I would not call for help. Captain Scott didn’t call his mummy for help in the Antarctic, did he? (Unfortunately, I had left my mobile phone at home.) The wind started to blow the rain sideways. By now my track suit pants were hugging my legs wetly, not unlike a clingy three year old with a soggy nappy. The odd drip or two was making it way slowly down my back, creeping towards undergarments that one would prefer to keep dry.

I saw a car, my heart lifted, it was the same make and colour as ours. Had the Yak come to rescue me from this foolhardy adventure? Nope, it wasn’t him. Resolutely, I put my head down. Rain was now pouring over the hood of my rain coat and down my nose like a miniature waterfall. Home was only ten minutes away.

My name is Cheergerm, I do not like long walks in the rain.

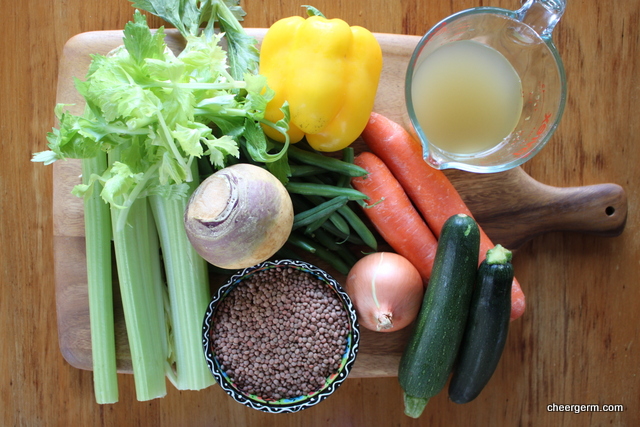
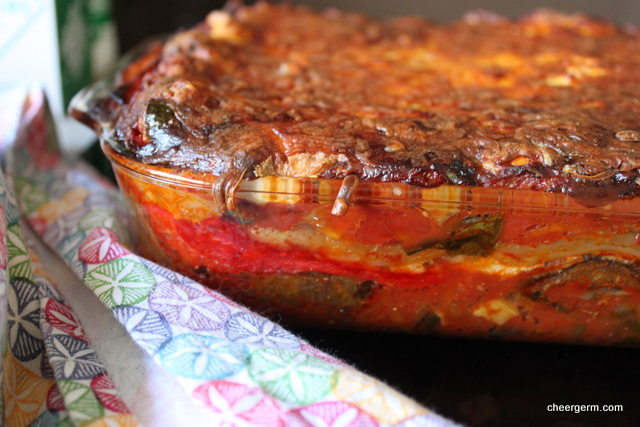
But I do like this. A marvellous restorative vegetable soup based on the kind of soup that Mum would make on wintery Sunday’s. It is perfect for when you feel wet, poorly, sad, or just in need of a big bowl of soup love. It makes a huge pot but I always freeze some for a rainy day. Mum always used barley but sadly, it is not gluten free. I threw in some lovely red Persian lentils which do not need soaking and keep their shape once cooked. The celery is essential.

RESTORATIVE VEGETABLE SOUP

2 tbl olive oil or grapeseed oil
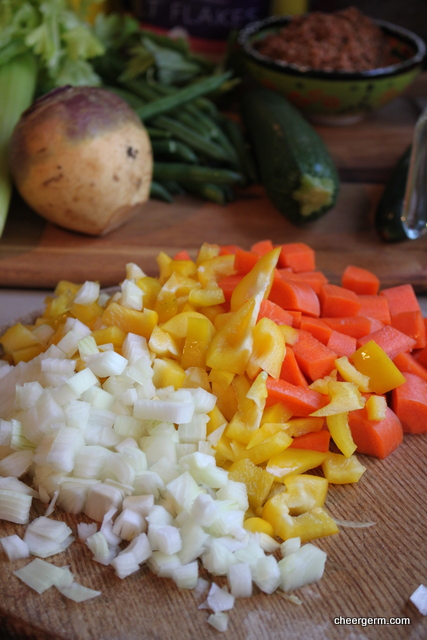
1 onion, diced
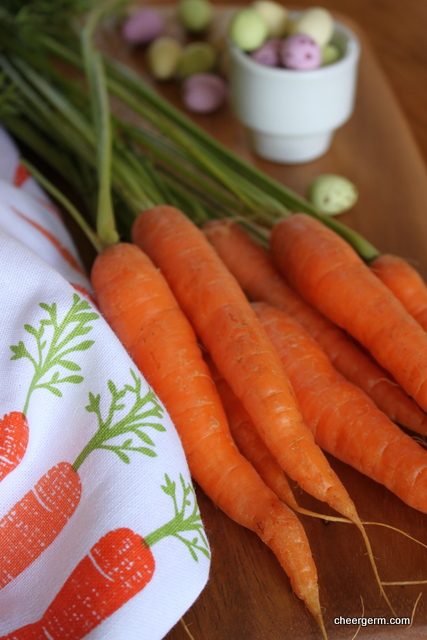
2 large carrots, diced
1 yellow or red capsicum, diced
4 sticks celery, 300g, diced
1 Swede (the vegetable not someone from Sweden), diced
4 cups veggie stock
7 cups of water
1 cup Persian red lentils (or green lentils, or barley if it doesn’t need to be GF), make sure you wash them
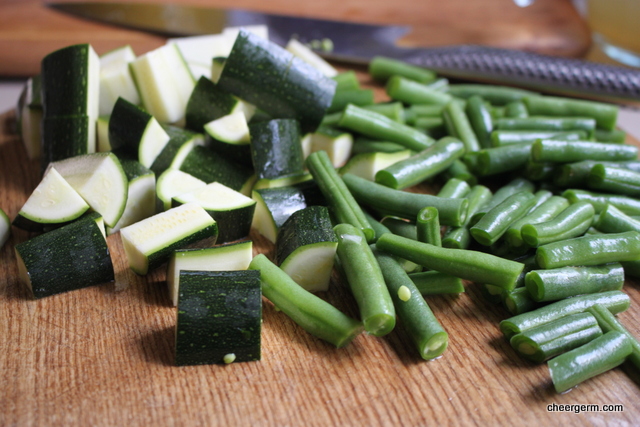
Big handful of green beans, chopped
2 medium zucchini, diced
1 tsp Salt and as much black pepper as you desire
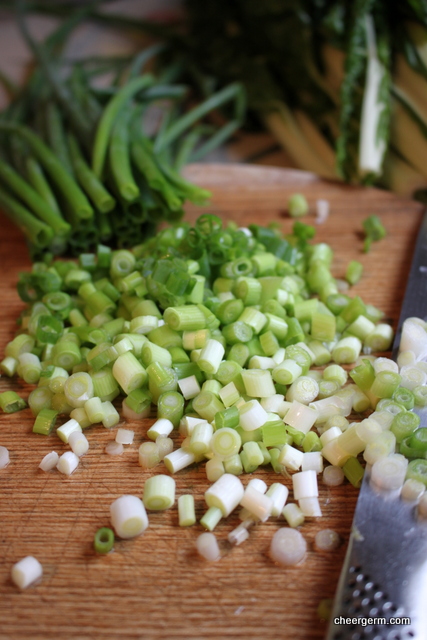
1 large handful celery leaves, roughly chopped
(Optional: vegetable stock powder.)

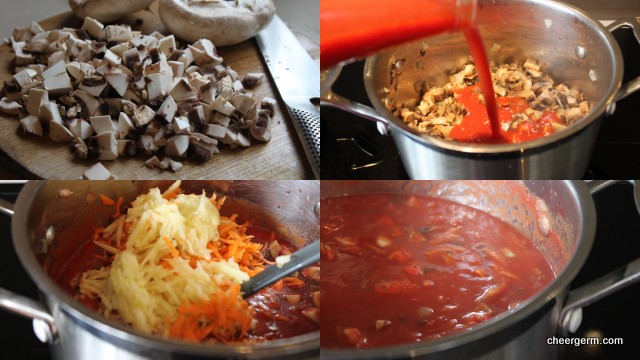
Heat oil in large stockpan and sweat off onion, carrots, pepper, celery and swede for about ten minutes. Do not colour the vegetables.
Add the veggie stock, water, lentils and a few big grinds of black pepper. Bring to the boil then reduce to a simmer.
Cook for about 40 minutes until the carrots are just tender, then add the beans, zucchini and salt and cook for a further 10-15 minutes or until they are just tender. You want to keep some vibrancy in them.
Check for seasoning, add more salt, pepper and a teaspoon of veggie stock powder if needed.
Add the celery leaves and cook for five more minutes. Let the soup sit off the heat for five minutes, scoop off any lentil scum that has come to surface.
Eaten with a slice of spelt sourdough and some manchego cheese.

A Cheergerm recipe

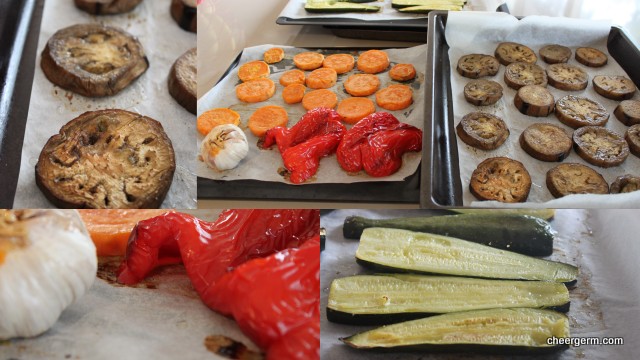
Cooking Notes: I used a store bought veggie stock. I have made my own before (a few years ago now) but I really fancy making the wonderful sounding roast vegetarian stock from the lovely Almost Italian blog. She roasted the vegetables first to obtain some umami depth. I haven’t made it yet but I will. Or maybe you will first. Bless and damn you if that is the case.

https://almostitalian.wordpress.com/2015/06/01/french-onion-soup-with-vegetable-stock-voila/


King of the vegetables and a potato and Comte galette

The Yak was crapping on orating upon the delight of the humble potato, his favourite vegetable over all others. We could say in fact, that in his view, it is The King of the Vegetables. As he plainly stated, there isn’t much that you cannot do with the tatie. Bake it, boil it, steam it, mash it, grate it, fry it, smash it, dumpling it. Perhaps The Yak has a point? What he was really trying to say was, could we please have potatoes for dinner?

The pantry was laden with potatoes, I also had some delicious looking Comte cheese that I had purchased at the cheese shop. I suffer from an insidious illness that I would not wish upon anyone, it is called ‘Cheeseyearningitis’. It entails standing in front of a cheese counter, looking longingly at cheeses that one wishes to try but one also knows, that one is of an age where one can no longer eat every cheese that ones hankers after. This is due to a waistline thickening on a daily basis and a propensity towards high cholesterol. ‘Cheeseyearningitis’. Look it up, it really exists.

Comte is a semi-hard French cheese made from unpasteurised milk obtained from cows that have only been freshly and naturally fed. It is very similar to Gruyere but a Comte cheese can only be called thus if it adheres to a whole bunch of strict Frenchy regulations. God Bless the French.

I was thinking of a good old potato bake but a googlebumble led me to this delightful concoction, a Comte and potato galette. (Galette meaning a flat pancake and this dish is intrinsically that, a pancake like concoction of cheese and potato.)

The smell of this simple dish baking caused dribble to surreptitiously slide out of the corners of my mouth. Luckily, no one was watching. How best to explain the odour of this cheese baking? I imagine that it is the smell of the meadows in the French alps, of the sweet grass and alpine flowers that blissfully happy European cows chow down upon.

This cheese and potato dish was nutty, sharp, crunchy and almost caramelised around the edges. Unfortunately, all the children present loved it so there were barely any leftovers. Which really sucked. As a French cow would say, ‘Le Moo, Le Sucky.’

POTATO AND COMTE GALETTE

2 tbl unsalted butter (30g)
1 kilo potatoes, peeled and coarsely shredded. I used Desiree because it’s all I had, the recipe called for Yukon Gold. I shredded them in my food processor, oh yeah. Squeeze the potatoes well to get rid of as much liquid as you can.
200g Comte cheese, grated
1 1/2 tsps sea salt
1/4 tsp ground nutmeg
Black pepper

Preheat oven to 180C.
Preheat a medium size frypan, add half the butter and melt it.
Place 1/3 of the shredded potatoes into the frypan, sprinkle half a teaspoon of salt, some grinds of black pepper and sprinkle some nutmeg evenly across.
Sprinkle 1/3 of the cheese over the potato.
Place another 1/3 of the potatoes on top, season with salt, pepper and nutmeg and add another 1/3 of the cheese.
Add the last 1/3 of potatoes, drizzle the remaining butter on top then press the mixture down with the back of a spatula. Season with salt, pepper and nutmeg then sprinkle the remaining cheese on top.
Over a medium heat, cook the potatoes for about 10-15 minutes until the potato on the bottom starts to sizzle.
Transfer the frying pan into the oven and cook for about 25-35 minutes until golden brown and the potatoes pierce easily with a knife. (Meaning they are cooked.)
Eat it down quickly before the children do.

Recipe knicked from the website listed below, only a minor change was made to it.

http://www.oliversmarket.com/index.php/413

http://en.m.wikipedia.org/wiki/Comté_cheese


Green lentil dal, a curry, not the author

How could I not use this recipe as an excuse to wax a wee bit lyrical about one of my favourite authors, Roald Dahl?

Easily, you may say but then, that is how I roll. Expect the unexpected, I never promised you a rose garden and all that. (Whatever the hell that means, seriously, what does it mean?)

As a child, my fervent reading habit encompassed the works of Roald Dahl. His books were devoured as readily as any white bread that I was able to get my mitts on. (Back in the day, Mum baked homemade bread or we ate brown bread. This once painfully fussy eater hankered after a slice of white bread something fierce.)

Favourite Dahl tomes included the hippy trippy delicious adventures of Charlie and the Chocolate Factory, closely followed by Charlie and the Great Glass Elevator and of course, James and the Giant Peach. These books were read cover to cover and more than once. They were then followed by the rest of his children’s novels and poetry. In my later teenage years, I encountered his more grown up ‘Tales of the Unexpected’ in which a story about screaming plants was inked indelibly onto my mind and psyche. To read Dahl is to go on an adventure and end up in a place you never thought you would go.

Indian food is a little like a Roald Dahl tale, an exciting and exotic journey into a diverse world of spice and many varying ingredients. Each bite can reveal a different flavour and aroma. Every spice brings something new to the party. This curry consisting of deep green legumes is gently earthy, with a delicate creamy blend of heat and richness. It is a wonderful addition to an Indian banquet or just as pleasantly, scoffed alone with a heft serving of basmati rice.

On that note, I leave you with my one of my favourite Roald Dahl quotes. (And of course, the recipe.)

‘And above all, watch with glittering eyes the whole world around you because the greatest secrets are always hidden in the most unlikely places. Those who don’t believe in magic will never find it.’

GREEN LENTIL DAL

WHAT YOU NEED
250g green lentils, washed
1 onion, roughly chopped
2 garlic clove, roughly chopped
5 cm ginger, roughly chopped
1/4 cup oil
1 tbl ground cumin
1 1/2 tsps ground coriander
2 tsps salt
1/4 tsp chilli powder
2 tbl garam masala
1/4 cup cream

HOW YOU DO IT
Put the lentils in a large saucepan and add 6 cups of water and bring to the boil. Reduce the heat to a simmer and cook for about 45 minutes to one hour or until the dal feels soft.The lentils will start to split a little and that is fine.
Drain and reserve the cooking liquid.
Blend the onion, garlic and ginger in a food processor to form a paste or finely chop them together with a knife.
Heat the oil in a medium size saucepan and fry the onion mixture over a high heat, stirring constantly until golden brown.
Add the cumin and coriander and fry for two minutes.
Add the lentils and stir in the salt, chilli powder and garam masala.
Pour 310ml (1 1/4 cup) of the reserved lentil liquid into the pan, bring to the boil, then reduce the heat to medium and simmer for ten minutes.
Just before serving, check for salt then stir in the cream and simmer for another 2 minutes to heat through.
Serve alone with steamed basmati rice or as part of a feast.

A Cheergerm adaptation from the The Food of India: A journey for food lovers by Murdoch Books. Recipes by Priya Wickramasingh and Carol Selva Rajah.


Gluten free silverbeet, herb and polenta pie for Easter

Sending the Yak to the superdoopermarket/green grocers is a hit and miss thing. He is very good at buying utilitarian dried goods (think loo paper, environmentally friendly toilet cleaner in the shape of a duck or gluten free taco shells) but one has to be extremely specific when it comes to fruit and vegetables.

Point in case….I once asked for some green beans. He came back with eight, yes eight, (count them people) individual green beans. I could have created an art installation from them but finding a way to incorporate eight beans into a recipe was a tad beyond my imagination.

When pondering a vegetarian gluten free recipe as part of a shared Easter celebration, I lovingly reminisced upon the traditional spanokopita. That wonderful Greek pie consisting of silverbeet or spinach, ricotta, feta, herbs and flaky layers of pastry. Pastry that The Yak can no longer partake of. Thinking cap placed firmly atop of my noggin, I thunked. Perhaps a polenta crust atop a semi-traditional spinach pie would be quite the treat? (Or a total disaster.)

Curiosity led me to pondering the Greek connection between ground corn and food. Googlebumbling revealed that ground corn has indeed been used in Greek cooking in various ways for several hundred years. It possibly arrived in Greece, courtesy of the Turkish Ottoman Empire by way of Africa. Amongst other uses, it is sprinkled atop leafy green pies or placed underneath to soak up the juices. I have added the link to the very interesting article, after the photos in this post.

Once upon a time, I used to favour a spanokopita recipe by Matthew Evans (a former chef and food critic, now television host). It contained an abundance of herbs, leafy greens and cheese. Having lost this recipe, I now make it merely from memory. (Not the most reliable of sources.) Do not freak out at the amount of herbs in this recipe. It seems a lot but it works. Need it be said, The Yak did not do the shopping for this dish.

This pie is audaciously herbaceous. The salty hits of feta and kefalograviera (a salty Greek hard sheeps milk cheese), combined with the slightly sweet corn polenta, balance the meadowy punch in the face. But this is the kind of face punch that you happily go back for.

Sadly I missed out on the actual abundant Easter feast itself due to Kid 2 and a tummy bug. However, I did get to eat leftovers of this pie. I poured myself a glass of vino, tucked in and pretended I was on a Greek island somewhere. (In a place where stomach viruses did not exist.)

SILVERBEET, HERB AND POLENTA PIE

WHAT YOU NEED
2 tbl olive oil
1 onion, finely chopped
1/2 bunch spring onion, finely chopped
1 big bunch chopped silverbeet, trim the woody ends and use the leafy greens and some of the softer stem. (I had roughly 700g once trimmed of stalks.)
1/4 tsp nutmeg
6 Eggs, beaten
300g Ricotta
200g Feta, crumbled
1 bunch mint, chopped
1 bunch parsley, chopped
1 bunch dill, chopped
Zest of one lemon and juice for the silverbeet
1 tsp Salt
Pepper

Polenta Crust
1.5 cups instant polenta
5 cups water
1 1/2 tbl butter
120g kefalograviera cheese (Use 1/4 cup to add to the polenta and the rest to sprinkle on top of the pie.)

HOW YOU DO IT
In a large frypan, sauté the chopped onion for a few minutes until they start to become translucent, add the chopped spring onions, sauté for one minute.
Remove the mixture from the pan into a large mixing bowl and allow to cool.
Re-heat the pan to a medium heat, add the chopped silverbeet along with a big squeeze of lemon and cook, stirring regularly until it has wilted and most of the liquid has evaporated. When it has cooled, squeeze out any remaining liquid.
Into the large bowl containing the onion mixture, add the silverbeet, nutmeg, beaten eggs, ricotta, feta, chopped herbs, lemon zest, salt and a few big grinds of black pepper, as much as you fancy. (I am not the pepper police!)
Mix well, taste and check for seasoning.
Smooth this mixture into a large oiled baking dish, I use a 3 litre rectangular Pyrex dish.
Preheat the oven to 180 C if you are cooking the dish immediately.
Polenta Crust
For the polenta. Heat the water in a medium saucepan until it just starts to boil. Using a whisk, slowly pour in the polenta, continuing to whisk. This is important as it avoids lumpy polenta.
Change to a wooden spoon, turn the heat to low and continue to cook the polenta, stirring constantly for 4-5 minutes. Add the butter and 1/4 cup of the kefalograviera, it should be of a spreadable consistency.
Remove the polenta from the heat and immediately, spread it over the silverbeet, herb and egg mixture.
Let cool for ten minutes. Sprinkle the remaining kefalograviera cheese on top, and bake for 45-50 minutes until golden brown on top. (You can also place the pie in the fridge if you are cooking the next day.)
Let the pie rest for about 15-20 minutes until it has set a little bit.
Serve with a green salad, or roasted veggies.
Cooking Notes: silverbeet is also know as chard. If you cannot find Kefalograviera, use Pecorino, Parmesan or Gruyere.

A Cheergerm creation

http://www.dianekochilas.com/when-greeks-do-corn/

http://en.m.wikipedia.org/wiki/Kefalograviera


Roasted baby carrots with cumin for Easter

Upon smelling a new perfume I was given for my birthday, Kid 1 made the following comment.

Kid 1: It smells like melted Easter eggs.

I am not sure whether to be displeased or not. I envisage myself swanning around attracting small chocolate-loving children and perhaps even the E.B. (Easter Bunny) himself. Not sure if that’s what the perfumier was aiming for when creating this parfum. ‘Eau de Chocolate Easter Egg.’ Give it a whirl, it’s all the rage in the Easter circles.

If you are looking for side dishes to accompany your Easter feast this coming weekend, please consider this wee recipe idea. Calling anything ‘baby’ that you are about to devour and consume has always creeped me out a bit. However, there is no escaping the fact that young veggies are usually the most tender and sweet. Let alone, super cute. Just like a real life human baby! Rest assured, only vegetable babies were harmed in the making of this dish. (That’s OK, right? Told you the whole thing is just, well, odd.)

These carrots were sweet with lovely undertones of the earthy cumin. Tender and juicy, I am positive that all, including the Easter Bunny, will love them.

ROASTED BABY CARROTS WITH CUMIN

WHAT YOU NEED
1 bunch baby carrots
1 tsp ground cumin
1 tbl butter, unsalted
Salt
Pepper
2 tbl white wine

WHAT YOU DO
Preheat oven to 180C.
Scrub or lightly peel the carrots.
Place in a foil package, add the cumin, salt and pepper to taste. Dob the butter over the carrots, add the wine and close the foil package.
Roast in the oven for 30 minutes or until tender.
Try it with https://cheergerm.com/2015/03/08/a-cheergerm-gluten-free-roasted-vegetable-lasagna/ or https://cheergerm.com/2015/01/02/millefeuilles-aux-tomates-et-lentilles-and-a-lady-crush/ or https://cheergerm.com/2014/11/09/a-side-of-herb-polenta-bake-and-an-aside/

A Cheergerm Creation


Parenting and cauliflower curry

Ten years later, I do not have this parenting thing down pat.

Kid 1: Mum, I am scared that an axe murderer is going to kill me.
Me: That is highly unlikely darling. Good night.
5 minutes later
Kid 1: Mum, can you come here please?
Me: Yes?
Kid 1: You telling me that ‘it’s highly unlikely’ does NOT make me feel better.
Me: Oh, all right then, it will never happen, how’s that?
Kid 1: OK, now I feel better.

Thanks for the parenting tip Kid 1.

Kid 1 will probably never eat this curry, he hates anything spicy. We don’t care, more for us. This curry benefits from a hit of bright, pungent mustard seeds; I love the little buggers. After a spot of googlebumbling research I discovered these wee dudes are high in a variety of B vitamins, minerals, anti-oxidants and phytyo-nutrients. (Phyto what?) Phyto-nutrients are intrinsically natural chemicals found in plant matter that may help prevent disease and keep your body working properly. Mustard seeds and their oils have traditionally been used to relieve muscle pain, arthritis and rheumatism pain.

Whatever a mustard seeds health benefit, this curry has good depth of flavour along with a punch of heat from the chilli. Add more chilli if you like but we enjoy the balance of flavours. If you aren’t a chilli fan, reduce the amount back to 1/4 of a teaspoon or you could leave it out. (No judgement from this Cheergerm….really, you don’t like chilli? What’s wrong with you??)

CAULIFLOWER CURRY

WHAT YOU NEED
2 tbl oil , rice bran or grapeseed oil
1 onion, finely chopped
A 3cm piece of peeled and grated fresh ginger
2 cloves crushed or grated garlic
1 tsp brown mustard seeds
1 tsp ground cumin
1 tsp ground coriander
1 tsp ground turmeric
1/2 tsp ground paprika
1/2 tsp chilli powder (the hot stuff)
1 tsp salt
Dry curry leaves about 10 (I only had 4)
1 cauliflower head, cored and cut into small florets , about 2-3 cm large
1/2 cup water to start with, you will need more
1 handful fresh chopped coriander

HOW YOU DO IT
Sauté onion in oil in a large frypan over medium heat for about 3-5 minutes until soft.
Add the ginger and garlic, cook for 1 minute.
Add all the spices, salt, curry leaves and cook for 2 minutes to release their flavour, stirring gently.
Add the cauliflower, stir well to coat the cauliflower in the spices.
Add 1/2 cup water and simmer on a low to medium heat for about about 50 minutes. If the curry starts to get dry, add a bit more water. I added just over a cup throughout the entire cooking process. By the end, the curry should be mostly dry with a small bit of liquid but soft and beginning to fall apart.
Take the curry off the heat, taste and see if it needs extra salt then stir through the chopped coriander.
Serve with rice, quinoa or whatever takes your fancy. We had it with brown basmati rice.

A Cheergerm creation


A Cheergerm gluten free roasted vegetable lasagna

There is a raging battle of supremacy in our family for the grand title of ‘Queen of the Veggie Lasagna.’ It’s not as if we have any other ruling status to aspire to, unless of course it was The Precious Princess of Dunny Cleaning or The Lady of the Laundry. Perhaps we should aspire to the title of The Duchess of Finding Lost Shoes and Spare Socks?

Battles aside, all of our vegetable lasagna versions have a different twist and they are all scrumptious. A lasagna is such a practical ‘big gathering’ dish as you are able to prepare it the day before you need it. Come the day of the party, you can smugly swan around the house preening and cleaning. Safe in the knowledge that the lasagna resides in stately grace, awaiting to be baked. In this case, we were enjoying a joint birthday celebration for Kid 2’s eighth birthday, as well as my birthday. (Thanks, turning 21 was tonnes of fun.) As such, I had prepared my Cheergerm veggie lasagna the day before.

It ain’t traditional Italian, more a mixed breed of an old school lasagna and a hippy vegetarian version. I know that the grated apple and carrot in the tomato sauce is based on a vague memory I have of a Julie Stafford recipe from the healthy eating cookbook, The Taste of Life. This was a 1980’s cookbook that was well used by Mum back in ‘the day’. This lasagna is unctuous and hearty. The use of the ricotta in the white sauce gives it a lighter taste. Yes, it does contain a shedload of veggies and whilst it looks overwhelming, it really isn’t as much work is it at first appears. ( Ah, who I am kidding but it’s worth it!) There are a lot of photos in the post, I took the ‘step-by-step’ approach quite figuratively. Go figure.

CHEERGERM GLUTEN FREE ROASTED VEGETARIAN LASAGNA

WHAT YOU NEED
Roasted vegetables
2 medium eggplants
1 large sweet potato
4 medium zucchini
1 red pepper
1 head garlic
Tomato sauce
1 onion, diced
400 g mushrooms, diced
700g bottle sugo (or passata, which is basically a tomatoey sauce)
1 tin chopped tomatoes
1 large carrot, grated
1 green apple, grated
Fresh basil, a big handful, torn
Ricotta sauce
2 tbl Butter
2 tbl gluten free plain flour
1 1/2 cups milk
400g Ricotta
Other
1 box 200g gluten free instant lasagna sheets
Grated mozzarella (2 cups, 200g)
40g Parmesan, grated
Lots of Olive oil
Salt and pepper

HOW YOU DO IT

Roast Vegetables
Preheat the oven to 200C (180 fan forced).
Cut the eggplants (I peel mine), sweet potato (peeled) and zucchini into one cm thicknesses. Place on trays lined with baking paper, oil both sides of the vegetables and season with salt and pepper lightly.
Place halved red pepper and head of garlic onto a tray and drizzle with olive oil.
Put the trays into the oven, turn the veggies over after 15 minutes, cook for another 10 minutes until the veggies are tender. You may have to leave the head of garlic in for another five minutes.
Allow the vegetables to cool.
Once the capsicum has cooled down, peel and cut into thin strips.
Take the head of roasted garlic, peel and squash up the peeled cloves. (This is to add to the red sauce.)

The tomato sauce
Sauté onion in 2 tbl olive oil over medium heat until they start to soften, add the mushrooms and fry them until most of the moisture is evaporated.
Add the sugo, tin of tomatoes, grated apple and carrot. Season with 1 tsp salt and some generous grinds of black pepper.
Cook for about 45 minutes until the mixture has thickened and reduced. Check again for salt, it may need more.
Take off the heat, add the torn basil and squashed up roasted garlic, stir gently.

Ricotta Sauce
Melt the butter in a medium size saucepan over a low to medium heat.
Add the flour and cook for 3 -4 minutes until the mixture (roux) starts to bubble.
Take off the heat and whisk in the cold milk. (This method of adding cold liquid to a hot roux helps to reduce the risk of a lumpy sauce.)
Put the sauce back on the heat and stir constantly with a wooden spoon until the mixture starts to thicken. Cook the white sauce for a few minutes, continuing to stir constantly.
Add the ricotta cheese, pepper and taste for salt before adding any.
Take off the heat.

Assembling the lasagna
Oil your lasagna dish. I use a Pyrex, 3 litre dish.
Place approximately five big spoons (a serving spoon size) of sauce on the bottom of the dish.
Place 4 lasagna sheets on top and spoon on more tomato sauce, about 4 spoonfuls.
Put all the eggplant in a single layer, place the red pepper strips on top then layer on half of the ricotta sauce. Smooth it out.
Place 4 more lasagna sheets on top of the ricotta sauce, you will probably need to snap one sheet in half to add as well. (Press down gently.)
Place another layer of tomato sauce, around 4 spoonfuls.
Add the sweet potato and zucchini. (It’s looking full by this point.)
Place a few more spoons of tomato sauce and spread it out. (I usually have some left, which I freeze.)
Spread the remaining ricotta sauce on top, then sprinkle with the combined mozarella and grated Parmesan.
At this point you can place the lasagna in the fridge and cook later that day or the next. (When doing this, make sure you bring the uncooked lasagna out of the fridge for an hour before cooking, so it isn’t stone cold going into the oven.) If you are eating straight away, place in a 180C oven for approximately 45 min to one hour until golden brown and bubbling.
Let stand for 20 minutes before serving. This helps the lasagna to re-solidify a bit and will be easier to portion and serve.
Now you can lie down and rest for a day or two.
It really is worth the effort.
Truly.
Serving Notes: Serves 12. Best served with a simple green salad and crusty bread of some kind.

A Cheergerm creation.

http://www.juliestafford.com.au/about-julie.php


Roasted sumac asparagus and rap

Macklemore, aka Ben Haggerty, is part of a rap duo called Macklemore and Ryan Lewis. These modern day musical poets produced an album the lads and I love, named The Heist. Imagine tuneful rap with a social conscience. Naturally, half of the album is full of ‘swear’ words, hence, the boys do NOT listen to those songs.

Kid 2 was recently singing this song he made up. I wrote it down verbatim.

Macklemore swears a lot
In his songs
But he’s an awesome singer and rapper
I never heard him say a rude word
But I know that he does
He sings them quietly
It is the ‘S’ word
But I wouldn’t know it if I heard it
My maniac mum loves Macklemore even if he swears a lot
Which is weird cause she doesn’t like swearing
Even though she says the ‘S’ word

Just to be clear.

I never did.

Well, I may have but I am NOT a maniac.

This is more of an idea than a recipe, albeit a delicious idea. The lemony sumac was the bomb when paired with the sweet roasted asparagus.

If only McDonalds sold these little darlings in french fry boxes. ‘Will you have asparagus with that?’

ROASTED SUMAC ASPARAGUS

WHAT YOU NEED
2 or 3 bunches asparagus
Olive oil to drizzle
1 tsp sumac
Salt and pepper

HOW YOU DO IT
Preheat oven to 180C and line a baking tray with baking paper.
Wash and trim the asparagus, place on the tray.
Drizzle the asparagus in olive oil, add the sumac and season with salt and pepper to your taste. Mix well to ensure the asparagus is well coated in the seasoning.
Cook the asparagus for ten to 15 minutes until tender.
Remove from oven and et voila! As easy as that. A great accompaniment to a vast array of whatever takes your fancy. That evening we ate it with roasted carrots and pork fillet steaks that had been marinated in mustard seeds, honey, oil and vinegar.

A Cheergerm creation


The Way of the Pierogi

IMG_7782

Before the Lovely R departed back to Poland, I was lucky enough to experience a hands on pierogi lesson. Pierogi is a Polish style dough dumpling stuffed with various fillings. R’s English is pretty darned good, despite her insistence that it isn’t. It is miles better than my Polish. (Ummm, non-existent.) As our lesson progressed, I tried to ask if she ever eats the pierogi straight after being boiled or does she always let it sit, then pan-fry and eat it. As we did on our lovely Polish picnic day.

Using her English/Polish dictionary, I found the word ‘boil’ and pointed at the translation. Horrified, the Lovely R vehemently shook her head and exclaimed ‘No, no!’ We spent a good few minutes, toing and froing, trying to understand what the other was saying. I showed her the dictionary again, this time, my finger was no long blocking the second meaning of the word ‘boil.’ It turns out that the first meaning had been an actual ‘boil’ that appears on the skin, a somewhat unsavoury medical condition.

Much laughter ensued.

This is one picture heavy post. I really tried to capture the intricacies of this process and I hope I have done the Lovely R justice. You can make the dough first then prepare the filling whilst the dough rests. R will often make the filling the night before then make the dough the next day. The dough also freezes well. She works fast. It is harder than it looks to make the dough stick, you must use all of your finger strength. No namby pamby weak fingers please. (Which obviously mine are.) The lovely R’s advice. ‘Practice will make you a master and Be Strong.’

For that is The Way of the Pierogi.

PIEROGI

WHAT YOU NEED
Pierogi Dough
1 kilo plain flour
400ml boiling water and extra ready if needed
1/3 cup Olive oil
1 tsp Salt

HOW YOU DO IT
Add oil to the flour then add the water gradually, you may not need all the water, or you may need a dash more. We used all 400ml and added another 3 tbl boiling water.
Bring the mixture together in the bowl then turn out onto a floured bench or board and knead until the gluten is activated, approximately 5 minutes.
Cover the dough in clingfilm and rest for half an hour minimum, up to one hour maximum at room temperature .
Flour a tray to place the pierogi on, and flour your workspace.
When the dough is soft and springy it is ready. Take a large ball of dough, around the size of a large orange.
Using a rolling pin, roll the dough, moving the dough regularly to avoid sticking, R worked it quite hard and it is quite elastic. Roll to approx 1mm thickness.
Using a glass or cutter about 8cm to cut out the pierogi shapes.
Use the scraps and add back into the dough.
Place a large teaspoon of filling onto each round of dough. (R works quickly.)
To shape the pierogi, pick up one pierogi and fold in into a crescent shape, press filling into the dough all the way and start to crimp around the edges.
As R says, Be Strong! Then turn over and crimp the other side. If there is too much filling, press it in with your index finger before crimping.
Don’t be afraid to pull the dough out as you crimp, you must have a good space between the filling and the dough so the two sides stick together without filling getting in the way. Again, Be Strong!
This filling used up about half of the dough made, we rolled out another batch once the first dough was used up. You can freeze leftover dough.

Filling
WHAT YOU NEED
3 potatoes, cooked and mashed
1 tbl oil and 1 tbl butter
1 medium onion, finely diced
300g-350g farm style cottage cheese, similar to Polish cheese. (Approximately the same weight of potatoes as cheese, with a tad extra cheese. Cheese must be slightly sour.
1 tbl Veggie stock powder (this is not mandatory)
1 1/2 tsp dried marjoram
Salt to taste, (more if not using vegetable stock)
Pepper to taste

HOW YOU DO IT
Cook onion in oil and butter until golden brown. Cool slightly.
Grate the cheese then add the cheese, stock powder (if using), marjoram, salt and pepper to the potato mixture.
Add half of the onion mixture to the cheese and potato mixture and mix well. R used her clean hands. The other half of the onion mixture is sprinkled on top of the cooked pierogi.
R usually makes the filling the day before or makes the filling whilst the dough is resting.

To cook pierogi
1 tsp salt
2 tbl oil
Fill a large saucepan over half way and bring to the boil.
Add about 8-10 pierogi at a time. When they float to the surface and have cooked for about 3-4 minutes, and feel tender, they are ready.
Meat pierogi take a bit longer, about 4-5 minutes.
You can eat them straight away topped with fried onion or refrigerate and pan fry on each side later in butter and oil, then top with the onion. (Which answered the infamous ‘boiling’ question, you can eat them straight away or wait and pan-fry them later. I have even re-poached them to keep them as softer type dumplings. It’s up to you!)

COOKING NOTES
If you are not cooking the pierogi straight away, cover the tray with a tea towel until ready to boil. It is ok if they get a bit drier and with a bit of air, it means they are less likely to stick.

Different filling ideas include a sweet variation of fresh blueberries. Do not add any sugar as it will bring out the juices and the pierogi will collapse. Serve them with a a sugar and butter sauce and sweet whipped cream.

Another popular vegetarian filling is finely chopped sauerkraut, dried mushrooms and onion. Meat fillings include ground lamb, pork and beef variations. When making meat pierogi, make the crescent shape then bring it around to the corners and squeeze into a tortellini shape. (See the photos at the very end. )

We did experiment with a gluten free version which was pretty darned tasty, however, it requires a tad more refining, so stay tuned.

Cheergerm Feb 1510

IMG_7792


A farewell afternoon tea with mini mushroom and feta frittatas

Last Sunday, The Mothership and Mr Polish hosted a family farewell afternoon tea for the Lovely R and Gorgeous A before they headed back to Poland. In direct hospitable response to the Lovely R’s Polish picnic generosity, the pressure was on to reciprocate. (In all reality, most of our get together’s involve some fairly tasty food due to a general love of eating, and eating well.)

The Cheergerm contribution to this slap up were dainty little mushroom and feta frittatas. Puffy, light and earthy from the thyme and mushroom; they were a nice addition to a motza of delicious afternoon tea delights.

This was the kind of spread from an Enid Blyton storybook. I half expected old Moonface himself to pop his head in and say ‘Hullo, oh, what have we here? What a top drawer afternoon tea. May I have a piece of cake?’ (To which the answer would have been a resounding, why yes Moonface, help yourself!) There was a pumpkin and veggie frittata, crispy homemade sausage rolls, dreamy gluten free lamingtons, fluffy pikelets, a gorgeous rich missisippi mud cake and spanokopita. The Polish contingent provided a delicious apple cake and peach cake (that had also been freed of gluten) and a vibrant marshmallow and Oreo cheesecake.

We sat in the sun, ate, talked and laughed, then ate some more. These beautiful people left a little bit of Poland behind and we hope that a little bit of Australia is forever tucked away in a corner of their hearts.

MINI MUSHROOM AND FETA FRITTATAS

WHAT YOU NEED
1 tbl olive oil
1 small onion, finely chopped
1 small zucchini, finely diced
200g mushrooms, finely chopped
6 eggs
100ml cream
1 tbl thyme
200g soft Danish style feta, crumbled
1/2 tsp salt
Pepper to taste

HOW YOU DO IT
Lightly oil a 12 pan non-stick muffin tin.
Heat olive oil in a frypan and cook onions over a medium heat for a few minutes.
Add the zucchini and cook until they start to soften.
Add the mushrooms and cook the mixture until any liquid from the mushrooms is reduced. Season lightly and allow to this mixture to cool.
Preheat oven to 180C or 170C fan-forced.
Beat the eggs and cream together in a medium sized bowl.
Stir in the mushroom mixture, thyme and gently fold in the feta. Check for salt and pepper, add more to taste.
Spoon the mixture evenly into the prepared tin and cook for 20-25 minutes, until puffy and golden. They will deflate as they cool, so don’t freak out.
Serve warm or cold, they would also be great for a picnic.

A Cheergerm creation