Cauliflower and zucchini gratin

Is it wrong to love someone simply because you return home at midnight from a girls night out, on a cold winters eve, to discover that your other half has thoughtfully left your side of the electric blanket switched on? You can keep your Tiffany’s, Cartier and Harry Winston. It’s the small thoughtful actions that float my boat and whilst diamonds may be a girls best friend, they can’t keep you warm on a chilly evening. (Not like an electric blanket does. Oh, and a Yak of course.)

My way of showing The Yak love, is to cook hearty vegetable dishes that involve cheese. This little recipe is a take on a dish from the excellent ‘The Wholesome Cook’ by Martyna Angeles. It is a smidgen lighter than a heavier cream-based gratin. The sharp cheese, nutty cauliflower and golden crust has ensured that this gratin will be on steady rotation for the remainder of winter.

CAULIFLOWER AND ZUCCHINI GRATIN

WHAT YOU NEED
2 tbl oil (I used grapeseed oil)
300g cauliflower, cut into small florets
3 small zucchini (300g), sliced into 1 cm chunks
Black pepper
Sea salt
1/2 cup milk
100g Comte, Gruyere or Taleggio cheese, diced
1/3 cup breadcrumbs of your choice, I used gluten free sourdough buckwheat crumbs). The original recipe uses almond meal.

HOW YOU DO IT
Preheat oven to 180C and grease a 20 cm gratin dish.
Heat the oil in a medium size frying pan and saute the cauliflower and zucchini over a medium heat for about ten minutes, until they start to colour and soften. Season generously with black pepper and add a big pinch of sea salt.
Add the milk and cheese and stir for one minute until the cheese starts to melt. Check the seasoning then pour into the gratin dish.
Sprinkle with the breadcrumbs or almond meal and bake for 30-40 minutes until golden brown.
Serves 2-4 people.

Cooking Notes: I have added a few pinches of nutmeg before which adds a bit of something nice, also the original recipe uses 3 yellow squash instead of zucchini; Taleggio instead of Comte and states to sprinkle 2 tbl of chopped parsley over the gratin with the breadcrumbs before baking.

Recipe only slightly adapted from The Wholesome Cook by Martyna Angeles, published by Harlequin, October 2015.

Go here for a Cheergerm post about The Wholesome Cook book and a millet and rice puff square


Gluten free lemon slice

When life gives you lemons.

Make a margarita.

If it’s too early to drink, you could always bake this. I am no gardener but my little Cheergerm heart swelled like a helium balloon at the bumper crop of lemons my mini-citrus tree birthed this year. Each lemon is picked and used with tender loving care and the deep appreciation that using homegrown produce brings. This is a tangy, delicate and deeply delicious treat.

LEMON BARS, GLUTEN FREE

WHAT YOU NEED
For the biscuit base:
125g butter, room temperature
1/4 (40g) cup gf icing sugar mixture
150g gf plain flour
For the lemon topping:
3 eggs, 70g each
1 cup (220g) caster sugar
35g gf plain flour
Zest two lemons, at least 2 tbl, I like a lot of lemon
1/2 cup lemon juice

HOW YOU DO IT
Preheat the oven to 170C fan-forced or 180C conventional.
Grease a 20cm X 20cm non-stick baking pan and cover the base with baking paper, extending the paper over two opposite sides. (This helps in removing the slice once it has cooled.)
For the biscuit base: Beat the butter and icing sugar in a bowl with an electric beater or in your stand mixture, until smooth. Stir in the 150g of gluten free plain flour.
Press this mixture evenly over the base of the prepared pan and bake for approximately 15 minutes or until it has browned slightly. Remove from the oven.
For the lemon topping: Place the eggs, caster sugar, remaining flour, lemon zest and juice into a bowl and whisk until well combined.
Pour this mixture over the prepared base and bake a further 20 minutes or until it is just firm.
Remove from the oven, place on a wire rack and let the slice cool completely in the tin.
Slice into pieces (I cut it into 16 square pieces) and dust with extra icing sugar for decoration.
Not suitable for freezing.

A Cheergerm adaptation of a recipe from the ninemsn website. Link to original recipe follows after photos.

http://food.ninemsn.com.au/recipes/ilemon/8344026/tangy-lemon-squares


Fennel and chickpea soup and he tangata

Soup cravings come on cold days, rainy days and sometimes on days when grief threatens to overwhelm. Soup in its many guises is my ultimate comfort food, bar mashed potato. It is the making and eating that brings a little salve for the soul, if only for a short while.

Our one-of-a-kind Uncle Rodger died a few weeks ago, he made us promise to use the word ‘dead.’ Not ‘passed’ (away, over or under), not ‘left’, not ‘lost’ and not ‘gone’. (As if he had somehow been carelessly misplaced.) I did ask if ‘carked it’ or ‘shuffled off this mortal coil’ were acceptable terminologies. We both had a good laugh at that.

It is difficult choosing words to describe a loved one who has died, my fear is that they may diminish and somehow confine the person you are writing about. Rodger was the strongest of the strong. The best of husbands, fathers, sons, brothers, uncles, friends, mentors and work colleagues. A teacher, therapist, board member of the Frederichs Ataxia Research Association of Australasia (the insidious disease that his three sons are and were afflicted with), an activist for social change and a man who refused to accept the status quo.

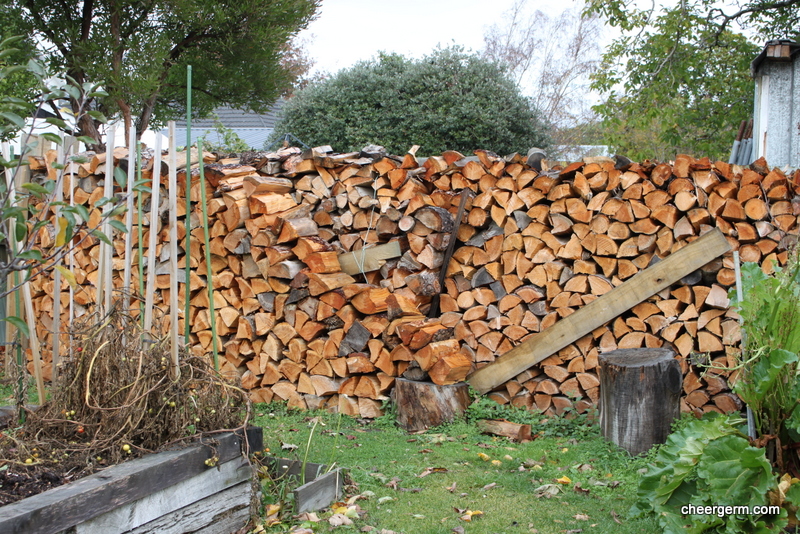
Rabidly rugby loving in a ‘shouty at the television’ kind of way, funny, headstrong, story-teller and family history orator. Outdoor adventurer, former Kathmandu model, lover of music, literature and beauty, gourmand, wine and whiskey aficionado. Empathetic and not afraid to cry. Renowned for his ongoing love affair with wood; building things out of it, collecting it, chopping it, admiring it and burning it. (The woodpiles he left are legendary.) This was a man who chose the timber for his own coffin and started to build it until he no longer could. This was a man who chose as his final song at his funeral, the eternally and everlastingly funny Monty Python song ‘Always Look on the Bright Side of Life.’

He fought the foul cancer that took his life with everything he had. His amazing wife is one of the most quietly determined and supportive people you would probably ever hope to meet. They walked side by side in love and joie de vivre as well as in grief. Through the diagnosis of their three beautiful boys disease and the ongoing heartaches it brought, when their oldest son took in own life in his early twenties, through to the Christchurch earthquakes and when Rodger himself was diagnosed. Their spirits however, were never broken despite the ongoing crap that life threw at them.

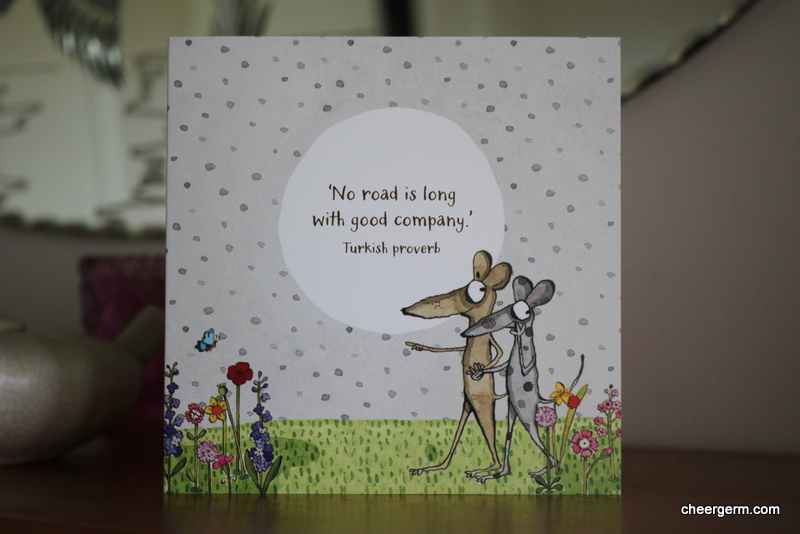
Rodger was a beacon that always burnt brightly and he will be missed beyond measure. As an Uncle, he was easy to talk to, his puns knew no end and he was always interested in what was going on and what I had to say. One of his favourite sayings was a Maori proverb.

He aha te mea nui o te ao
What is the most important thing in the world?
He tangata, he tangata, he tangata
It is the people, it is the people, it is the people

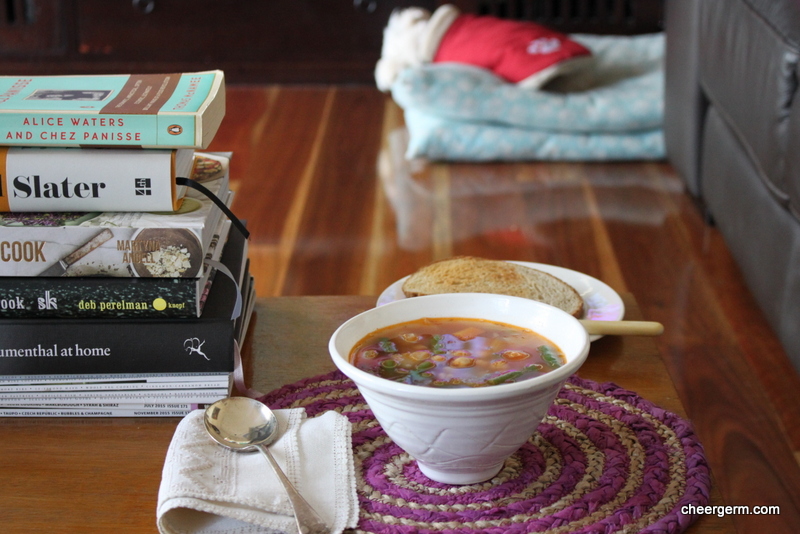
So, after returning from New Zealand where we got to say goodbye, then celebrate and mourn his remarkable life, I needed soup. This was the soup I made. The chunky chickpea bites, the silky aniseed fennel alongside the slight hum of chilli and thyme is warming and nourishing. (It’s even better the next day.) Rodger would have hated it. He was bloody sick of soup of by the end of his life as it was the only thing he could eat. The cancer he battled, deprived him of eating the food he had always loved.

This soup is not for you Rodger but this post is. Because what truly makes this life worth living is the people, the people, the people.

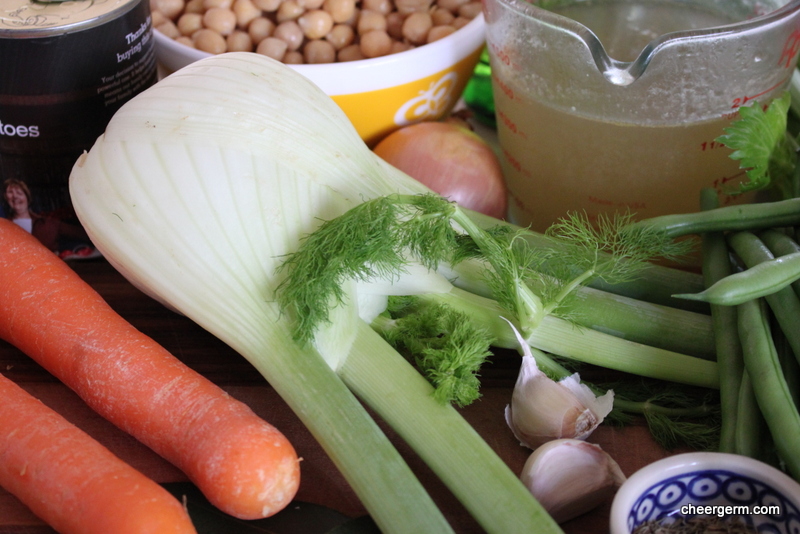
FENNEL AND CHICKPEA SOUP

WHAT YOU NEED
3 tbl grapeseed or olive oil,
1 medium onion, finely diced
1 large fennel bulb, diced into 2 cm
4 celery stalks, chopped into roughly 2 cm dice
2 carrots, diced into 2cm
2 garlic cloves, crushed
1//4 tsp dried chilli flakes
2 litres vegetable stock
1 litre water
1 tin crushed tomato
800g cooked chickpeas, drained (I used two tins chickpeas.)
1/2 tsp dried thyme (1 tbsp fresh thyme)
2 fresh bay leaves
200g green beans, chopped
Salt and pepper

HOW YOU DO IT
Sauté onions, fennel, celery and carrot for about ten minutes in a large saucepan over a medium heat, until they start to soften.
Add the garlic and chilli and cook for one minute, stirring continually.
Add the stock, water, tomato, chickpeas, thyme and bay leaves. Add a few good grinds of pepper and about a teaspoon of sea salt. (My stock was homemade and did not contain salt, so do not add salt at this point if your stock contains salt.)
Bring the soup to the boil then reduce to a simmer.
Skim off any scummy frothy bits that float to the top.
Cook for about 60-80 minutes until the carrots and fennel are tender, check for seasoning.
Add the green beans and cook for about ten minutes until the beans are just tender and still a bright colour.
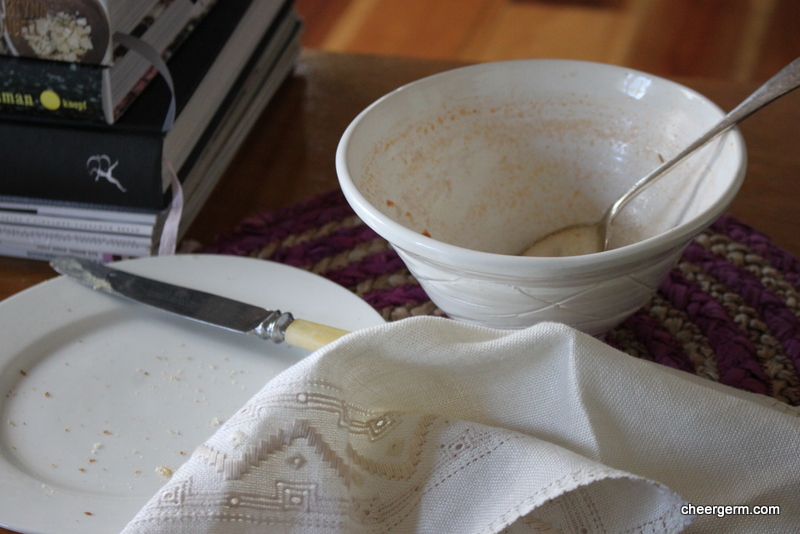
Serve in bowls and be comforted. This soup freezes very well.

Cooking Notes: I like this soup with a fair bit of broth so if you prefer a more ‘stew’ like soup, cut back the amount of water you add from 1 litre to 500ml of water.

A Child’s Christmas in Wales and a family celebration

All the little lights

Christchurch Will Rise Again Seafood Chowder

Friedreich Ataxia Research Association


Gluten free weet-bix slice and The Mo Theory

Kid 1 has ‘a moustache theory’. He believes that anyone with a ‘mo’, immediately feels more confident and intimidating than someone without one. Gunna go grow me one….

Until then, the baking goes on, regardless of an outstanding insufficiency of facial hair. My standard weetbix slice uses a creamed butter method but sometimes, you just can’t be arsed bothered with all that malarkey. So a melt and mix slice was required, I had been wanting to use gluten free weetbix for a wee while now. (The Yak was a very happy little coeliac when a certain company started producing these iconic baked breakfast bricks using gluten free sorghum flakes.) This recipe works a treat and is nice and quick.

All of you wheat tolerant out there may be thinking, big whoop. Our Yak is no cry baby and as we all know, far worse things happen than being a coeliac. It’s just that every now and again, he wants to eat something that is as delicious as the original memory of a dish ever was. This is one of those dishes.

Whether ye be coeliac, gluten intolerant or just experimental, ye will not be unhappy. (But if ye are, dont tell me. Well go on, if you really must.)

GLUTEN FREE MELT AND MIX WEETBIX SLICE

WHAT YOU NEED
3 plain gluten-free weetbix
1 3/4 cups gluten-free self-raising flour
1 tbl cocoa powder
3/4 cup brown sugar
1 cup dessicated coconut
125g butter, melted
2 tbl milk

Icing
3/4 cup icing sugar
2 tbl Cocoa powder
50g butter
1 tbl hot water
3 tbl extra dessicated coconut (you can get some super nice organic and sulphur free coconut from health food shops these days.)

HOW YOU DO IT
Preheat the oven to 180C (170C fan-forced) and line a 26cm X 18 cm tin with baking paper.
Crumble the weetbix finely into a large bowl.
Sift over the flour and cocoa.
Stir through the sugar and coconut until all ingredients are combined.
Add the butter and stir then add the milk and stir again until well combined.
Spoon the mixture into the prepared tin and press down firmly (I use my fingers).
Bake for 20-25 minutes.
Allow to cool.
Sift icing sugar and cocoa together into a medium sized bowl. Add the butter then the hot water and stir until runny.
Pour the icing over the cooled slice and spread. Sprinkle the coconut over immediately. Let the icing set then cut the slice into squares.
Makes, well, enough.

A Cheergerm adaptation of a recipe from the Best Recipes website. Link follows.

Footnote: (Or is that ‘thumbnote?) My wrinkly thumb has somewhat of a starring role in these photos, deepest apologies.

http://www.bestrecipes.com.au/recipe/weet-bix-slice-L5572.html


Quinces baked in honey

‘They dined on mince, and slices of quince
Which they ate with a runcible spin
And hand in hand, on the edge of the sand,
They danced by the light of the moon,
The moon,
The moon,
They danced by the light of the moon. ‘

An excerpt from the lyrical ‘The Owl and the Pussy-cat’ by Edward Lear. This nonsensical poem has always tickled my fancy. From the pea-green boat, the unlikely pairing of a cat and an owl to the mince, quince and runcible spoon. What on earth is a runcible spoon? Conjecture abounds and opinion is varied. (Yes, another hard hitting exposé from the Cheergerm. Not exactly a hot topic on Twitter but it still matters, right?) It is certainly a word that Lear made up and appears in several of his works in different connotations. There is a ‘runcible cat’, a ‘runcible hat’, a ‘runcible goose’ and a ‘runcible wall’.

Some dictionaries define a ‘runcible spoon’ as a fork with three curved tines, or a ‘spork’. In one of his accompanying illustrations, Lear actually drew the ‘runcible spoon’ as more of a ladle. Some believe that it was a spoon designed specifically for babies by one of Edward Lears friends, George Runcy. However, this does not explain the varied use of the word in his other poems. It is most likely a word that Lear invented purely because of the delicious way it sounds and not because it had any real meaning to him.

Quince is my current fruity obsession. This dish is baked long and slow in butter and floral pink-tinged honey, given by a friend. Dark in colour, achingly soft and sweet; you can definitely cut these quince with a spoon. Preferably a runcible spoon.

QUINCES BAKED IN HONEY

WHAT YOU NEED
3 large quinces, washed well
80g butter
4 tbl runny honey
1/4 cup water

HOW YOU DO IT
Preheat the oven to 150C.
Wash the quinces very well. Halve but do not peel the quinces then remove the pips and core each of them with a spoon to make a hollow. (This is not a job for wimps. Be warned.)
Place in a gratin dish that will hold them snugly (unlike mine) and using a third of the butter, grease the dish.
Arrange the quinces, hollow side up. Divide the remaining butter and honey between the hollows and pour water gently around the sides.
Cover the dish with foil and bake for at least 3 hours (denying on the size of the quinces) until they are soft and rich red. (Turn quinces over after 1 1/2 hours.)
Serve hot or warm with hollows filled with the honey juices and with cream, ice-cream , yoghurt or marscapone.

Recipe from The Cooks Companion by Stephanie Alexander , published by Penguins Books, 1996


Quince and apple pudding, gluten free

A recent conversation with Kid 1, went like this.

Me: How does it feel to be turning twelve?
Kid 1: Oh, I’m really not that fussed about birthdays. Another year older, another year closer to death.
Me: Wow, that’s a bit of a downer!
Kid 1: Imagine how much worse it would be if I died before I even turned twelve? They could put on my tombstone ‘Kid 1. Never reached puberty.’ Or ‘Never been kissed.’
Kid 2 then chimed in. ‘Or never got a girls phone number. (The back story being that a girl gave him her number when he was a mere six years old. Nothing quite compares to beating your older brother in the romance stakes.)

The good news is that he made it to twelve. His sense of humour and unique view of the world is a constant joy to us. (And keeps us on our toes.) He was a big fan of these aromatic and autumnal wee puddings. The smell of the cooking quince was the musky, heady smell of an orchard full of every ripe fruit you could possibly ever imagine. This golden knobbly produce starts out as rock hard and with slow, gentle cooking, morphs into soft, sweet delectable flavoured fruit with pale pink to deep ruby colour flesh. (The longer and slower it is cooked, the deeper red it becomes.)

Adding a modicum of tart green apple adds a welcome sharpness and when topped off with a subtly spiced gluten free sponge, this is a fabulous wee pudding indeed.

Happy Birthday Kid 1, I promise to make these again for you soon.

QUINCE AND APPLE PUDDING, GLUTEN FREE

WHAT YOU NEED
2 large quinces
1 lemon
1 large Apple, peeled and chopped into 2-3 cm pieces
1 large knob of butter
1 cup water
2 tbl soft brown sugar
Pudding topping
60g butter, room temperature
50g soft brown sugar
2 large eggs, lightly beaten
100g plain gluten free flour
50g ground almonds
2 tsps gf baking powder
1/2 tsp mixed spice
1/4 tsp vanilla bean powder or 1/2 tsp vanilla essence
1/4 cup milk

HOW YOU DO IT
Squeeze the lemon and place in a bowl full of water. Peel and chop the quince into 2-3 cm cubes and place immediately into water, this stops the quince discolouring.
Place the quince, butter, brown sugar and 1/4 of a cup of the water into a medium saucepan. Cook the quince on a low heat for about 30 to 40 minutes, once it starts to soften, add the apple and cook for another 20 minutes until the apple just starts to soften. Check regularly to ensure the water doesn’t dry out, replenish if it does.
Whilst the fruit is cooking. Preheat the oven to 180C and butter six small ramekins or tins or one large 1 litre pie dish.
Cream the butter and sugar until light and fluffy. (Add vanilla essence if using here.)
Add the eggs one at a time, beating well after each.
Sift the gluten free flour, almond meal, baking powder, mixed spice and vanilla bean powder.
Fold the flour mixture and milk alternately into the egg mixture to make a soft batter.
Divide the cooked fruit between the tins then cover with the topping.
Bake for 20 to 30 minutes until well risen, firm and golden brown. (A one litre pie dish may take more like 30 minutes.)
Serve hot with cream, ice-cream or yoghurt. Kid 1 also loves them cold for a breakfast treat as well.

A Cheergerm recipe, the sponge batter adapted from a Stephanie Alexander recipe.


Spicy parsnip soup

Autumn is finally casting it’s multi-hued shadow over our city, changing leaves from green to yellows and varying shades of red or orange. Summer has had a tight grip on the throne and has refused to abdicate, up until now. Nights are somewhat cooler and the produce at the growers market has started to reflect the changing seasons. Parsnips, swede, pumpkins, ruby coloured plums and pale lemon coloured quinces.

The knobbly root vegetable parsnip, has a lovely creamy white flesh and lends itself well to soups and purées. Roasting the veggies in the spice mix adds a wonderful depth of flavour and whilst this may not be the prettiest of soups, it is earthy, certainly quite spicy and heartily warming.

SPICY PARSNIP SOUP

WHAT YOU NEED
2 tbsp olive oil
500g parsnip, peeled and diced
1 potato, peeled and diced
1 red onion, peeled and cut into 8 chunks
2 cloves garlic, peeled
1 tsp ground coriander,
1 tsp ground cumin
1/2 tsp ground turmeric
1/2 tsp mustard seeds
1/4 tsp chilli powder
1 litre vegetable stock
Salt

HOW YOU DO IT
Preheat oven to 180C and line a baking tray with baking paper. Place all the diced and chopped veggies including the garlic, into the tray. Sprinkle over the spices, pour over the olive oil and mix the veggies until they are well coated in the spice mixture.
Bake for 20 minutes, then stir the vegetables. Bake for another 20 minutes or until the vegetables are tender.
Once the vegetables are tender, place them in a large saucepan, add the vegetable stock and bring to the boil.
Simmer for ten minutes then allow to cool for a few minutes before blending with a stick blender. Check for seasoning and add a bit of extra water if the soup is too thick for your liking, I added 3/4 cup. Bring the soup back to a simmer and serve.
We ate it with sourdough toast and hunks of Manchego and blue cheese.
Serves 4 for lunch or 2 very hungry grown ups for dinner (with a little leftover for someone the next day.)

A Cheergerm recipe


A fight to the death and chocolate swirled pavlova

Some marriages are life-long love affairs, full of flowery and undying proclamations of romantic love. Others are like a military alliance, where the couple march steadily along the highway of life, side by side, enjoying common goals with stoic fortitude. Some marriages are simply just endured and others don’t make it at all. Whilst ours has had its bursts of romance and is based on a rock solid friendship, it is probably best described as a prolonged torturous comedic metaphorical fight to the death. The winner of the day is the one who gets in the best joke, at the others expense of course. The final victor will be the last one left standing. I am going to make sure it is me.

This pavlova was made for a friends pre-Easter soirée. The Yak was a big fan of the grown-up savoury spiciness of this dessert. The soft buttery pears, the chewy meringue, the tangy sour cream and the sweet heat of the gingery syrup was a food revelation. Happy fifteenth wedding anniversary Yak. In the face of the fear that I won’t do better at this late stage of the game; I guess you’ll do.

CHOCOLATE SWIRL PAVLOVA WITH MAPLE POACHED PEARS

WHAT YOU NEED
6 small pears, peeled (I used rather large Corella pears but smaller pears would have looked better on the pavlova)
2 cup (250)ml maple syrup
5cm piece ginger, sliced
6 fresh bay leaves (I didn’t have any fresh, so I didn’t use any.)
6 egg whites, room temperature
1 1/2 cups caster sugar (330g)
1/ tsp white vinegar
1 tsp cornflour
2 1/2 tbls cocoa powder
300-400g creme fraiche
1 tsp pure icing sugar, sifted

HOW YOU DO IT
To make the maple pears: place pears, maple syrup, ginger, bay leaves and 3 cups water (750ml) in a saucepan.
Bring to a simmer over medium heat, then cover the circle with a circle of baking paper and reduce heat to low. Simmer for 45 minutes or until tender. (My bigger pears took about 1 hour and fifteen minutes.) Remove pears from the liquid.
Discard half the liquid, reserving the bay and ginger. Return the remaining liquid, bay leaves and ginger to a deep saucepan and place over high heat.
Boil the liquid for 30 minutes or until thick and syrupy. Cool completely and set aside.
To make the pavlova, preheat the oven to 180C and line a baking tray with baking paper.
Place baking paper on a large tray and draw an 18 cm circle.
Beat the egg whites and a pinch of salt to firm peaks.
Keep beating the egg white on low adding the sugar a tablespoon at a time.
Once all of the sugar is added, continue beating on a medium speed until the meringue is no long gritty to the touch and is stiff and glossy.
Fold through the vinegar, cornflour and 2 heaped tsps of the cocoa.
Spread into the prepared tray and sprinkle another 2 tsps of the cocoa over the pavlova and using a palette knife, swirl the cocoa through the pavlova.
Place it in the oven and drop the temperature down to 130 (120 fan forced) and bake for one hour. Rotate every 20 minutes to ensure even baking and colouring.
Turn off the oven, leave the door ajar and let the pavlova cool down in the oven for at least 3 hours.
Combine the sour cream, icing sugar and remaining 1 tsp cocoa and spread over the pavlova. Halve (or quarter) the pears and arrange over the top. Served drizzled with the reduced maple syrup and scatter with the bay leaves. (If you had any.)

A Cheergerm adaption of a recipe from the April 2016 Delicious magazine. I changed the pavlova method


Easter egg biscuits and Miffy

Sister number three in our family, from a very young age, adored the series of books about a small white rabbit named Miffy. The Dutch artist Dick Bruna created this character over sixty years ago. It is easy to see the appeal to small children with his clever use of primary colours and minimalist bold lines. Our sisters love of these books was so great, that we nicknamed her after that iconic straight-eared bunny.

Miffy was a sweet and sensitive child with a solid love of the ridiculous. She was a deep thinking furrowed browed tumble of light brown curls, with a smackering of tawny freckles upon the bridge of her cute button nose. One of the moments that best describe her, was when around the age of nine or ten, she decided to forgo any Christmas gifts and donate the money to Mother Teresa and the poor. (We may have teased her mercilessly about this selfless act but we were secretly all very impressed.)

These chewy coconut biscuits are a bit of festive Easter frippery and fun. Easy to make with kids, they are a colourful addition to any Easter table. Using my favourite Coconut Macaroon recipe, I threw in a dash of lemon zest which added a faint hum of citrus. Miffy visited the other day and even though we are all ‘growed up’ and life and time has altered us somewhat, she is still that same sweet, funny and tender soul. After taste testing these biscuits our Miffy gave them two very big bunny thumbs up.

EASTER EGG MACAROON BISCUITS

WHAT YOU NEED
2 egg whites
Pinch salt
1/2 cup (100g) caster sugar
1 1/4 cups (125g) desiccated coconut
1/4 tsp vanilla bean powder (or pure vanilla paste or essence)
Zest of one medium sized lemon
125g mini candy coated eggs (gluten free)
40g white chocolate

HOW YOU DO IT
Preheat the oven to 150C and line two baking trays with baking paper.
Beat the egg whites and salt until they are stiff. Gradually beat in the sugar and fold in the remaining ingredients.
Drop 2 teaspoonfuls of the mixture about 5cm apart on the trays and using the other end of the spoon, dig a small indentation. This is where you will pour the chocolate and pop the eggs in once the biscuits are cooked and cooled.
Bake for about 20 minutes, rotating halfway through. When the macaroons are dry and cooked, they will be a pale, pinky-gold. Let them cool completely.
Melt the white chocolate in a small glass bowl, either in the microwave or on a double boiler. Let the chocolate cool and thicken, then place abut 1/4 to a 1/2 tsp into the middle of each macaroon. Pop three of the Easter eggs onto each macaroon.
Store in an airtight container.

Recipe slightly adapted from Ladies, A Plate by Alexa Johnston.

Looking for other Easter food ideas?
Gluten free silverbeet, herb and polenta pie
Roasted baby carrots with cumin
Heirloom carrot autumn salad
Hot cross buns


Tomato, fennel and goats cheese salad

Inspiration, not unlike perspiration, happens unexpectedly and far more pleasantly. Whilst trawling our local Growers Markets, I happened upon some bulbs of baby fennel and trays of sunny yellow and dark red to the point of black, cherry tomatoes. The bloke on the stall informed me that the dark reds were named Black Russians. This romantic moniker instantly transported me to long gone days of Tsars, bejewelled Faberge eggs and Rasputin. All set against a backdrop of snow covered mulit-coloured Russian Orthodox churches. A far cry from the humid heat and slick sweat that was slowly rolling down between my shoulder blades. (Of course Tsarinas don’t perspire they gently ‘glow’ but I doubt that the Russian royalty of that era went veggie shopping under a blazing hot Aussie sun either.)

This unseasonably warm weather calls for salads and lots of ’em. My fridge coughed up a jar of the lovely marinated Meredith goats cheese feta. And so it was. Crunchy, finely sliced aniseed fennel, the sweet tartness of tomatoes, the creamy goaty tang of the cheese and the herbal zing of mint. Perfect for a bloody hot day and a dish fit for a Tsar or perhaps even a mad monk.

TOMATO, FENNEL AND FETA SALAD

WHAT YOU NEED
250g cherry tomatoes, I used a mix Black Russian and yellow
1 baby fennel bulb (or half a normal size bulb)
Juice of half a medium size lemon
3 tbl extra virgin olive oil
Salt and pepper to season
50g goats cheese (if you don’t have or like goats cheese, a creamy feta cheese would be a great substitute)
1 tbl fresh chopped mint

HOW YOU DO IT
Wash the tomatoes, de-stalk and slice them in two.
Wash the fennel bulb, slice in half and take out the hard core in the middle. Using a mandolin, slice into fine slices. (The fennel that is, not your fingers.)
Place the tomatoes and sliced fennel on a platter or in a bowl. Season with salt and pepper and add the lemon juice and olive oil.
Toss together and let this sit for 15 to 30 minutes to absorb the flavours.
Crumble the feta over the salad, scatter the mint and et voila!
Serves 2 very hungry people, could serve 4 alongside a lot of other dishes. I had it with a lemon pepper pork schnitzel. It was the bomb.

A Cheergerm take on a number of similar salad recipes