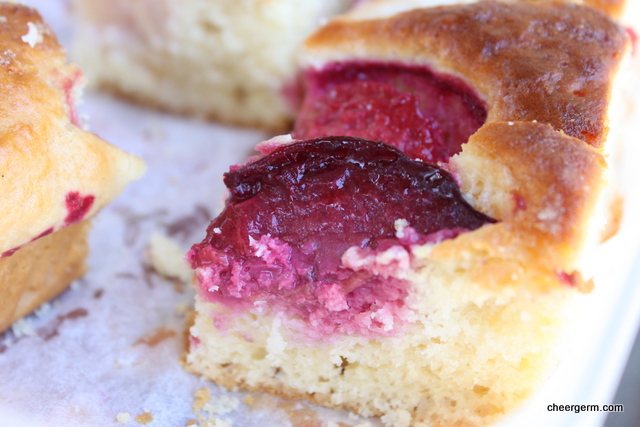
Before the Lovely R departed back to Poland, I was lucky enough to experience a hands on pierogi lesson. Pierogi is a Polish style dough dumpling stuffed with various fillings. R’s English is pretty darned good, despite her insistence that it isn’t. It is miles better than my Polish. (Ummm, non-existent.) As our lesson progressed, I tried to ask if she ever eats the pierogi straight after being boiled or does she always let it sit, then pan-fry and eat it. As we did on our lovely Polish picnic day.
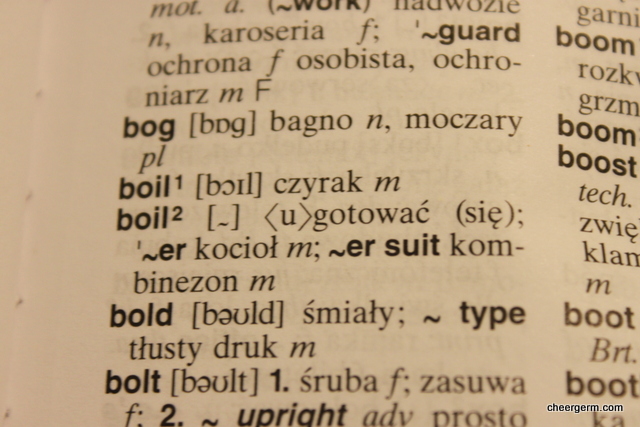
Using her English/Polish dictionary, I found the word ‘boil’ and pointed at the translation. Horrified, the Lovely R vehemently shook her head and exclaimed ‘No, no!’ We spent a good few minutes, toing and froing, trying to understand what the other was saying. I showed her the dictionary again, this time, my finger was no long blocking the second meaning of the word ‘boil.’ It turns out that the first meaning had been an actual ‘boil’ that appears on the skin, a somewhat unsavoury medical condition.
Much laughter ensued.
This is one picture heavy post. I really tried to capture the intricacies of this process and I hope I have done the Lovely R justice. You can make the dough first then prepare the filling whilst the dough rests. R will often make the filling the night before then make the dough the next day. The dough also freezes well. She works fast. It is harder than it looks to make the dough stick, you must use all of your finger strength. No namby pamby weak fingers please. (Which obviously mine are.) The lovely R’s advice. ‘Practice will make you a master and Be Strong.’
For that is The Way of the Pierogi.
PIEROGI
WHAT YOU NEED
Pierogi Dough
1 kilo plain flour
400ml boiling water and extra ready if needed
1/3 cup Olive oil
1 tsp Salt
HOW YOU DO IT
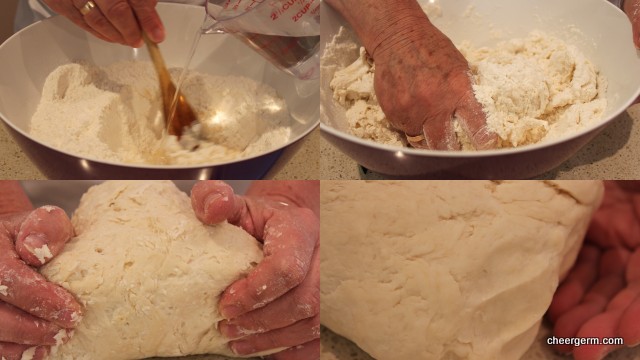
Add oil to the flour then add the water gradually, you may not need all the water, or you may need a dash more. We used all 400ml and added another 3 tbl boiling water.
Bring the mixture together in the bowl then turn out onto a floured bench or board and knead until the gluten is activated, approximately 5 minutes.
Cover the dough in clingfilm and rest for half an hour minimum, up to one hour maximum at room temperature .
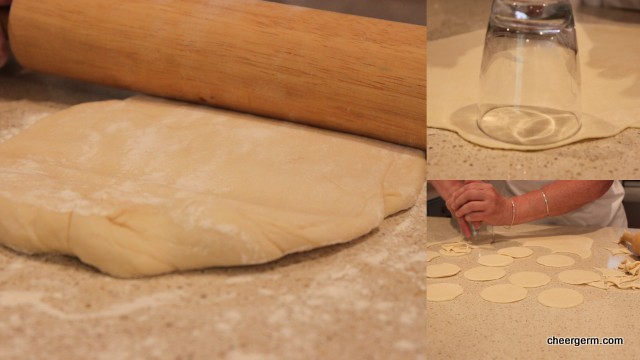
Flour a tray to place the pierogi on, and flour your workspace.
When the dough is soft and springy it is ready. Take a large ball of dough, around the size of a large orange.
Using a rolling pin, roll the dough, moving the dough regularly to avoid sticking, R worked it quite hard and it is quite elastic. Roll to approx 1mm thickness.
Using a glass or cutter about 8cm to cut out the pierogi shapes.
Use the scraps and add back into the dough.
Place a large teaspoon of filling onto each round of dough. (R works quickly.)
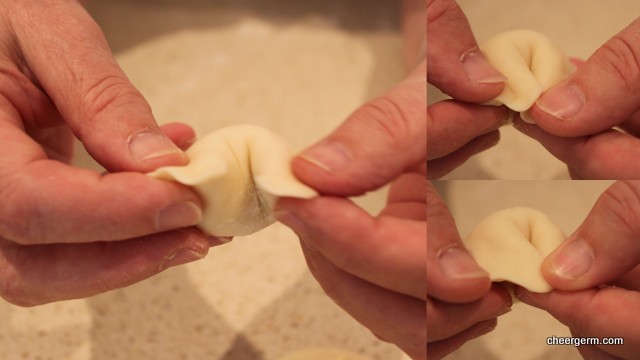
To shape the pierogi, pick up one pierogi and fold in into a crescent shape, press filling into the dough all the way and start to crimp around the edges.
As R says, Be Strong! Then turn over and crimp the other side. If there is too much filling, press it in with your index finger before crimping.
Don’t be afraid to pull the dough out as you crimp, you must have a good space between the filling and the dough so the two sides stick together without filling getting in the way. Again, Be Strong!
This filling used up about half of the dough made, we rolled out another batch once the first dough was used up. You can freeze leftover dough.
Filling
WHAT YOU NEED
3 potatoes, cooked and mashed
1 tbl oil and 1 tbl butter
1 medium onion, finely diced
300g-350g farm style cottage cheese, similar to Polish cheese. (Approximately the same weight of potatoes as cheese, with a tad extra cheese. Cheese must be slightly sour.
1 tbl Veggie stock powder (this is not mandatory)
1 1/2 tsp dried marjoram
Salt to taste, (more if not using vegetable stock)
Pepper to taste
HOW YOU DO IT
Cook onion in oil and butter until golden brown. Cool slightly.
Grate the cheese then add the cheese, stock powder (if using), marjoram, salt and pepper to the potato mixture.
Add half of the onion mixture to the cheese and potato mixture and mix well. R used her clean hands. The other half of the onion mixture is sprinkled on top of the cooked pierogi.
R usually makes the filling the day before or makes the filling whilst the dough is resting.
To cook pierogi
1 tsp salt
2 tbl oil
Fill a large saucepan over half way and bring to the boil.
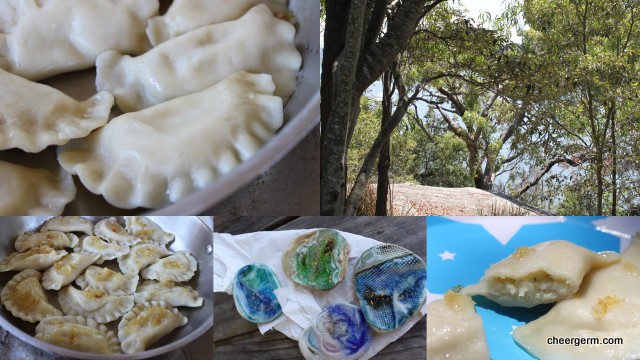
Add about 8-10 pierogi at a time. When they float to the surface and have cooked for about 3-4 minutes, and feel tender, they are ready.
Meat pierogi take a bit longer, about 4-5 minutes.
You can eat them straight away topped with fried onion or refrigerate and pan fry on each side later in butter and oil, then top with the onion. (Which answered the infamous ‘boiling’ question, you can eat them straight away or wait and pan-fry them later. I have even re-poached them to keep them as softer type dumplings. It’s up to you!)
COOKING NOTES
If you are not cooking the pierogi straight away, cover the tray with a tea towel until ready to boil. It is ok if they get a bit drier and with a bit of air, it means they are less likely to stick.
Different filling ideas include a sweet variation of fresh blueberries. Do not add any sugar as it will bring out the juices and the pierogi will collapse. Serve them with a a sugar and butter sauce and sweet whipped cream.
Another popular vegetarian filling is finely chopped sauerkraut, dried mushrooms and onion. Meat fillings include ground lamb, pork and beef variations. When making meat pierogi, make the crescent shape then bring it around to the corners and squeeze into a tortellini shape. (See the photos at the very end. )
We did experiment with a gluten free version which was pretty darned tasty, however, it requires a tad more refining, so stay tuned.