Quince and apple pudding, gluten free

A recent conversation with Kid 1, went like this.

Me: How does it feel to be turning twelve?
Kid 1: Oh, I’m really not that fussed about birthdays. Another year older, another year closer to death.
Me: Wow, that’s a bit of a downer!
Kid 1: Imagine how much worse it would be if I died before I even turned twelve? They could put on my tombstone ‘Kid 1. Never reached puberty.’ Or ‘Never been kissed.’
Kid 2 then chimed in. ‘Or never got a girls phone number. (The back story being that a girl gave him her number when he was a mere six years old. Nothing quite compares to beating your older brother in the romance stakes.)

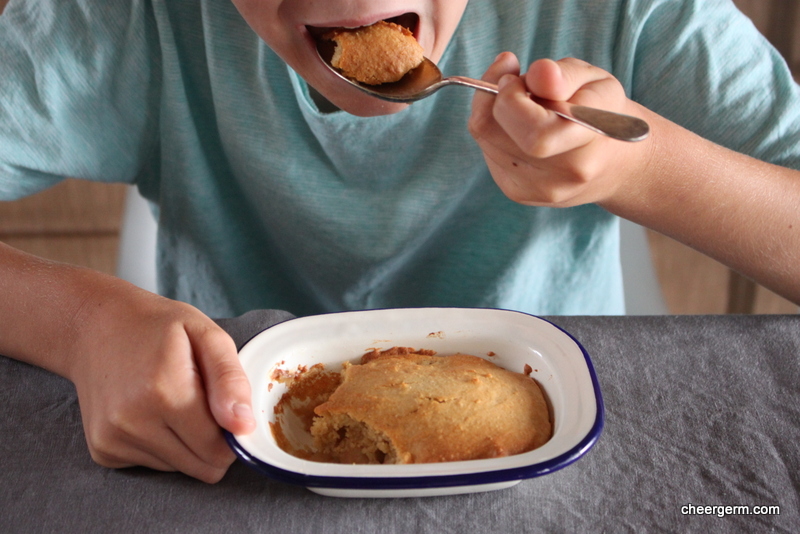
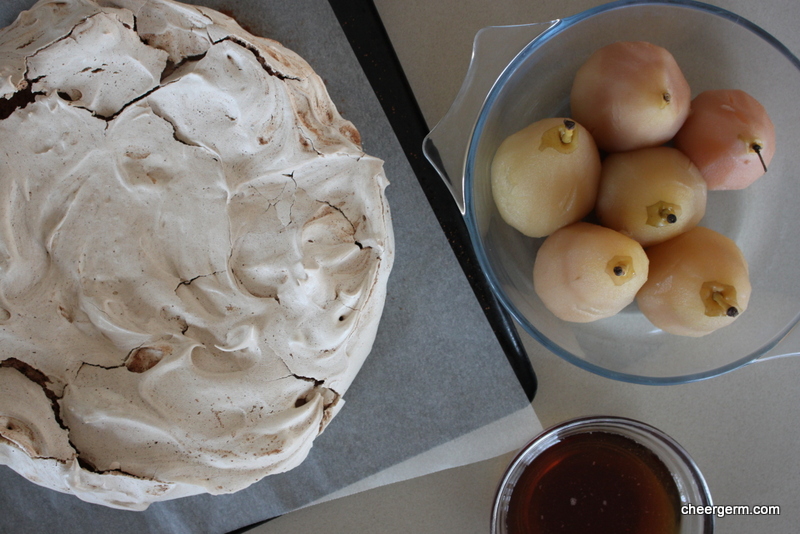
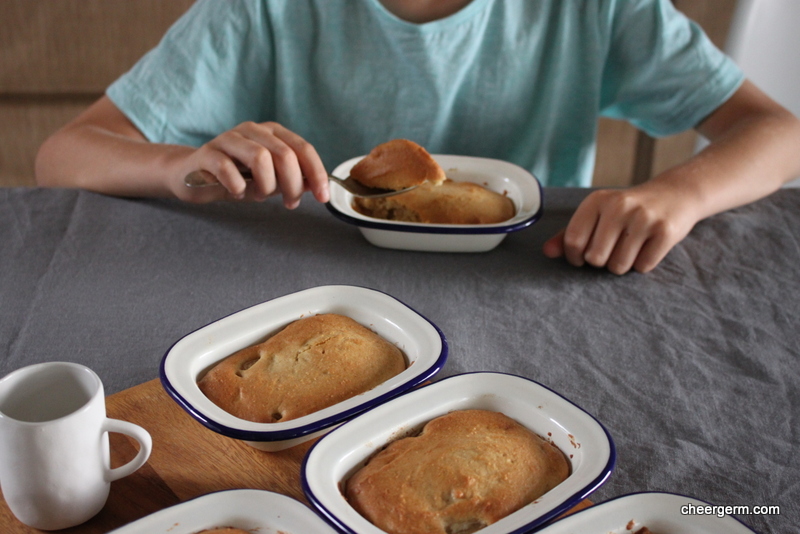
The good news is that he made it to twelve. His sense of humour and unique view of the world is a constant joy to us. (And keeps us on our toes.) He was a big fan of these aromatic and autumnal wee puddings. The smell of the cooking quince was the musky, heady smell of an orchard full of every ripe fruit you could possibly ever imagine. This golden knobbly produce starts out as rock hard and with slow, gentle cooking, morphs into soft, sweet delectable flavoured fruit with pale pink to deep ruby colour flesh. (The longer and slower it is cooked, the deeper red it becomes.)

Adding a modicum of tart green apple adds a welcome sharpness and when topped off with a subtly spiced gluten free sponge, this is a fabulous wee pudding indeed.

Happy Birthday Kid 1, I promise to make these again for you soon.

QUINCE AND APPLE PUDDING, GLUTEN FREE

WHAT YOU NEED
2 large quinces
1 lemon
1 large Apple, peeled and chopped into 2-3 cm pieces
1 large knob of butter
1 cup water
2 tbl soft brown sugar
Pudding topping
60g butter, room temperature
50g soft brown sugar
2 large eggs, lightly beaten
100g plain gluten free flour
50g ground almonds
2 tsps gf baking powder
1/2 tsp mixed spice
1/4 tsp vanilla bean powder or 1/2 tsp vanilla essence
1/4 cup milk

HOW YOU DO IT
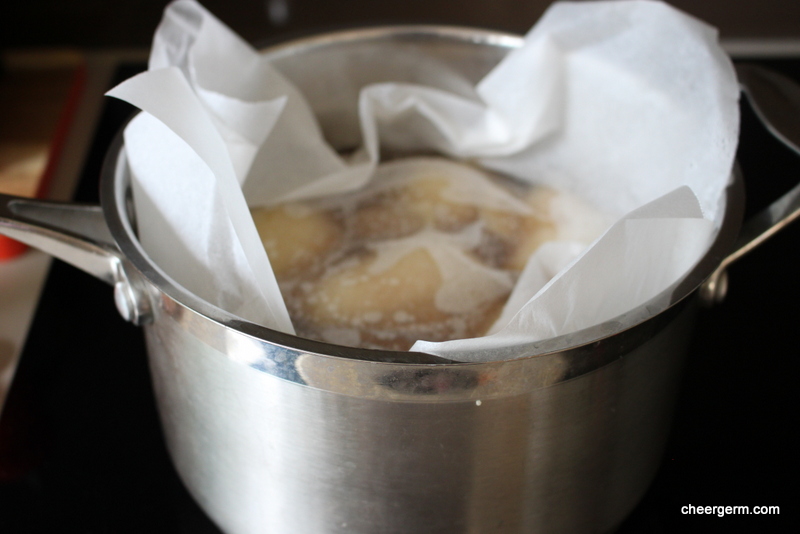
Squeeze the lemon and place in a bowl full of water. Peel and chop the quince into 2-3 cm cubes and place immediately into water, this stops the quince discolouring.
Place the quince, butter, brown sugar and 1/4 of a cup of the water into a medium saucepan. Cook the quince on a low heat for about 30 to 40 minutes, once it starts to soften, add the apple and cook for another 20 minutes until the apple just starts to soften. Check regularly to ensure the water doesn’t dry out, replenish if it does.
Whilst the fruit is cooking. Preheat the oven to 180C and butter six small ramekins or tins or one large 1 litre pie dish.
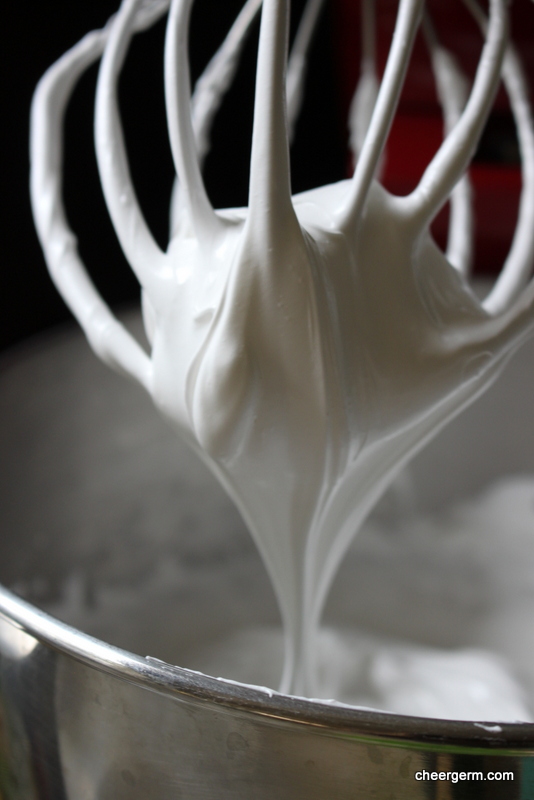
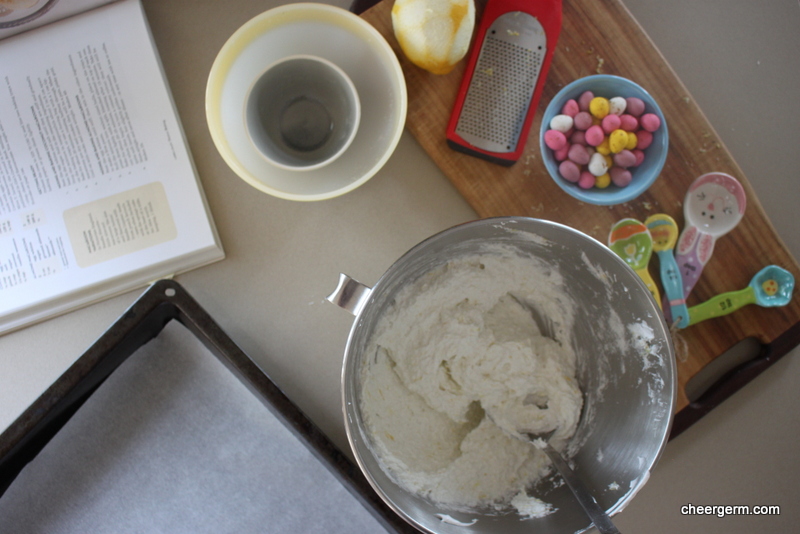
Cream the butter and sugar until light and fluffy. (Add vanilla essence if using here.)
Add the eggs one at a time, beating well after each.
Sift the gluten free flour, almond meal, baking powder, mixed spice and vanilla bean powder.
Fold the flour mixture and milk alternately into the egg mixture to make a soft batter.
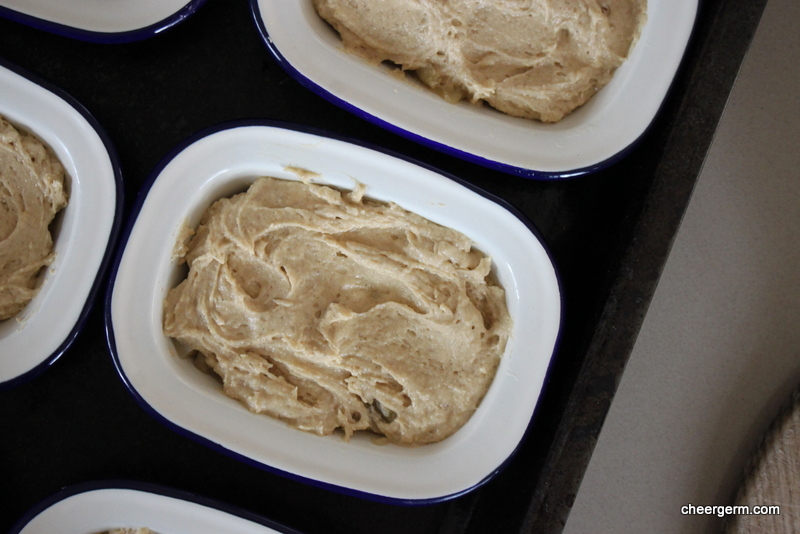
Divide the cooked fruit between the tins then cover with the topping.
Bake for 20 to 30 minutes until well risen, firm and golden brown. (A one litre pie dish may take more like 30 minutes.)
Serve hot with cream, ice-cream or yoghurt. Kid 1 also loves them cold for a breakfast treat as well.

A Cheergerm recipe, the sponge batter adapted from a Stephanie Alexander recipe.


Spicy parsnip soup

Autumn is finally casting it’s multi-hued shadow over our city, changing leaves from green to yellows and varying shades of red or orange. Summer has had a tight grip on the throne and has refused to abdicate, up until now. Nights are somewhat cooler and the produce at the growers market has started to reflect the changing seasons. Parsnips, swede, pumpkins, ruby coloured plums and pale lemon coloured quinces.

The knobbly root vegetable parsnip, has a lovely creamy white flesh and lends itself well to soups and purées. Roasting the veggies in the spice mix adds a wonderful depth of flavour and whilst this may not be the prettiest of soups, it is earthy, certainly quite spicy and heartily warming.

SPICY PARSNIP SOUP

WHAT YOU NEED
2 tbsp olive oil
500g parsnip, peeled and diced
1 potato, peeled and diced
1 red onion, peeled and cut into 8 chunks
2 cloves garlic, peeled
1 tsp ground coriander,
1 tsp ground cumin
1/2 tsp ground turmeric
1/2 tsp mustard seeds
1/4 tsp chilli powder
1 litre vegetable stock
Salt

HOW YOU DO IT
Preheat oven to 180C and line a baking tray with baking paper. Place all the diced and chopped veggies including the garlic, into the tray. Sprinkle over the spices, pour over the olive oil and mix the veggies until they are well coated in the spice mixture.
Bake for 20 minutes, then stir the vegetables. Bake for another 20 minutes or until the vegetables are tender.
Once the vegetables are tender, place them in a large saucepan, add the vegetable stock and bring to the boil.
Simmer for ten minutes then allow to cool for a few minutes before blending with a stick blender. Check for seasoning and add a bit of extra water if the soup is too thick for your liking, I added 3/4 cup. Bring the soup back to a simmer and serve.
We ate it with sourdough toast and hunks of Manchego and blue cheese.
Serves 4 for lunch or 2 very hungry grown ups for dinner (with a little leftover for someone the next day.)

A Cheergerm recipe


Mum

To our Mum on her 70th birthday, from your four daughters.

When we were little, you were always there for us, both physically and emotionally. You clothed us (yes, albeit it in homemade corduroy trousers and hand knitted jumpers) and fed us delicious and healthy food that you made (mostly) with love. You played with us, made sure we spent plenty of time outside and provided books, music, art and craft with what felt like, endless encouragement and loving patience. When we were teenagers and things were often treacherously bumpy, you listened to us and you talked to us. Now we are grown up and know what it takes to be a parent, we know that your mind would have been full of many concerns and worries and that nothing is as easy as it looks. Yet, when we were little, we always felt that you saw us. That we were actually people who had as much right to be in this world as any grown up did.

And maybe that is your most special gift Mum. When you look at a person, what you see, is the actual heart of that person. Not physical beauty, not colour, not difference, not ability or lack of ability, not whether hair is curly or straight but the fact that they are put on this earth and in your view, that makes each of us worthwhile. This quality along with your sense of humour, kindness, can do attitude, work ethic, interest in others and in this crazy world we live in; has made you the best of teachers, a beloved daughter and sister, an attentive grandmother, the most steadfast of friends, a great wife (twice), a valued member of our community and in our view, the very best of mothers.

And for that, we thank you.

http://bluwatergrill.com.au/


A fight to the death and chocolate swirled pavlova

Some marriages are life-long love affairs, full of flowery and undying proclamations of romantic love. Others are like a military alliance, where the couple march steadily along the highway of life, side by side, enjoying common goals with stoic fortitude. Some marriages are simply just endured and others don’t make it at all. Whilst ours has had its bursts of romance and is based on a rock solid friendship, it is probably best described as a prolonged torturous comedic metaphorical fight to the death. The winner of the day is the one who gets in the best joke, at the others expense of course. The final victor will be the last one left standing. I am going to make sure it is me.

This pavlova was made for a friends pre-Easter soirée. The Yak was a big fan of the grown-up savoury spiciness of this dessert. The soft buttery pears, the chewy meringue, the tangy sour cream and the sweet heat of the gingery syrup was a food revelation. Happy fifteenth wedding anniversary Yak. In the face of the fear that I won’t do better at this late stage of the game; I guess you’ll do.

CHOCOLATE SWIRL PAVLOVA WITH MAPLE POACHED PEARS

WHAT YOU NEED
6 small pears, peeled (I used rather large Corella pears but smaller pears would have looked better on the pavlova)
2 cup (250)ml maple syrup
5cm piece ginger, sliced
6 fresh bay leaves (I didn’t have any fresh, so I didn’t use any.)
6 egg whites, room temperature
1 1/2 cups caster sugar (330g)
1/ tsp white vinegar
1 tsp cornflour
2 1/2 tbls cocoa powder
300-400g creme fraiche
1 tsp pure icing sugar, sifted

HOW YOU DO IT
To make the maple pears: place pears, maple syrup, ginger, bay leaves and 3 cups water (750ml) in a saucepan.
Bring to a simmer over medium heat, then cover the circle with a circle of baking paper and reduce heat to low. Simmer for 45 minutes or until tender. (My bigger pears took about 1 hour and fifteen minutes.) Remove pears from the liquid.
Discard half the liquid, reserving the bay and ginger. Return the remaining liquid, bay leaves and ginger to a deep saucepan and place over high heat.
Boil the liquid for 30 minutes or until thick and syrupy. Cool completely and set aside.
To make the pavlova, preheat the oven to 180C and line a baking tray with baking paper.
Place baking paper on a large tray and draw an 18 cm circle.
Beat the egg whites and a pinch of salt to firm peaks.
Keep beating the egg white on low adding the sugar a tablespoon at a time.
Once all of the sugar is added, continue beating on a medium speed until the meringue is no long gritty to the touch and is stiff and glossy.
Fold through the vinegar, cornflour and 2 heaped tsps of the cocoa.
Spread into the prepared tray and sprinkle another 2 tsps of the cocoa over the pavlova and using a palette knife, swirl the cocoa through the pavlova.
Place it in the oven and drop the temperature down to 130 (120 fan forced) and bake for one hour. Rotate every 20 minutes to ensure even baking and colouring.
Turn off the oven, leave the door ajar and let the pavlova cool down in the oven for at least 3 hours.
Combine the sour cream, icing sugar and remaining 1 tsp cocoa and spread over the pavlova. Halve (or quarter) the pears and arrange over the top. Served drizzled with the reduced maple syrup and scatter with the bay leaves. (If you had any.)

A Cheergerm adaption of a recipe from the April 2016 Delicious magazine. I changed the pavlova method


Easter egg biscuits and Miffy

Sister number three in our family, from a very young age, adored the series of books about a small white rabbit named Miffy. The Dutch artist Dick Bruna created this character over sixty years ago. It is easy to see the appeal to small children with his clever use of primary colours and minimalist bold lines. Our sisters love of these books was so great, that we nicknamed her after that iconic straight-eared bunny.

Miffy was a sweet and sensitive child with a solid love of the ridiculous. She was a deep thinking furrowed browed tumble of light brown curls, with a smackering of tawny freckles upon the bridge of her cute button nose. One of the moments that best describe her, was when around the age of nine or ten, she decided to forgo any Christmas gifts and donate the money to Mother Teresa and the poor. (We may have teased her mercilessly about this selfless act but we were secretly all very impressed.)

These chewy coconut biscuits are a bit of festive Easter frippery and fun. Easy to make with kids, they are a colourful addition to any Easter table. Using my favourite Coconut Macaroon recipe, I threw in a dash of lemon zest which added a faint hum of citrus. Miffy visited the other day and even though we are all ‘growed up’ and life and time has altered us somewhat, she is still that same sweet, funny and tender soul. After taste testing these biscuits our Miffy gave them two very big bunny thumbs up.

EASTER EGG MACAROON BISCUITS

WHAT YOU NEED
2 egg whites
Pinch salt
1/2 cup (100g) caster sugar
1 1/4 cups (125g) desiccated coconut
1/4 tsp vanilla bean powder (or pure vanilla paste or essence)
Zest of one medium sized lemon
125g mini candy coated eggs (gluten free)
40g white chocolate

HOW YOU DO IT
Preheat the oven to 150C and line two baking trays with baking paper.
Beat the egg whites and salt until they are stiff. Gradually beat in the sugar and fold in the remaining ingredients.
Drop 2 teaspoonfuls of the mixture about 5cm apart on the trays and using the other end of the spoon, dig a small indentation. This is where you will pour the chocolate and pop the eggs in once the biscuits are cooked and cooled.
Bake for about 20 minutes, rotating halfway through. When the macaroons are dry and cooked, they will be a pale, pinky-gold. Let them cool completely.
Melt the white chocolate in a small glass bowl, either in the microwave or on a double boiler. Let the chocolate cool and thicken, then place abut 1/4 to a 1/2 tsp into the middle of each macaroon. Pop three of the Easter eggs onto each macaroon.
Store in an airtight container.

Recipe slightly adapted from Ladies, A Plate by Alexa Johnston.

Looking for other Easter food ideas?
Gluten free silverbeet, herb and polenta pie
Roasted baby carrots with cumin
Heirloom carrot autumn salad
Hot cross buns


Lentils, slow roasted tomatoes and goats cheese

Most of you would have heard the saying ‘you don’t make friends with salad.’ The underpinning sentiment being that salad is not worth eating. Personally, I try to avoid eating anything or anybody that I have made friends with. However, if we were ever to find ourselves in an extremely desperate survival type situation, who knows what may happen. (Having read the book ‘Alive’ based on the 1972 Andes flight disaster where sixteen survivors survived only by deciding to eat pieces of their dead friends, I have been forever haunted by the choices they made. Would I, wouldn’t I?)

Ponderings on cannibalism aside, salads these days are mega interesting and worthy of being elevated to ‘main course’ status. Yotam Ottolenghi, the British chef, cookery writer and TV presenter could easily be hailed as the ‘King Of Delicious and Fascinating Salads.’ Having been lucky enough to procure another smattering of delicious cherry tomatoes from the local Growers Markets, the idea of slow roasting them popped into my brain box. Trawling through my cookbooks I came across this salad from Ottolenghi’s book ‘Plenty’ and did a bit of re-jigging. The lentils have a toothsome nutty bite, the thyme perfumed tomatoes are unctuously sweet, the melting red wine vinegar onions and bright herbs add a zingy lift. The nuggets of goats cheese provide an extra creamy tart surprise.

Salad may not be ‘my friend’ but it is certainly a very tasty acquaintance.

LENTILS, SLOW ROASTED TOMATOES AND GOATS CHEESE

WHAT YOU NEED
1 small red Red onion, very finely sliced
1 tbsp red wine vinegar
1 tsp sea salt
250g lentils (I used a french style fine green lentil from Mount Zero, Ottolenghi used castelluccio lentils or you could use French puy. The lentils need to hold their shape once cooked.)
3 tbsp extra virgin olive oil
1 garlic clove, crushed
4 tbl parsley, chopped
1 tbl oregano, chopped (note, Ottolenghi’s recipe used 3tbsp chervil or parsley, 3 tbsp chopped chives, 4 tbsp chopped dill but I didn’t have these so just made do with what I had)
80g goats cheese (or Gorgonzola, or feta)
Black pepper

Slow roasted tomatoes
400g mixed cherry tomatoes, washed
2 tbl olive oil
1 tbl caramelised balsamic vinegar
8 sprigs of thyme
Extra sea salt

HOW YOU DO IT
Start by making the slow roasted tomatoes. Preheat the oven to 100C. Place the cherry tomatoes and thyme sprigs onto a baking tray lined with baking paper. Drizzle over the olive oil and balsamic vinegar, sprinkle with some salt and gently toss to coat. Roast for one hour, turning once or twice in that time.
Remove the tomatoes from the oven, discard the thyme and allow them to cool.
Meanwhile, place the red onion in a medium bowl, pour over the red wine vinegar and sprinkle with the salt. Stir, then leave the onions to soften.
Place the lentils in a pan of boiling water (the water should come three centimetres above the lentils) and cook for 20-30 minutes or until tender.
Drain the lentils in a sieve and whilst still warm, add them to the sliced red onion. Next, add the extra virgin olive oil, garlic and some black pepper. Stir to mix and leave aside to cool down.
Once cool, add the herbs and gently mix together. Taste and adjust the seasoning.
To serve, pile up the lentils on a large plate or bowl, integrating the goats cheese and tomatoes as you build up the pile. Drizzle the tomato cooking juices on top and serve.

A slight variation on a Yotam Otteolenghi recipe from ‘Plenty’ published by Edbury Press, 2010


Tomato, fennel and goats cheese salad

Inspiration, not unlike perspiration, happens unexpectedly and far more pleasantly. Whilst trawling our local Growers Markets, I happened upon some bulbs of baby fennel and trays of sunny yellow and dark red to the point of black, cherry tomatoes. The bloke on the stall informed me that the dark reds were named Black Russians. This romantic moniker instantly transported me to long gone days of Tsars, bejewelled Faberge eggs and Rasputin. All set against a backdrop of snow covered mulit-coloured Russian Orthodox churches. A far cry from the humid heat and slick sweat that was slowly rolling down between my shoulder blades. (Of course Tsarinas don’t perspire they gently ‘glow’ but I doubt that the Russian royalty of that era went veggie shopping under a blazing hot Aussie sun either.)

This unseasonably warm weather calls for salads and lots of ’em. My fridge coughed up a jar of the lovely marinated Meredith goats cheese feta. And so it was. Crunchy, finely sliced aniseed fennel, the sweet tartness of tomatoes, the creamy goaty tang of the cheese and the herbal zing of mint. Perfect for a bloody hot day and a dish fit for a Tsar or perhaps even a mad monk.

TOMATO, FENNEL AND FETA SALAD

WHAT YOU NEED
250g cherry tomatoes, I used a mix Black Russian and yellow
1 baby fennel bulb (or half a normal size bulb)
Juice of half a medium size lemon
3 tbl extra virgin olive oil
Salt and pepper to season
50g goats cheese (if you don’t have or like goats cheese, a creamy feta cheese would be a great substitute)
1 tbl fresh chopped mint

HOW YOU DO IT
Wash the tomatoes, de-stalk and slice them in two.
Wash the fennel bulb, slice in half and take out the hard core in the middle. Using a mandolin, slice into fine slices. (The fennel that is, not your fingers.)
Place the tomatoes and sliced fennel on a platter or in a bowl. Season with salt and pepper and add the lemon juice and olive oil.
Toss together and let this sit for 15 to 30 minutes to absorb the flavours.
Crumble the feta over the salad, scatter the mint and et voila!
Serves 2 very hungry people, could serve 4 alongside a lot of other dishes. I had it with a lemon pepper pork schnitzel. It was the bomb.

A Cheergerm take on a number of similar salad recipes


An homage in the shape of a gluten free apricot slice

If people could be a fruit, my maternal Nana Dorothy would have been an apricot. Our grandparents owned an orchard in the Central Otago region of the South Island of New Zealand. Pop’s apricot trees were special, as was the fruit they produced. They tasted of sunshine with a hint of savoury tartness. My memories of Nana are inexorably woven together with this small pale golden orange fruit. The blushing velvety exterior of an apricot still reminds me of her luminous complexion and whilst she was warm and kind, Dorothy also had a sharp wit and tongue when it was required.

If I close my eyes and remember those visits, I think of rosehips and grey wild thyme, whispering pines and the muted golden browns and tans of the surrounding craggy Central Otago hills. Tartan woollen blankets, bountiful stone fruit, apples, pears and the low rocky walls made of the unique local schist stone of the region. I can see Pop on the tractor amongst the variegated foliage of the fruit trees. I can hear the ear splitting bark of the cherry gun and watch the frost pots being readied when temperatures were set to drop.

Dorothy was a good cook and baker. How very grown up I felt when helping her carry the wicker baskets laden with a morning tea of something homemade down to the workers. I can see and almost smell the fat juicy sausages that Nana served with her homemade, piquant apricot sauce. Her baking tin always contained a slice or cake. She was generous with food, with her love and with her particularly joyously infectious laugh that I can still hear in my head.

This apricot slice is my homage to her. Sweet, buttery, tropically coconut and vanilla; beautifully offset by the faintly tart fruit. The apricot and almond meal are happy bedmates. I wish she was still with us so I could serve her a generous portion alongside a cup of tea and hear her laugh, just one more time. If you were a fruit, what fruit would you be? I think I too, would be an apricot.

GLUTEN FREE APRICOT SLICE

WHAT YOU NEED
185g butter, room temperature
3/4 cup caster sugar
2 eggs
1 tsp vanilla essence or 1/2 tsp vanilla bean powder
100g almond meal
135g gluten free self-raising flour
1/2 cup dessicated coconut
12 fresh apricots (500g), halved and de-stoned
1 heaped tablespoon Apricot jam to glaze

HOW YOU DO IT
Preheat oven to 180C (170C fan-forced) and line a 18cm x 28cm lamington tin with baking paper.
Using a hand mixer or stand mixer, beat the butter and sugar until light and fluffy.
Add the eggs one at a time, beating well after each addition. Add the vanilla.
Sift the almond meal and self-raising flour into a bowl, then stir in the coconut. Gently fold the flour mixture into the butter mixture.
Spread the mixture evenly over the base of the prepared pan.
Arrange the apricot halves cut side up on the cake batter, pressing them in slightly.
Bake for 35 to 40 minutes or until a skewer inserted into the middle of the slice comes out clean.
Whilst the cake is still hot, heat the apricot jam and brush it over the apricots.
Cool completely in the pan, then cut and serve.
Cooking Notes: this can also be served hot as a dessert with ice-cream, yoghurt or mix a tablespoon of honey into mascarpone or ricotta.

A Cheergerm adaptation of two recipes from the Taste Website. Links after photos.

I

image

http://www.taste.com.au/recipes/26489/coconut+apricot+slice

http://www.taste.com.au/recipes/347/apricot+and+almond+slice


Quick pickled baby cucumbers, Japanese style

Kid 1 and I were watching the lovely Rachel Khoo on her BBC cooking show when I asked him, ‘Rachel is your type, isn’t she?’ Kid 1 replied, ‘I don’t have a type, all girls are my type.’

Ummm. Think we are in trouble.

Back to food. I am on a pickling rampage. Well, that is a slight exaggeration but quick refrigerator pickles are somewhat of a revelation. If it ain’t tied down, I will pickle it.

QUICK PICKLED BABY CUCUMBERS JAPANESE STYLE

WHAT YOU NEED
350g baby cucumbers
3/4 cup Rice wine vinegar
1/4 cup water
2 tbl granulated sugar
1 1/2 tsp Sea salt
1 tsp fresh ginger, finely grated
1 tsp gluten free soy sauce
1/2 tsp Sesame oil

HOW YOU DO IT
Trim any stalks off the baby cucumbers and wash and dry them.
Pack them into a medium sized jar that holds about 500ml liquid.
Combine the rest of the ingredients in a small saucepan and cook over a medium heat.
Bring to the boil, stirring occasionally until the sugar has dissolved.
Remove from the hear and let it cool down for 10 to 15 minutes.
Pour the brining liquid into the jar, covering the cucumbers.
Let the pickles cool down to room temperature then cover the jar and shake or rotate the jar gently to distribute the ginger throughout the jar.
Refrigerate the pickles for at least one day before serving, they can last up to five days in the refrigerator.
These teeny pickled cucumbers are magnificent with a cheese platter and go really well with my Miso Glazed Eggplant and Tofu Agedashi. Add to burgers, sandwiches and they are super nice when sliced and added to the top of a taco. Failing that, there is nothing wrong with eating them straight from the jar.

A Cheergerm creation


A gluten free brownie

Valentine’s Day is not a big deal in our household. Total respect to all you V-Day fans, we are simply just not that into it. However, I am not adverse to the idea of cooking or baking something delicious for your beloveds on this non-public holiday. (Be they lover, spouse, friend, child, sibling; you get the drift.) Creating something delicious to eat with your own mitts, is a great way of avoiding rampant heart-shaped commercialism and giving a little something of yourself to those whom you adore. (Much like making a beautiful card, something this craft-challenged Cheergerm is unable to do.)

This is a fudgy, dense, yet surprisingly melt-in-the-mouth brownie. Intensely chocolatey, decadent and not for the faint of heart. We all tussle for a piece of this on the rare occasions it is baked and every time we eat it, perhaps we love each other just a little more. (At least until the sugar high wears off.)

GLUTEN FREE CHOCOLATE BROWNIES

WHAT YOU NEED
200g unsalted butter, chopped
200g dark chocolate, broken into pieces (I used 72% cocoa content)
1 cup brown sugar
3 eggs, lightly beaten
1 tsp vanilla extract (or 1/4 tsp vanilla bean powder)
3/4 cup gluten free plain flour
2 tbl cocoa powder

HOW YOU DO IT
Preheat the oven to 190C (180C fan-forced) and line a 5cm deep, 18cm square cake pan with non-stick baking paper.
Place the butter, chocolate and sugar in a saucepan over low heat and stir constantly, until melted and smooth.
Pour the mixture into a heatproof bowl and set aside to cool slightly. (About 15 minutes.)
Add the eggs and vanilla to the chocolate mixture and mix well.
Sift the flour and cocoa over the chocolate mixture and stir to combine.
Pour the brownie mixture into the pan and bake for 20 minutes or until just set. Let completely cool in the pan.
Once cooled, lift the brownie out, wrap in plastic wrap and place in an airtight container. Stand for 1 day then cut into pieces and serve.

Recipe by Alison Roberts from Super Food Ideas, March 2005.