Roasted cauliflower soup and doonas

Hot soup is like a winter weight doona. It wraps it’s arms around you and bear hugs you into a calmer state of existence. (Put that on a card Hallmark.) Soup is by nature pretty forgiving. It’s a nifty way of using up spare veggies and other assorted leftover bits and bobs.

Rarely does it taste exactly the same twice and making soup is always a bit of an exciting adventure. (Please keep in mind that I don’t get out much anymore.) It reminds me of 1970’s flannelette pyjamas, Walt Disney movies on the television, Mum’s veggie soup and her homemade scones.

Autumn is upon us. The days here have been unseasonably warm but the nights are certainly cooler. As the Yak stretches up to the top of the linen cupboard for cosier bedding, I also dust off the soup pot, ready for heavy usage. (In other words, expect a plethora of soupy type posts over the new few months.)

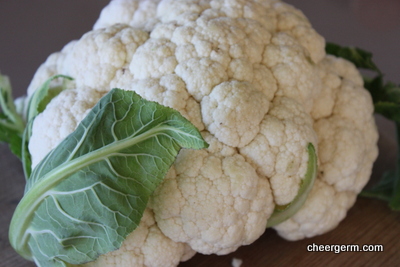
Roasting the cauliflower emphasises this vegetables nutty flavour and gives it some gorgeous caramelisation. Preparing this cruciferous veggie in this manner is like eating cauliflower on steroids. (Without any uncomfortable enquiries from official sporting governing bodies.) This soup is soft and harmonious with a slight garlicky hint and earthy undertones from the cumin.

Keep in mind that roasting garlic will give it a it milder and sweeter flavour. My cloves of garlic were very small but it was all I had left. Next time I would use bigger cloves or add a few more in. At least it was Australian garlic, the upside being there were no food kilometres/miles/cubits/furlongs on it.

Roasted cauliflower soup

WHAT YOU NEED
1 head cauliflower cut into large florets
4 garlic cloves, unpeeled
Olive oil to drizzle
2 tbl olive oil
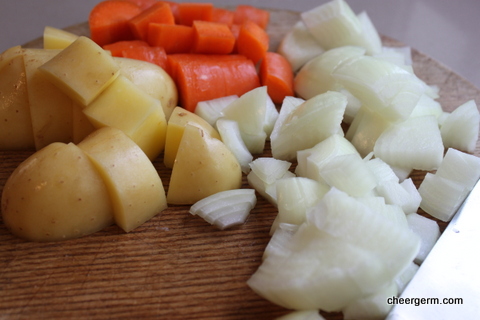
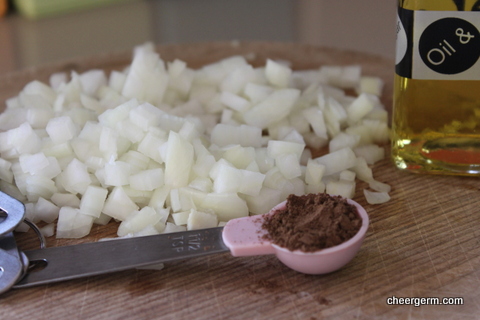
1 medium onion, diced
1 large peeled potato, small dice
1 tsp cumin powder
6 cups water
1 teaspoon Massel vegetarian stock powder (or stock powder of your choice)
1/2 tsp sea salt
Black pepper to season

HOW YOU DO IT
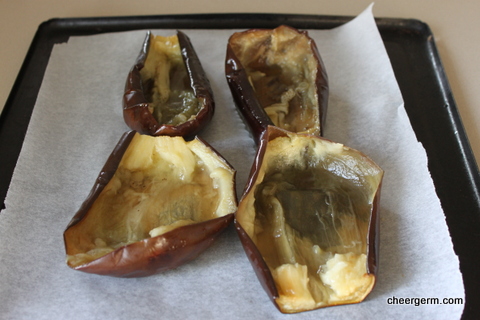
Preheat oven to 170C.
Place cauliflower and garlic cloves into a roasting pan lined with baking paper . Drizzle over olive oil and season with salt and pepper.
Roast in the oven for 15 minutes, remove and stir then for another 15 minutes.
Check at 30 minutes and remove from the oven if the cauliflower is tender. Place aside and peel the garlic when it has cooled.
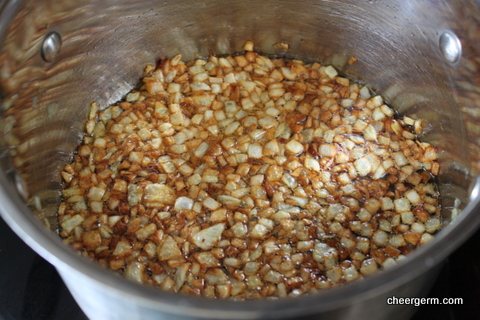
In a large saucepan, pour in 2 tbl olive oil and sauté onion for 1 – 2 minutes then add potatoes, cumin and stir for a minute or two.
Add the cooked cauliflower and peeled garlic, water, stock powder, salt and some pepper.
Bring to the boil then reduce the soup to a simmer.
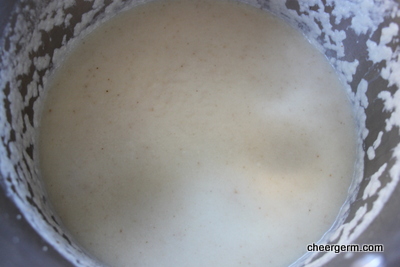
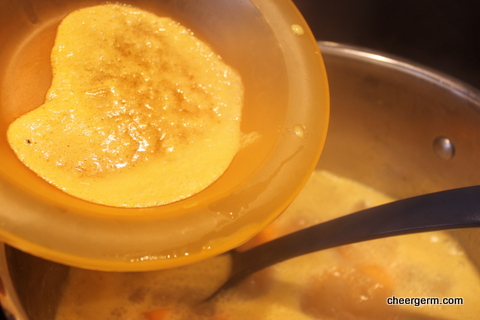
Cook for 30 min, until potatoes are soft then blend with a stick blender.
Check for seasoning and serve.
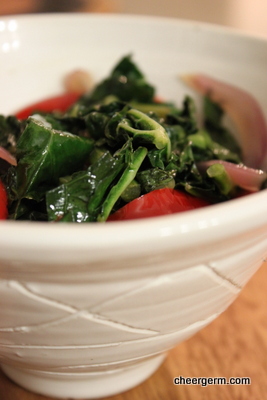
We enjoyed this soup topped with crumbled fetta and crunchy toast on the side.

A cheergerm recipe


Kale, red onion and a splash of verjuice

Dear snotty lady in the overpriced posh food shop many years ago,

Four score and twenty years ago, I came in to your store and asked for some verjuice. I pronounced it exactly as it was spelt. Saying ‘ver’, then ‘juice’ as in ‘orange juice’. You looked down your elongated nose and pronounced in your very best plum in the mouth, lower northshore accent. ‘Surely dear, you mean ver-jus’. (Your pronunciation of the ‘juice’ as in the French pronuciation of the word jus…rhyming with zhoo..like ach-choo but softer).

Yes, you did make me feel ten cm tall (and I am barely taller than that anyway). I slunk away that day, clutching my bottle of unripe grape juice to my slightly wounded pride.

I write today to happily inform you that your elitist attitude didn’t deter me from continuing on my food journey. Some of the foodie jobs I have held did consist of educating others. I truly hope I have never contributed towards making anyone feel as small I as felt, when I left your shop that day.

This big, wide wonderful world of food is a never ending journey of exciting discoveries. Learning new things everyday rocks my very being.

Yours delightfully,

Cheergerm

PS Get stuffed.

KALE AND RED ONION with a splash of verjuice!

WHAT YOU NEED
2 tbl garlic infused olive oil or regular olive oil
1 medium red/Spanish onion, sliced
1 red capsicum, sliced
1/2 tsp salt
1/4 tsp chilli flakes
1 bunch kale washed and chopped into 2-3cm strips
Splash of verjuice or squeeze of lemon

HOW YOU DO IT
In a large frypan, sauté the onion, capsicum, salt and chilli over low to medium heat until they are soft and starting to caramelise, about 15 -20 minutes.
Add the kale, stir and cook for 10 – 15 minutes until it starts to soften.
Add a large splash of verjuice (or lemon) and stir to mix through until the verjuice starts to sizzle.
Season with extra salt and pepper to taste.

This dish is great by itself as a light lunch or dinner. Also as a side to eggs, grilled meats, casseroles, tofu dishes, anything your wee heart desires really.

This is also good with a couple of cloves of crushed garlic, added just before you pop in the kale. Due to the Yak having to talk to people all day, sometimes we have to dial back on the garlic during the week.

A cheergerm recipe

What the heck is verjuice anyhoo?

Made from unripe grapes, it was used in the Middle Ages as a condiment in sauces or to deglaze particular dishes. It is a alternative to vinegar. One of my food heroes, Maggie Beer, was at the forefront of bringing verjuice back into popularity by being the first (her claim) in the world to produce it commercially.

The mild acidity of verjuice is a real bonus. It isn’t as ‘in yo face’ as lemon juice or vinegar and is great in dishes where you want a gentler acidic alternative. You should be able to find it in good delis and in some supermarkets.

I love it as an alternative to vinegar and lemon in dressings, tossed over sautéed veggies and also to deglaze the pan juices of meat, cheese and other veggies dishes.

Please note the beautiful white pottery bowl I popped the kale in. Made by one of my fabulous New Zealand aunts who is a very talented potter.

Verjuice 375mL


Pumpkin soup, the best you ever tasted?

The wee lads have a beloved book, it’s called Pumpkin Soup. It is impossible to say how many times this book has been read. One particular stanza has stuck in my mind.

‘Pumpkin Soup. The best you ever tasted. Made by the Cat who slices up the pumpkin. Made by the Squirrel who stirs in the water. Made by the duck who scoops up a pipkin of salt, and tips in just enough.’

This mantra is always in the back of my mind when making pumpkin soup. (Or as the Yak and I call it, snoup…no idea why.) Naturally, the children won’t touch the stuff.

Now, this may not be the best pumpkin soup you ever tasted but it ain’t half bad.

You could have a pumpkin soup recipe you love so much that no other can or will, hold a candle to it. If you have a hankering to try something new, this soup is buttery and softly sweet with a mild undercurrent of warming Indian spices. Feel free to add half a teaspoon of red chilli powder if you fancy a hit of the good stuff. Hearty autumnal soup, good for the soul and just the thing for the gobshite horrid weather that has descended upon us recently.

Spiced pumpkin soup

YOU NEED
2 tbl oil
1 onion, roughly chopped
1 carrot, roughly chopped (I don’t peel, lots of goodness in the skin!)
2 cloves garlic, crushed
1 tsp dried coriander
1/2 tsp dried cumin
1/2 tsp dried ginger
1/2 tsp dried turmeric
2 tsp sea salt (or a pipkin)
1 potato, roughly chopped (don’t bother peeling)
butternut pumpkin (my 1.4kg pumpkin yielded 900g chopped pumpkin)
6 cups water
1 cup dried red lentils, rinsed under cold water
Salt and pepper to taste

HOW YOU DO IT
Sauté onion and carrot for 3- 4 few minutes over medium heat.
Add garlic, spices and salt and cook for one minute, stirring.
Add the pumpkin and potato and stir through.
Add the water, lentils and a few grinds of black pepper.
Bring to the boil then reduce to a simmer and cook on medium heat.
Whilst cooking, check for salt, you may need to add a bit more.
When cooking lentils, sometimes a ‘frothy scum’ rises to the surface. Don’t go nuts but do skim off some of it whilst cooking.
Once the vegetables are soft and collapsing (about 40 minutes), take off heat and blend with a stick blender until smooth.
Add water to get the consistency of soup you prefer and gently heat through. I added about an extra 3/4 of a cup as I don’t enjoy overly gluggy soup. This soup does thicken quite a bit as it cools.
Garnish with a sprig of coriander and a dollop of plain yoghurt if you have it and serve with crunchy toast or your favourite crackers.
Great for the next day and for freezing.

A cheergerm recipe

A quick note on stock, many years ago I used to make my own chicken, seafood and beef stock. Then I had children. That is my excuse and I am sticking to it. Store bought ready made stock is very salty, so when I do use it, I either water or it down or try and buy the reduced salt variety. Frozen meat or vegetable stocks from butchers and gourmet food outlets are also a great alternative.

For veggie soups, I often don’t use any stock and try and let the natural ‘vegetable flavours’ shine through. (Although I will use a spoon of Massel veggie stock powder which is gluten free and vegan, sometimes.) Lately I have had a hankering to try making my own veggie stock. Stay tuned for that.

Book photo credits: ‘Pumpkin Soup’ written by Helen Cooper, published by Picture Corgi Books Transworld Publishers Ltd. Copyright 1998 by Helen Cooper.


Baked polenta pie and carking it

The following is a recentish conversation with Kid 1. The exact origins of how it began are murky. He may have been talking about living in our house once the Yak and myself had shuffled off this mortal coil.

Me: That can wait until you bury me in the cold hard ground.
Kid 1: Would you rather be buried or incinerated?
Me: Eek! Incinerated!? I hope you mean cremated?
Kid 1: Yes, yes! Actually, I think I will mount your head on the wall, hang on, maybe I will put you in a glass coffin like Snow White!
Me: Ummm…cremation will suffice thanks kiddo.

There is absolutely no way of linking this discussion to our recent ‘early Easter mums birthday family get together.’ Except that if you were to eat like this every day, you probably would shuffle off to an early grave. These events are no mean affairs, everyone contributes joyfully and the table groans from the weight of a feast fit for a King. That day we began with varying cheeses and crackers served with a nutty, rich fruit paste. Next was roast lamb, cauliflower cheese, potato bake, polenta pie and a green salad. To finish, a fruit platter the size of a small baby, lemon meringue cheesecake (to die for) and a decadent chocolate cake (both gluten free).

This vegetarian polenta pie is a great ‘big group gathering dish’, as it makes a motza. It’s an adaptation of a recipe from Two Peas and a Pod, a delightful food blog with tonnes of varied recipes. It’s a bit like a lasagna, without the pasta and white sauce. Polenta is cornmeal that is boiled into a hearty porridge (sounds scrumptious?) then eaten directly or baked, fried or grilled. It is gluten free so it’s a great ingredient for Silly Yaks.

(Ps whenever I do ‘pass onto the next realm’, can someone (anyone) please ensure I don’t end up hung ‘moose like’ on the wall or spend eternity on display in a glass box?)

Baked vegetarian polenta pie

YOU NEED
4 tbl olive oil
1 large onion, diced
1 medium red pepper, diced
1 large eggplant, peeled and diced into 3cm dice
2 medium zuchinni, diced 2 cm dice
200g mushrooms, roughly chopped
2 cloves garlic, crushed
1/4 tsp dried chilli flakes (leave out if you choose to)
1/2 tsp oregano
1/4 tsp fennel seeds
2 tins (400g) crushed/diced tomatoes
1 cup water
1/2 cup fresh basil leaves roughly chopped
1 cup grated Parmesan
2 cups shredded/grated mozarella

HOW YOU DO IT
Preheat oven to 180C and lightly oil a 3 litre baking dish.

The sauce
Sauté onion and red pepper in olive oil for a few minutes.
Add eggplant, cook stirring for 2 minutes, add the zuchinni, cook 3 minutes.
Add the mushrooms, chilli, fennel, garlic and oregano. Stir for a minute or two.
Add tomato, water and season with salt and pepper.
Cook for 30-40 minutes until vegetables are tender and sauce is reduced and silky. Remove from heat and stir in the basil.

Polenta
1.5 cups instant polenta
4.5 cups milk
1.5 tbl butter
1 tsp sugar
1/2 tsp salt
Black pepper

Place the milk, butter, sugar, salt and a few grinds of black pepper into a large saucepan and bring to a light simmer.
Using a whisk, slowly add the polenta to the pot, whisking constantly. When the polenta starts to thicken swap the whisk for a spoon.
Once the polenta pulls away from the pot, add half of the Parmesan cheese and stir to combine. Remove from the heat.

Assembling the pie
Spread the polenta into the baking dish and sprinkle with the remaining Parmesan cheese.
Pour the tomato vegetable sauce over the polenta and top with the mozarella.
Bake in a moderate oven for 30 to 35 minutes until golden brown and bubbly.
Rest for ten minutes before cutting into squares and serving.

It goes beautifully with a crisp, green salad and leftovers of this dish are fantastic the next day.

Adapted from Two Peas in a Pod. Go here for the original recipe:
http://www.twopeasandtheirpod.com/baked-polenta-pie/


Get stuffed eggplant

‘Get stuffed!’ Growing up in a certain era, as one did, this was a charming way you could tell someone who was irritating you, to get lost. Other equally lovely Aussie vernacular of the day included: ‘Get knicked!’, ‘Rack off!’ and ‘Bugger off!’.

What’s not to love about a stuffed vegetable? This is a rhetorical question. If you dislike or hate them, well, you know what you can do. Get stuffing a vegetable, you may change your mind!

Get stuffed eggplant

YOU NEED
2 cups cooked quinoa (see quinoa notes below)
2 medium eggplants
2tbl olive oil
1/2 red onion
1/2 small red capsicum
1 garlic clove, crushed
1/4 tsp dried chilli flakes
1/2 tin (200g) chopped tomatoes
1 tsp dried basil
2 tbl chopped parsley
1/3 cup grated Parmesan
salt and pepper

HOW YOU DO IT
Preheat oven to 180C.
Cut the eggplants in half lengthways, oil the flesh and place them flesh side down on a lined baking tray. Bake for 40 min at 180C or until they are tender.
Scoop out the flesh of the eggplant, let it drain for five minutes in a colander to get rid of excess water.
Chop the eggplant flesh. Place aside.
Sauté the onion and red pepper for a few minutes, until onion starts to soften.
Add the garlic and chilli flakes, cook for one minute.
Add the eggplant, cook for 2-3 minutes.
Add tomato and basil, cook for 5 minutes.
Stir in the cooked quinoa and chopped parsley.
Season to taste with salt and pepper.
Scoop filling back into eggplant shells and top with grated Parmesan
Cook in a 180C oven for 30 minutes until the tops are golden brown.
Serve with a salad.

Other stuffable veggies include red capsicum (peppers), zuchinni and mushrooms. This is a great way to use up leftover quinoa, it is just as delish using cooked brown rice or cooked buckwheat.

A cheergerm recipe

Quinoa: As you all know, it’s very hip and cool so I won’t crap on about it too much. The Incan’s called it the ‘mother seed’ and considered it to be sacred. It is being touted as a ‘superfood’ these days. Really, we are just walking in the footsteps of a long gone ancient race who used it as their staple food source for nigh on 5000 years. (Ain’t nothing new people.)

Pronounced ‘keen-wah’, this gluten free ‘grain’ is actually not a grain but the seed of a vegetable related to spinach. It is high in protein and is a complex carbohydrate with a low glycemic index. I actually HATED it when I first tried it but since then, have actually grown to enjoy chowing down on it, in various forms. Of course, it’s great for the Yak.

In it’s natural state, quinoa is coated with something called ‘saponin’ which is actually toxic and makes the quinoa taste bitter. Most commercial brands have been washed before packaging but it is a good idea to rinse your quinoa before use and like any food, moderation is the key. (Ie don’t chow down on it every day.)

I love using a tri-coloured blend of quinoa but use whatever you have. Cooking instructions should be on the packet but it is usually 1 part quinoa to 2 parts liquid. This will yield about 3-4 cups cooked quinoa, more than enough for this recipe and for other uses. I like to use a part stock/part water blend to add a bit of flavour to the quinoa.

Yes, I did crap on for too long about ‘keen-wah’….sorry….

IMG_8252-001

IMG_8286

IMG_8299

IMG_8304


Green beans in olive oil (Loubyeh bi Zaht)

A standard purchase from our local Hornsby Growers Market is a bag of green beans. Sometimes they are added to a curry, sometimes they are blanched and tossed together with fennel and orange to make a vibrant salad. Sometimes I will just stare at them for hours at a time, pondering the true beauty of their verdant, glossy, bean-like attributes. But mostly likely, they will end up in this dish.

I like to fancy that I am a teeny part Lebanese, not through blood but through osmosis. A dear friend (who’s hubby is of Lebanese origin) gave me Abla Amad’s cookbook, ‘The Lebanese Kitchen’ about 12 years years ago. Abla started her restaurant in 1979. It soon became a Melbourne dining institution and is still serving simple, traditional style Lebanese food today. Having never eaten there, it is definitely on my list of things to do. Anyhoo, it has been a pleasure to trawl through this book and experiment with the variety of tasty dishes that grace the pages.

My next Middle Eastern connection was making friends with yet another amazing chick through mothers group. Our sons were born around the same time and she is also of Lebanese heritage. The tip of caramelising the onions for this dish came from her mum. (Just saying, but this good friend has yet to cook me a Lebanese feast…..I am still waiting.)

The Yak and myself love this dish served with baked or roasted potatoes and veggie burgers. It’s equally good with kafta (lamb mince patties), grilled chicken or haloumi. Other great pairings include quinoa dishes, stuffed eggplants or capsciums and flatbreads. It is equally yummy served hot, cold or warm.

Mopping up the velvety sauce at the end with whatever carbohydrate you fancy is the best bit.

Green beans in olive oil (Loubyeh bi Zayt)

YOU NEED
1/2 cup olive oil
1 large onion, finely diced
500g green beans, top and tailed and cut into 2cm length
1 1/2 tsps ground allspice
1 tin (400g) diced tomatoes
1 tsp salt
1/4 tsp ground black pepper

HOW YOU DO IT
Heat oil in a saucepan, add onion and sauté the onions until they are a dark golden brown. Cook over medium heat, this takes about 10-15 minutes.
Add beans and stir, then add allspice and cook for 1 minute, stirring constantly.
Add tomato, salt and pepper.
Replace lid and cook for 30 minutes over low heat, cooking until beans are tender. (I usually take the lid off for the last 10 minutes). I taste for seasoning about half way through, you may need a touch more salt.

You can make this dish without tomatoes but I never have. I love allspice but if you are unsure, try 1 teaspoon to start with. Seriously folks, take the time to caramelise the onions. It adds a depth of flavour that was missing when I used to sauté the onions lightly.

Adapted from The Lebanese Kitchen by Abla Amad


The danger of eating chimichurri

The modern woman faces many challenges and hidden dangers. Point in case, a friend recently rushed home from work to get ready for a girls night out. She had 15 minutes to do so. Hair, done. Makeup applied, she was ready for the final touches of a finishing translucent powder to her face. As us ladies know, there is nothing worse than a shiny fizzog (face.)

She took her makeup brush, hurriedly swiped it across the product and diligently applied it vigorously to her forehead, chin, nose and cheeks. She put down her brush. Time to go, she thought and did a final check in the mirror. Staring back at her, other than the usual visage of loveliness, she now resembled a two year old who had gotten into her mothers makeup. Her entire face glowed like a red emergency beacon bobbing up and down in the ocean. It appears she had mistakenly applied her blush/rouge instead of the powder. Must wash face and start again, she sighed.

We were at a girly dinner the evening our friend recounted this story to us. That same night, another friend turned to me and said ‘you have something stuck between your teeth.’ Ahh, yes, I was encountering yet another hidden danger. The old ‘herb wedged in the dentures drama.’ Nothing quite completes a well put together look like a huge chunk of parsley stuck between your choppers. It says ‘class’. It says ‘look at me’. It says ‘you know I got it going on ‘. At this point, we rely on family, friends and sometimes embarrassingly, the kindness of strangers to point out our herbivorous shortcomings.

If you are willing to accept all the adventure and danger that freshly chopped herbs can bring you, I can’t think of a more exciting way to spark up grilled vegetables, meats, haloumi or eggs than chimichurri. I am currently addicted to this zingy, herbaceous South American condiment. Used as a sauce or a marinade, there are many variances between recipes. Some contain oregano, some use no vinegar. The beauty is that you can tinker around until you discover how you like it best.

But I beg you. Please let me know if there is something lodged between my pearly whites.

Chimichurri
This makes a large squodge of sauce and keeps well for 3 days in a well sealed container in the fridge. I found this on a website (see link below) and have made it over and over again.

YOU NEED
1/2 small red onion
3 cloves of garlic (if you like it really garlicky, add an extra clove or 2)
2 cups of well packed parsley and coriander. (I use a half/half mix. If you hate coriander, use parsely and a bit of fresh oregano.)
1/2 cup extra Virgin olive oil
2 tbl red wine vinegar
1 tbl lime juice
Sea salt and pepper

HOW YOU DO IT
In a food processor, pulse the onion and garlic together until finely chopped.
Add the herbs and pulse briefly until finely chopped.
Put the herb and onion mixture into another bowl and stir in the olive oil, vinegar, lime juice and season with salt and pepper to taste.
Refrigerate until ready to serve.
It can also be used as a marinade.

Go here for the original recipe:
http://southamericanfood.about.com/od/saladssidedishes/r/chimichurri.htm


Hard knock life spelt pizza

Kid 1 has a hard life. He thinks he has it tougher than little orphan Annie ever did. The following conversation we had recently, highlights this.

Kid 1: I think Kid 2 should start learning his timetables.
Me: But you just started learning them recently yourself, and you are almost 10. He only just turned 7!
Kid 1: Yes mum, but I want him to have a better life than me. Can’t you see I’m going nowhere fast?

Yes, we can see why he has lost all hope at the ripe old age he is. ‘How about we have homemade pizza for dinner?’ I ask. ‘Yeah!’ he cries. It’s a surefire way to cheer up a hard knock life child like Kid 1.

This pizza uses a mix of wholemeal spelt flour and a strong, high protein flour that is used for bread or pizza. It’s a great workout for the arms. The crust has a moreish nutty flavour but is still light from the pizza flour. I am a bit of a minimalist topping kind of chick but you can use whatever toppings float your boat. We are big fans of mushrooms. If you have never made your own pizza, go for it. Get your kidlets to help, if you can.

YOU NEED
Pizza dough
220g strong flour
200g wholemeal spelt flour (if you don’t have spelt, use plain wholemeal flour)
2tsps (7g) dried yeast
1 1/2 tsps salt
320 ml lukewarm water
2 tbl olive oil

Pizza sauce
1 tbl garlic oil
1 tbl olive oil
1/2 onion finely diced
1 tin chopped tomatoes
Salt and pepper
1/2 tsp dried basil
Splash of caramelised balsamic vinegar or 1/2 tsp brown sugar

Toppings
400g mushrooms, finely sliced
250g shredded/grated mozarella
Fresh basil leaves to garnish (I had run out)

Equipment
2 large pizza pans (mine are 40 and 30cm). I prefer the ones with holes as they work better in a home oven, letting hot air onto the bottom of the pan and making the base crispier.

HOW YOU DO IT
Dough
Sieve the flours and salt into a large mixing bowl.
Dissolve the yeast in a little of the lukewarm water, then stir in the remaining water and add the oil.
Make a well in the centre of the flour mixtures, pour the liquid into the well and gradually work the flour in from the sides.
Remove the dough from the bowl and place onto a board that is sprinkled with flour.
Knead (use those muscles!) for about 5 minutes. (You may need to add more of the pizza flour if it’s too wet.)
Put the dough into a clean and slightly oiled bowl, cover with a damp cloth.
Leave the dough to rise in a warm place until it has doubled in size.

The Sauce:
Whilst your dough is proving (rising), make the sauce. Sauté the onions in the oils for a few minutes until translucent.
Add the tin of tomatoes, basil, salt and pepper, balsamic vinegar or sugar.
Cook on low to medium heat for about 20 minutes until it has reduced and thickened to a spreadable consistency.

Now you are ready to assemble the pizza!
Once you are ready, knock back the dough ( basically squash it), divide in half and roll out thinly on a well floured board. Place on your 2 pizza pans and add your toppings.
Cook 20 to 30 min until cooked. (I always check the bottom of the pizza to make sure it is cooked.)

(The dough quantity makes 2 large pizza bases.)

A cheergerm recipe

Why spelt? Why not? Seriously, this ancient grain contains 50% more protein than wheat flour. It also contains quite a lot of different vitamins and minerals. This cheergerm believes it is beneficial to eat from a wide variety of food sources. Please note, it is NOT gluten free.


Hey dude, don’t call me dude corn fritters

Buying a new computer sucks. No matter how crap your old one is, it’s somewhat akin to ending a destructive intimate relationship. You may have to come to loathe them, yet you know their foibles and quirks. You keep coming back for more, even when they continue to let you down.

Hence, shopping around begun. The first two young men, at two different mega stores, were 20 something self professed computer nerds. (I prefer to call them enthusiasts.) Both had super long hair, tied back and both were battling errant flakes of dry scalp that adorned their tresses like fake snow at Christmas. (Bless them). They were fountains of information and happy to hear what I wanted and what my opinions were. (Even though my eyes were rolling back in my head due to a total lack of comprehension.)

Young guy No 2, in his excitement at explaining a new space age laptop and it’s amazing abilities, exclaimed to me ‘it has 12 gigabytes, dude!’

Dude!? I have always thought of myself as non-conformist and reasonably ‘hip to the jive’. Whilst I found this moniker slightly amusing, I had to admit that the inner Victorian within (lace stays and corsets done up tightly) was a little taken aback. Not being an actual ‘dude’ and all that. Let alone the fact that the normal sales assistants that one encountered, did not usually call their customers dude.

So, off to the third unnamed mega store. This third much, much older guy, allowed me to briefly explain my needs. He then condescendingly, proceeded to tell me what I needed. I dared to asked him a question at the end of his diatribe. His reply? A brusque ‘come back when you are ready to buy and I will tell you the answer.’

In the light of guy number 3, I was forced to reconsider my opinion. I think that now, I am more than happy to be called dude. I also know where I won’t be buying my new computer.

Enjoy this recipe dudes. (I imagine this may be a dish that those totally awesome computer dudes would enjoy). These fritters are a fab light, vegetarian (and gluten free) dinner.

Dude, don’t call me dude corn fritters

YOU NEED
1 small red onion, finely diced
1 corn cob, kernels cut off
1 cup besan (chickpea) flour
1 egg
1 tbl chopped fresh coriander
1 tsp ground coriander
1/2 tsp ground cumin
1/4 tsp ground ginger
1/4 tsp ground turmeric
1/4 tsp salt
1/4 tsp ground chilli powder
Few grinds black pepper
Up to 1/3 cup water
2 tablespooons rice bran oil or vegetable oil

Place all the ingredients except the water in a large bowl.
Add the water slowly and mix to form a batter. You may not need all of the water, I used the 1/3 of a cup but it will depend on your chickpea flour.
Heat the oil in a large non-stick frypan over medium heat.
Add ungainly large spoonfuls of the batter to the frypan. Cook 4 to 5 minutes until just turning golden, flip carefully and transfer onto a tray lined with baking paper.
Once they are all pan fried, transfer the fritters into the oven and cook 8- 10 mins until golden and crispy.
Serve with whatever you want. We enjoyed it with a dollop of plain yoghurt mixed with sweet chilli sauce and a simple rocket salad.

Makes about 9 – 12 depending on the size you make them!

A cheergerm recipe


Vegetarian Tacos and Derriere’s

Not too long ago, Kid 2 sent me his first text from his fathers mobile. I read it in trembling mumma anticipation, what did it say? ‘Bum’. Yup, that’s what it said. Ahh the eloquence of 6 year old boys.

That event has no bearing whatsoever on this recipe post. Unless you can connect the poor trampled heart of a mum, to the cooking of two different batches of bean taco mix because the little twerps darlings can’t handle any chilli. Cant handle the heat? Then get out of the kitchen lads, hang about, it’s only me in here anyway…

Anytime I ask Kid 1 what he would like for dinner, tacos is the standard reply. Believe me, finding a meal that everyone will eat in this house can be a nightmare challenge. It’s a great sharing meal where we get to sit down together and share our deepest thoughts. (Past topics have included who would win in a battle between a giant man eating crocodile versus an anaconda, the various ways to break wind and why rolling your brother in a doona and sitting on him isn’t such a great idea.)

It’s not really difficult, just split the mixture into two before adding the requisite spices. (Mild for the kids and spicy for the grown ups.) I love to ‘cheat’ and use Herbies Mexican spice blend (this is not an advertisement I assure you, I just love them!) There is also a quick ‘make your own spice blend’ in the recipe below.

VEGETARIAN TACO’S FOR GROWN-UPS AND KIDLETS

YOU NEED
2 tbl rice bran or olive oil
1 large onion, diced
1 small red pepper, diced
1 medium zuchinni, diced
300g mushrooms, diced
2 tins 420g red kidney beans, rinsed and drained
1 ear of corn, kernels cut off (or 1 cup frozen corn)
1 tin chopped tomatoes
1/2 tsp dried oregano
1/2 tsp cumin
1 tbl Herbies Mexican spices blend or make your own by combining: 1/2 tsp red chilli powder, 1/2 tsp smoked paprika, 1/2 tsp cumin, 1/2 tsp oregano, 1/2 tsp salt
1 lime or lemon
2 tbl chopped fresh coriander
Taco shells, gluten free. (The Yak and Cheergerm can down 4-5 each of these bad boys, the kids 2 to 3 each) cook to packet instructions just before serving.

Serve with
Grated cheese (as much as you like)
1 diced tomato
1/2 shredded lettuce

Sauté onions and red peppers in oil until translucent in medium saucepan.
Add zucchini, cook for 2-3 minutes
Add mushrooms, cook 2-3 minutes
Add beans and corn. Combine then remove about 1/3 to just under half of the mixture and place in smaller saucepan.
Add oregano and cumin to the smaller saucepan cook for 2 mins, then add 1/3 of the tinned tomato and add 1/2 cup water.
In the big pot, add the spicy spices, cook 2 mins, add remaining tinned tomato and 3/4 cup water.
Cook both sauces over low to medium heat until they have reduced and thickened, about 20 mins.
Heat the taco shells in the oven according to packet instructions.
Add a generous squeeze of lime or lemon juice to both pots just before serving.
Stir the coriander through the ‘grown-up’ version and the kidlet version if you so fancy (my kids won’t eat fresh coriander….)
Serve with taco shells, tomatoes, grated cheese and shredded lettuce.
We usually have some leftovers for the next day. Yum.

A Cheergerm recipe

In our house there is a division as to whether the cheese goes into the taco shell before the bean mix or last, after the bean mix. Anyone with an ounce of common sense knows it’s last. Right?