Gluten free chocolate chip biscuits

Kid 1: ‘Feed us or we will eat you’.

The natural world provides many totally understandable hideous examples of mothers eating their young. After some paltry research, I was unable to find examples of offspring devouring their devoted parentals.

I do not want to be the first. So, thus far, I have continued to feed my little darlings. Of course, when Kid 1 makes this proclamation, he usually wants something sweet.

Most of us who enjoy baking, have a standard ‘go to’ choc chip biscuit recipe. Me included, and the lads love them. Once they are baked, the Yak will stand there, all sad eyed and ask in a teeny tiny hopeful voice ‘Are they perhaps gluten free?’ The answer is usually no and the poor wee coeliac walks morosely away, leaving a trail of glistening gluten free tears behind him.

These biccies have been a work in progress for a little while now. There are no promises, that in my quest for perfection, they will not change again. Previous incarnations have had that slightly too sandy, gritty texture that gluten free baking can easily end up with. I wanted to make a flour blend that had some wholefood benefits. The addition of almond meal has given them that sought after softer bite. The end result is very similar to my standard choc chip biscuits.

Not everyone will have these flours so feel free to experiment. If you don’t have any sorghum or teff, try 3/4 cup brown rice flour instead.

Gluten free chocolate chip biscuits

WHAT YOU NEED
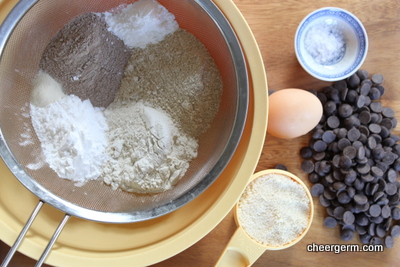
1/2 cup sorghum flour
1/4 cup teff flour
1/4 cup tapioca flour
1/4 cup buckwheat flour
3 tsps baking powder
1/2 tsp xanthum gum
Big Pinch of salt
1/2 cup almond meal
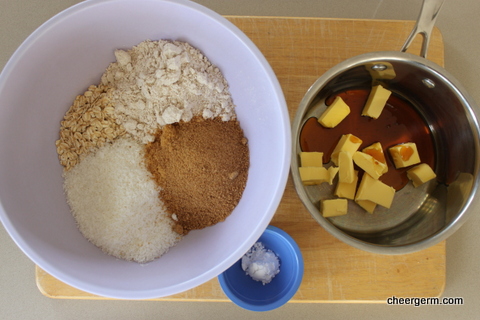
125g butter, chopped and at room temperature
2/3 cup coconut sugar (or rapadura or 1/3 cup soft brown sugar combined with 1/3 cup white caster sugar)
1/2 tsp vanilla bean paste (1 tsp vanilla essence)
1 egg at room temperature
100g dark chocolate chips (I used Callebaut or 100g dark chocolate chopped)
Sea salt flakes to sprinkle

HOW YOU DO IT
Preheat oven to 180C and line two baking trays with baking paper.
Sift together the sorghum, teff, tapioca, buckwheat, baking powder, Xanthum gum and salt.
Stir through the almond meal.
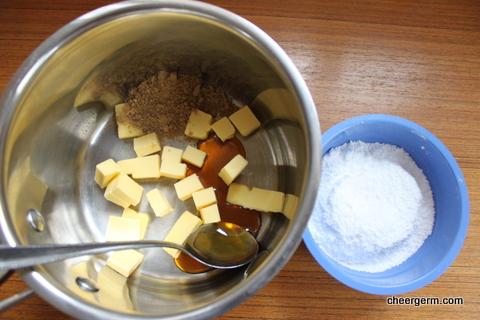
Cream together butter, sugars and vanilla. (I used my KitchenAid mixer.)
Add the egg gradually to the butter mixure. This will sometimes looks like it’s split, (think this is the coconut sugar) but it all comes out right in the wash.
Stir in the flour mixture.
Stir in chocolate chips.
Refrigerate for 20 minutes to make the dough easier to work. (Equally if you don’t have time for this step, omit it. They will just be a bit soft to work with.)
Shape teaspoons of mixture into small balls, place on greased baking trays, allow room for spreading,
Indent each biscuit lightly and sprinkle a few flakes of sea salt on each biscuit.
Cook 8-10 minutes, or until golden brown. Don’t let them get too dark.
Sit on trays for a few minutes before removing to cooling tray.
Makes 20 biscuits.

A cheergerm recipe


Kale, red onion and a splash of verjuice

Dear snotty lady in the overpriced posh food shop many years ago,

Four score and twenty years ago, I came in to your store and asked for some verjuice. I pronounced it exactly as it was spelt. Saying ‘ver’, then ‘juice’ as in ‘orange juice’. You looked down your elongated nose and pronounced in your very best plum in the mouth, lower northshore accent. ‘Surely dear, you mean ver-jus’. (Your pronunciation of the ‘juice’ as in the French pronuciation of the word jus…rhyming with zhoo..like ach-choo but softer).

Yes, you did make me feel ten cm tall (and I am barely taller than that anyway). I slunk away that day, clutching my bottle of unripe grape juice to my slightly wounded pride.

I write today to happily inform you that your elitist attitude didn’t deter me from continuing on my food journey. Some of the foodie jobs I have held did consist of educating others. I truly hope I have never contributed towards making anyone feel as small I as felt, when I left your shop that day.

This big, wide wonderful world of food is a never ending journey of exciting discoveries. Learning new things everyday rocks my very being.

Yours delightfully,

Cheergerm

PS Get stuffed.

KALE AND RED ONION with a splash of verjuice!

WHAT YOU NEED
2 tbl garlic infused olive oil or regular olive oil
1 medium red/Spanish onion, sliced
1 red capsicum, sliced
1/2 tsp salt
1/4 tsp chilli flakes
1 bunch kale washed and chopped into 2-3cm strips
Splash of verjuice or squeeze of lemon

HOW YOU DO IT
In a large frypan, sauté the onion, capsicum, salt and chilli over low to medium heat until they are soft and starting to caramelise, about 15 -20 minutes.
Add the kale, stir and cook for 10 – 15 minutes until it starts to soften.
Add a large splash of verjuice (or lemon) and stir to mix through until the verjuice starts to sizzle.
Season with extra salt and pepper to taste.

This dish is great by itself as a light lunch or dinner. Also as a side to eggs, grilled meats, casseroles, tofu dishes, anything your wee heart desires really.

This is also good with a couple of cloves of crushed garlic, added just before you pop in the kale. Due to the Yak having to talk to people all day, sometimes we have to dial back on the garlic during the week.

A cheergerm recipe

What the heck is verjuice anyhoo?

Made from unripe grapes, it was used in the Middle Ages as a condiment in sauces or to deglaze particular dishes. It is a alternative to vinegar. One of my food heroes, Maggie Beer, was at the forefront of bringing verjuice back into popularity by being the first (her claim) in the world to produce it commercially.

The mild acidity of verjuice is a real bonus. It isn’t as ‘in yo face’ as lemon juice or vinegar and is great in dishes where you want a gentler acidic alternative. You should be able to find it in good delis and in some supermarkets.

I love it as an alternative to vinegar and lemon in dressings, tossed over sautéed veggies and also to deglaze the pan juices of meat, cheese and other veggies dishes.

Please note the beautiful white pottery bowl I popped the kale in. Made by one of my fabulous New Zealand aunts who is a very talented potter.

Verjuice 375mL


Rhubarb rhubarb rhubarb and chocolate pudding, gluten free.

Pretty pink stems of rhubarb inspiration whacked me aside the head the other day at the growers market. (Not figuratively, that would have hurt.) This purchase, coupled with a recent winning deconstructed rhubarb and chocolate tart on MKR (My Kitchen Rules, an Aussie TV cooking competition), had the old brain cogs a whirring. The thinking was…how can I enjoy these flavours without going to a whole lot of bother/trouble/effort and time?

Pudding was the natural answer. (It often is.) A popular dessert in this here household is a rhubarb and gingerbread pudding, so why not look for a similar recipe using chocolate? Naturally, it had to be gluten free.

This cooky person did hold a little bit of hesitancy regarding the marriage of chocolate and rhubarb, but the way the judges on MKR oohed and threw compliments around the room like small boys with a new handball, meant it had to be tried.

My gluten free adaptation has a lot less sugar than the original recipe, the sourness of rhubarb is a fave in our family and we don’t like it too sweet, man. (The butter has been knocked back a bit too.) It does use a food processor so it is super easy and quick.

To really ensure it’s validity, a poll was taken from those who shovelled this pud into their fizzogs for dessert.

The Verdict

Kid 1: ‘It’s nice but not a winning combination, I much prefer rhubarb bumble (crumble.)’
Mr Bagpipes visiting from Big Sky Land: ‘Mmmmm, we can have more of that lass, somewhat down the track.’
The Yak: ‘Yummy, I love it.’
Cheergerm: I like the cray cray (what all the hip young thangs say for ‘crazy’) combo of bitter dark chocolate and slightly sour rhubarb. It’s nuts but it works.

What do 10 years old know anyway?

GLUTEN FREE RHUBARB AND CHOCOLATE PUDDING

WHAT YOU NEED

Fruit

700 g trimmed weight rhubarb (recipe said 600 but I had a big bunch)
Cut into 2cm sizes
50 g coconut sugar (or raw, brown, rapadura)

Sponge

150 g self raising gluten free flour
50 g sorghum flour (or buckwheat or teff flour)
25 g cocoa powder
2 1/2 tsp baking powder
150g butter, room temperature and diced
150 g coconut sugar (raw caster sugar, rapadura)
4 eggs, room temperature
1/2 tsp vanilla bean paste or 1 tsp vanilla extract
50g dark chocolate chips (I used the good stuff baby…Callebaut callet, oh, fancy Belgian chocolate)

WHAT YOU DO

Preheat the oven to 200C/180C fan/gas mark 6.
Cut the rhubarb into 2 – 3 cm lengths and toss with the sugar in a bowl.
Spread evenly over the base of a buttered 30cm/2 litre capacity ovenproof dish (or equivalent size.)
Sift the flours, cocoa powder and baking powder in a separate bowl.
Reserving 2 tablespoons of the sugar, place the butter, eggs, vanilla and sifted mixture into a food processor and cream together. (No food processor? Try beating butter, vanilla and sugar, add eggs gradually then the sifted ingredients.)
Stir in the chocolate chips with a spoon.
Spread the mixture over the rhubarb and sprinkle on the reserved sugar.
Bake for 50 minutes or until a skewer comes out clean. (Remember if you hit a choc chip it will come out looking like it isn’t cooked but it probably is).
This is great hot out of the oven, or warm.
We snarfled it with ice cream but it would be delicious with yoghurt, custard or cream.

A cheergerm adaptation from the daily mail uk website

Pop here for my gluten free rhubarb crumble recipe:

https://cheergerm.wordpress.com/2014/02/03/gluten-free-rhubarb-and-berry-bumble/

Go here for the original non-gluten free rhubarb and chocolate pudding recipe. You could still knock back the sugar and butter quantities as per this recipe and keep the rest the same.

http://www.dailymail.co.uk/home/you/article-1272877/Recipe-Chocolate-rhubarb-sponge-pudding.html

Other websites that you may be interested in:

http://www.callebaut.com

https://au.tv.yahoo.com/my-kitchen-rules/recipe/23057262/deconstructed-chocolate


Heirloom carrot autumn salad

Hello sweet little baby carrots in varying shades of orange and purple….lying there beguilingly, coaxing me into wanting to eat you all up.

Sorry, that may have come across as a tad creepy. These beautiful heirloom carrots, purchased from the Agrestic Grocery in Orange on our recent country sojourn, were just crying out to be paired with the local feta cheese from the Second Mouse Cheese Company. One of my nicknames as a child was Mouse (as well as Electric Rat and E Rattus, charming I know) so how could a mouse not buy this mousy cheese?

The bloke behind the counter informed us the cheese had recently won an award against other fetas at a cheese show (somewhere) and that it was a bit controversial due to the fact that this feta cheese is made of cows milk, instead of sheeps or goats milk. (Rumblings and bumblings, a possible cheesy fisticuffs, oh my!) How did it taste? Tangy, smooth, a wee bit crumbly, salty with background notes of the grass that those sweet cows had chowed down on. It certainly deserved it’s wee gold medal.

This salad is a grand accompaniment to whatever takes your fancy. The carrots are oven roasted in a coating of spices and topped with zesty feta and sweet, lemony, crunchy pomegranate seeds. A beautiful addition to our Easter feast this year.

WHAT YOU NEED
1 bunch baby orange carrots, scrubbed and topped
1 bunch baby purple carrots, scrubbed and topped
1/4 tsp salt
1/2 tsp cumin
1/2 tsp coriander
1/4 tsp allspice
2 tbl olive oil
50 g Feta to garnish
1/2 a pomegranate, seeds scatter over
Extra virgin olive oil to garnish

HOW YOU DO IT
Preheat oven to 180C.
Place carrots on tray lined with foil and toss with with salt, spices and olive oil.
Roast for 20-30 minutes until carrots are tender.
Place on a pretty dish, dob the feta over the dish.
Squeeze and sprinkle the pomegranate seeds over and add a light drizzle of extra virgin olive oil.

We served this salad with grilled haloumi, lamb chops marinated in ras el hanout, and a big plate of roasted kumara and potato.

A cheergerm recipe

What the heck is an heirloom carrot you ask? In brief, heirloom vegetables, fruits and flowers are grown from seeds passed down from generation to generation. Heirloom seeds rely on natural pollination from insects or the wind.

These often unusual looking, multi coloured fruits and vegetables are more likely to be grown by small suppliers and are often organic. By buying or growing heirloom produce, you are helping to support crop biodiversity and assist in helping to keep these older varieties from becoming extinct.

http://secondmousecheeseco.com.au

https://www.facebook.com/theagresticgrocer?fref=ts


Spelt Anzac Biscuits

With Easter a not so distant chocolatey memory, those of us in Australia and New Zealand, turn our attention to Anzac Day this coming Friday. Anzac stands for ‘Australia and New Zealand Army Corp’ and this important national holiday marks the anniversary of the first military action fought by Australian and New Zealand forces in World War I.

Anzac Day has become a day to commemorate those brave soldiers who fought in the battle of Gallipoli in 1915 and also serves as a way of remembering all of our soldiers who lost their lives in World Wars I, II and and all military operations since then.

This brief description fails to convey the intangible ‘spirit of Anzac’ that is ingrained in the psyche of both our nations. It speaks of courage, humility, humour, mateship, understatement and facing unbeatable odds. The humble Anzac biscuit imbues this spirit and is a much loved biscuit, especially on Anzac Day.

A little bit of Anzac bikkie history, according to Alexa Johnston’s ‘Ladies: a Plate’. This biscuit wasn’t actually sent to New Zealand soldiers at Gallipolli as popular legend has it, at least, not under this name. Professor Helen Leach of Otago University researched the history of this biscuit and discovered that is wasn’t named until the year after World War I ended.

My adapted version is a little more like the recipe published in the 1933 Ideal Cookery Book, published by the Plunket Society. A Mrs Wyvern Wilson (strangely my mothers maiden name but no relation, I think!) used a well known formula of wholemeal flour and walnuts without oats. She also used much less sugar than today’s regular recipes. I do use oats and avoid nuts so they can be sent to school. If you have no spelt flour, it is just as good using wholemeal plain flour.

Not overly sweet, these biscuits have caramel undertones. The initial bite is crunchy but morphs into a delicious chewiness as you munch your way through it. The smell of them baking cries ‘childhood’ and ‘eat me now!’

Even though I consider myself somewhat of a pacifist, I am thankful for the sacrifices these brave men made to ensure the freedom of many. There exists a photograph of my maternal grandfather from World War II. He is on a horse, in Egypt. A young, handsome New Zealand soldier version of Lawrence Olivier. My other Pop worked on the railways back in New Zealand as he was unable to enlist due to health reasons.

Both of these men contributed to the war effort, as did all those left at home who assisted in other meaningful and valued ways. How lucky we were that our Pop came back. (Well, otherwise, I wouldn’t be here and that would really suck.)

Lest we forget.

Spelt Anzac biscuits

YOU NEED
1 cup rolled oats
1 cup desiccated coconut
3/4 cup wholemeal spelt flour (or wholemeal plain flour)
2/3 cup coconut sugar (or raw caster sugar, rapadura sugar)
115g butter
2 tbsp golden syrup
1 tsp baking soda
2 tbsp boiling water

WHAT YOU DO
Preheat oven to 180C (350F) and line two baking trays with non-stick baking paper. If you like, pop the trays into the fridge to get them cold, this does help the biscuit (somehow!) but I don’t always do it.
In a large bowl, combine the rolled oats, coconut, flour and sugar.
Place butter and golden syrup in a small saucepan and stir with a wooden spoon until they have melted together.
Put the baking soda in a cup, add the boiling water and mix to dissolve the soda before pouring it into the mixture in the saucepan.
Stir with a wooden spoon then tip it into the dry ingredients and mixture to a crumbly mixture.
Drop heaped teaspoonfuls on the trays, or roll into balls for a more even shape, leaving 3cm of space around each biscuit as they do spread.
Bake for 10-15 minutes until they have spread out and are a dark golden colour. I like to give them 8 minutes then turn the trays around to ensure even baking.
Cool on a rack, Make sure they are fully cooled before storing as this helps to keep them crisp. Store in an airtight container.
Makes 18 biscuits.

A cheergerm adaptation from ‘Ladies, A Plate. Traditional home baking’ by Alexa Johnston


Baked polenta pie and carking it

The following is a recentish conversation with Kid 1. The exact origins of how it began are murky. He may have been talking about living in our house once the Yak and myself had shuffled off this mortal coil.

Me: That can wait until you bury me in the cold hard ground.
Kid 1: Would you rather be buried or incinerated?
Me: Eek! Incinerated!? I hope you mean cremated?
Kid 1: Yes, yes! Actually, I think I will mount your head on the wall, hang on, maybe I will put you in a glass coffin like Snow White!
Me: Ummm…cremation will suffice thanks kiddo.

There is absolutely no way of linking this discussion to our recent ‘early Easter mums birthday family get together.’ Except that if you were to eat like this every day, you probably would shuffle off to an early grave. These events are no mean affairs, everyone contributes joyfully and the table groans from the weight of a feast fit for a King. That day we began with varying cheeses and crackers served with a nutty, rich fruit paste. Next was roast lamb, cauliflower cheese, potato bake, polenta pie and a green salad. To finish, a fruit platter the size of a small baby, lemon meringue cheesecake (to die for) and a decadent chocolate cake (both gluten free).

This vegetarian polenta pie is a great ‘big group gathering dish’, as it makes a motza. It’s an adaptation of a recipe from Two Peas and a Pod, a delightful food blog with tonnes of varied recipes. It’s a bit like a lasagna, without the pasta and white sauce. Polenta is cornmeal that is boiled into a hearty porridge (sounds scrumptious?) then eaten directly or baked, fried or grilled. It is gluten free so it’s a great ingredient for Silly Yaks.

(Ps whenever I do ‘pass onto the next realm’, can someone (anyone) please ensure I don’t end up hung ‘moose like’ on the wall or spend eternity on display in a glass box?)

Baked vegetarian polenta pie

YOU NEED
4 tbl olive oil
1 large onion, diced
1 medium red pepper, diced
1 large eggplant, peeled and diced into 3cm dice
2 medium zuchinni, diced 2 cm dice
200g mushrooms, roughly chopped
2 cloves garlic, crushed
1/4 tsp dried chilli flakes (leave out if you choose to)
1/2 tsp oregano
1/4 tsp fennel seeds
2 tins (400g) crushed/diced tomatoes
1 cup water
1/2 cup fresh basil leaves roughly chopped
1 cup grated Parmesan
2 cups shredded/grated mozarella

HOW YOU DO IT
Preheat oven to 180C and lightly oil a 3 litre baking dish.

The sauce
Sauté onion and red pepper in olive oil for a few minutes.
Add eggplant, cook stirring for 2 minutes, add the zuchinni, cook 3 minutes.
Add the mushrooms, chilli, fennel, garlic and oregano. Stir for a minute or two.
Add tomato, water and season with salt and pepper.
Cook for 30-40 minutes until vegetables are tender and sauce is reduced and silky. Remove from heat and stir in the basil.

Polenta
1.5 cups instant polenta
4.5 cups milk
1.5 tbl butter
1 tsp sugar
1/2 tsp salt
Black pepper

Place the milk, butter, sugar, salt and a few grinds of black pepper into a large saucepan and bring to a light simmer.
Using a whisk, slowly add the polenta to the pot, whisking constantly. When the polenta starts to thicken swap the whisk for a spoon.
Once the polenta pulls away from the pot, add half of the Parmesan cheese and stir to combine. Remove from the heat.

Assembling the pie
Spread the polenta into the baking dish and sprinkle with the remaining Parmesan cheese.
Pour the tomato vegetable sauce over the polenta and top with the mozarella.
Bake in a moderate oven for 30 to 35 minutes until golden brown and bubbly.
Rest for ten minutes before cutting into squares and serving.

It goes beautifully with a crisp, green salad and leftovers of this dish are fantastic the next day.

Adapted from Two Peas in a Pod. Go here for the original recipe:
http://www.twopeasandtheirpod.com/baked-polenta-pie/


Hot cross buns, a love letter to mum

Growing up, our mum baked bread. The aromas of rising yeast and mouthwatering smells of fresh loaves, speak to me of childhood. The warm crust slathered with butter and homemade jam was the best bit. These memories transport me back to our paddock surrounded ‘Billenya’ house in Holloway Road.

Of course, the bread was mostly wholemeal. My plea of ‘Mum, can’t I just have store bought white bread?’, must have driven her nuts. Rarely do my own sproglets have white bread. My, we really do turn into our mothers.

Mum also made her own hot cross buns. Having children of my own, helped me to truly appreciate what our own mother did for us. Not everyone is lucky enough to have mothers as emotionally and physically present as she was. (Even when things were less than idyllic.) As time has passed, some friends have sadly lost their mums. I am feeling very thankful for mum today.

Apart from pizza, yeast based products have never been my forte. That is about to change. On this slightly cloudy and drizzly day, with Easter on the horizon, something in me longs for the aromas of mums kitchen. These hot cross buns are a homage to her. In every knead of the dough, I pour in gratitude for all of her hard work, commitment and for always feeding her four girls so well and healthily.

No matter how much we may have moaned about it.

Hot cross buns

Light, airy with a lovely warmth from the spices, these were absolutely delicious, scoffed down with a cup of tea. Ambrosia.

I have slightly adapted an SBS website recipe by halving it, adding a touch of spelt flour and using less fruit. I have also provided the full recipe quantities if you would like to make about 20 buns. (See after the recipe.) I made 9 out of this quantity.

I only added sultanas as the kidlets don’t like a lot of dried fruit, but feel free to add some chopped apricots and currants if you like. (Maybe 50g or so.) Keep in mind the 1 hour and 45 minutes resting time.

YOU NEED
200 ml milk
60g butter
2 cups bread (high protein ) flour
1/2 cup wholemeal spelt flour
40g raw caster sugar (or regular)
1 x 7g yeast sachet
120g sultanas
2 tsps cinnamon
1 tsp mixed spice
1/2 tsp salt
Zest one lemon
1/2 beaten egg

Cross paste (this makes too much for 9, its the full amount for 20 buns)
1/2 cup plain flour
75 ml sunflower oil (I used rice bran oil)
65ml water

Spice glaze
1/4 tsp mixed spice
70g raw caster sugar
50ml water

HOW YOU DO IT
Place the milk and butter in a small saucepan over low to medium heat and stir until combined. Let cool slightly.
Place the sugar, yeast, flours, sultanas, cinnamon, mixed spice, salt and lemon zest into the bowl of an electric mixer fitted with a dough hook. Stir to combine.
Stir in the egg, then the milk mixture.
Knead for 9 minutes or until the mixture is smooth and elastic.
Turn the dough into an oiled bowl, cover with clingfilm and please in a warm and draught free spot for 1 hour or until doubled in size. (This process is called ‘proving’.)
Knock back the dough and divide into 9 or 10 equal pieces. Knead each piece for 1 minute until it is a smooth ball.
Place in rows on an oven tray lined with baking paper. Cover with a tea towel and place in a warm, draught free spot for 45 minutes or until dough doubles in size.

Preheat oven to 220C (conventional, 200C fan forced)
To make paste for the cross, place flour, oil and water in a bowl and stir to a smooth paste. Place into a piping bag with a small nozzle (or a small ziplock plastic bag with the tip cut off) and pipe a cross shape onto each dough ball.
Bake for 10 minutes at 220C (conventional, or 200C fan forced) for 10 minutes, reduce heat to 200C (or 180C fan forced) and bake for a further 9 minutes or until golden.

Make spice glaze while buns are baking, put mixed spice, sugar and water in a small saucepan over medium heat and bring to a simmer, dissolving sugar. Remove from heat and cool slightly.
Brush buns generously with glaze. Serve warm or at room temperature with butter.

A tip from one of my lovely sissies: If your house is draughty, try proving in the microwave! (Just don’t turn it on).

To make 20 buns:
400 ml milk, 120g butter, 4 cups bread (high protein ) flour, 1 cup wholemeal spelt flour, 75g raw caster sugar (or regular), 2 x 7g yeast sachet, 240g sultannas, 3 1/2 tsps cinnamon, 1 tsp mixed spice, 1 tsp salt, zest one lemon, 1 beaten egg.
The paste recipe is the same, for the glaze, use 1/2 tsp mixed spice and 125 g caster sugar.

Go here for the original recipe: http://www.sbs.com.au/food/recipes/hot-cross-buns-0


Get stuffed eggplant

‘Get stuffed!’ Growing up in a certain era, as one did, this was a charming way you could tell someone who was irritating you, to get lost. Other equally lovely Aussie vernacular of the day included: ‘Get knicked!’, ‘Rack off!’ and ‘Bugger off!’.

What’s not to love about a stuffed vegetable? This is a rhetorical question. If you dislike or hate them, well, you know what you can do. Get stuffing a vegetable, you may change your mind!

Get stuffed eggplant

YOU NEED
2 cups cooked quinoa (see quinoa notes below)
2 medium eggplants
2tbl olive oil
1/2 red onion
1/2 small red capsicum
1 garlic clove, crushed
1/4 tsp dried chilli flakes
1/2 tin (200g) chopped tomatoes
1 tsp dried basil
2 tbl chopped parsley
1/3 cup grated Parmesan
salt and pepper

HOW YOU DO IT
Preheat oven to 180C.
Cut the eggplants in half lengthways, oil the flesh and place them flesh side down on a lined baking tray. Bake for 40 min at 180C or until they are tender.
Scoop out the flesh of the eggplant, let it drain for five minutes in a colander to get rid of excess water.
Chop the eggplant flesh. Place aside.
Sauté the onion and red pepper for a few minutes, until onion starts to soften.
Add the garlic and chilli flakes, cook for one minute.
Add the eggplant, cook for 2-3 minutes.
Add tomato and basil, cook for 5 minutes.
Stir in the cooked quinoa and chopped parsley.
Season to taste with salt and pepper.
Scoop filling back into eggplant shells and top with grated Parmesan
Cook in a 180C oven for 30 minutes until the tops are golden brown.
Serve with a salad.

Other stuffable veggies include red capsicum (peppers), zuchinni and mushrooms. This is a great way to use up leftover quinoa, it is just as delish using cooked brown rice or cooked buckwheat.

A cheergerm recipe

Quinoa: As you all know, it’s very hip and cool so I won’t crap on about it too much. The Incan’s called it the ‘mother seed’ and considered it to be sacred. It is being touted as a ‘superfood’ these days. Really, we are just walking in the footsteps of a long gone ancient race who used it as their staple food source for nigh on 5000 years. (Ain’t nothing new people.)

Pronounced ‘keen-wah’, this gluten free ‘grain’ is actually not a grain but the seed of a vegetable related to spinach. It is high in protein and is a complex carbohydrate with a low glycemic index. I actually HATED it when I first tried it but since then, have actually grown to enjoy chowing down on it, in various forms. Of course, it’s great for the Yak.

In it’s natural state, quinoa is coated with something called ‘saponin’ which is actually toxic and makes the quinoa taste bitter. Most commercial brands have been washed before packaging but it is a good idea to rinse your quinoa before use and like any food, moderation is the key. (Ie don’t chow down on it every day.)

I love using a tri-coloured blend of quinoa but use whatever you have. Cooking instructions should be on the packet but it is usually 1 part quinoa to 2 parts liquid. This will yield about 3-4 cups cooked quinoa, more than enough for this recipe and for other uses. I like to use a part stock/part water blend to add a bit of flavour to the quinoa.

Yes, I did crap on for too long about ‘keen-wah’….sorry….

IMG_8252-001

IMG_8286

IMG_8299

IMG_8304


Green beans in olive oil (Loubyeh bi Zaht)

A standard purchase from our local Hornsby Growers Market is a bag of green beans. Sometimes they are added to a curry, sometimes they are blanched and tossed together with fennel and orange to make a vibrant salad. Sometimes I will just stare at them for hours at a time, pondering the true beauty of their verdant, glossy, bean-like attributes. But mostly likely, they will end up in this dish.

I like to fancy that I am a teeny part Lebanese, not through blood but through osmosis. A dear friend (who’s hubby is of Lebanese origin) gave me Abla Amad’s cookbook, ‘The Lebanese Kitchen’ about 12 years years ago. Abla started her restaurant in 1979. It soon became a Melbourne dining institution and is still serving simple, traditional style Lebanese food today. Having never eaten there, it is definitely on my list of things to do. Anyhoo, it has been a pleasure to trawl through this book and experiment with the variety of tasty dishes that grace the pages.

My next Middle Eastern connection was making friends with yet another amazing chick through mothers group. Our sons were born around the same time and she is also of Lebanese heritage. The tip of caramelising the onions for this dish came from her mum. (Just saying, but this good friend has yet to cook me a Lebanese feast…..I am still waiting.)

The Yak and myself love this dish served with baked or roasted potatoes and veggie burgers. It’s equally good with kafta (lamb mince patties), grilled chicken or haloumi. Other great pairings include quinoa dishes, stuffed eggplants or capsciums and flatbreads. It is equally yummy served hot, cold or warm.

Mopping up the velvety sauce at the end with whatever carbohydrate you fancy is the best bit.

Green beans in olive oil (Loubyeh bi Zayt)

YOU NEED
1/2 cup olive oil
1 large onion, finely diced
500g green beans, top and tailed and cut into 2cm length
1 1/2 tsps ground allspice
1 tin (400g) diced tomatoes
1 tsp salt
1/4 tsp ground black pepper

HOW YOU DO IT
Heat oil in a saucepan, add onion and sauté the onions until they are a dark golden brown. Cook over medium heat, this takes about 10-15 minutes.
Add beans and stir, then add allspice and cook for 1 minute, stirring constantly.
Add tomato, salt and pepper.
Replace lid and cook for 30 minutes over low heat, cooking until beans are tender. (I usually take the lid off for the last 10 minutes). I taste for seasoning about half way through, you may need a touch more salt.

You can make this dish without tomatoes but I never have. I love allspice but if you are unsure, try 1 teaspoon to start with. Seriously folks, take the time to caramelise the onions. It adds a depth of flavour that was missing when I used to sauté the onions lightly.

Adapted from The Lebanese Kitchen by Abla Amad


Ginger cat crunch

Kid 2: In the olden days did they use to eat ginger cats?
Me: Ummm no, dear, why?
Kid 2: Oh, what about when they needed ginger?
Me: Well, ummm, actually, ginger is from a plant.

His relief is palpable. For those of you who were also concerned as to the true origin of ginger, you can all breathe a sigh of relief.

The lads adore this Ginger Crunch. A crisp and crunchy biscuity slice topped off with a spicy thin layer of icing. I have made two small changes to a recipe from a beloved cookbook that the mothership once gave me. The book, ‘Ladies: A Plate’ is a gorgeous conglomeration of classic New Zealand baking recipes.

Ginger Cat Crunch

WHAT YOU NEED
The Base
80g coconut sugar (or raw caster sugar, rapadura)
200g wholemeal flour
1 tsp ground ginger
1/2 tsp baking powder
115 g butter

Icing
55g butter
1 tbsp golden syrup
2 tsp ground ginger
55 g icing sugar, sifted

HOW YOU DO IT
Base
Preheat oven to 180C and line a shallow 30 x 21 cm tin with baking paper.
Put all the dry ingredients into a food processor and pulse briefly to combine them. Drop in the butter and process just until the mixture forms fine crumbs. (You can do all this by hand, rubbing the butter into the flour but this is easier!)
Pour the crumbs into the tin, spread them out evenly and press down firmly using your fingers to compact them slightly. They will stick together properly as they bake.
Bake for 20 – 25 minutes until the mixture is a pale golden brown.

Icing
While the base is cooking, put the butter, golden syrup and ginger into a saucepan and heat gently, stirring. When they are melted and combined, tip in the icing sugar mixture and mix to a fairly runny consistency.
Remove the base from the oven and immediately pour on the icing. Spread it evenly over the surface with a spatula.
Cut the mixture into fingers or squares, leave to cool then break it apart along the cuts and store in an airtight container.
Makes 12 squares or about 16-20 fingers.

Note, to make it really crunchy you can make it thinner than I did. My mixture didn’t quite fill the whole pan so the slice was more, ummm, slicey than super crunchy.

Recipe slightly adapted from ‘Ladies: A Plate. Traditional home baking.’ By Alexa Johnston

Please note, no ginger cats were harmed in this recipe