Vegetarian Tacos and Derriere’s

Not too long ago, Kid 2 sent me his first text from his fathers mobile. I read it in trembling mumma anticipation, what did it say? ‘Bum’. Yup, that’s what it said. Ahh the eloquence of 6 year old boys.

That event has no bearing whatsoever on this recipe post. Unless you can connect the poor trampled heart of a mum, to the cooking of two different batches of bean taco mix because the little twerps darlings can’t handle any chilli. Cant handle the heat? Then get out of the kitchen lads, hang about, it’s only me in here anyway…

Anytime I ask Kid 1 what he would like for dinner, tacos is the standard reply. Believe me, finding a meal that everyone will eat in this house can be a nightmare challenge. It’s a great sharing meal where we get to sit down together and share our deepest thoughts. (Past topics have included who would win in a battle between a giant man eating crocodile versus an anaconda, the various ways to break wind and why rolling your brother in a doona and sitting on him isn’t such a great idea.)

It’s not really difficult, just split the mixture into two before adding the requisite spices. (Mild for the kids and spicy for the grown ups.) I love to ‘cheat’ and use Herbies Mexican spice blend (this is not an advertisement I assure you, I just love them!) There is also a quick ‘make your own spice blend’ in the recipe below.

VEGETARIAN TACO’S FOR GROWN-UPS AND KIDLETS

YOU NEED
2 tbl rice bran or olive oil
1 large onion, diced
1 small red pepper, diced
1 medium zuchinni, diced
300g mushrooms, diced
2 tins 420g red kidney beans, rinsed and drained
1 ear of corn, kernels cut off (or 1 cup frozen corn)
1 tin chopped tomatoes
1/2 tsp dried oregano
1/2 tsp cumin
1 tbl Herbies Mexican spices blend or make your own by combining: 1/2 tsp red chilli powder, 1/2 tsp smoked paprika, 1/2 tsp cumin, 1/2 tsp oregano, 1/2 tsp salt
1 lime or lemon
2 tbl chopped fresh coriander
Taco shells, gluten free. (The Yak and Cheergerm can down 4-5 each of these bad boys, the kids 2 to 3 each) cook to packet instructions just before serving.

Serve with
Grated cheese (as much as you like)
1 diced tomato
1/2 shredded lettuce

Sauté onions and red peppers in oil until translucent in medium saucepan.
Add zucchini, cook for 2-3 minutes
Add mushrooms, cook 2-3 minutes
Add beans and corn. Combine then remove about 1/3 to just under half of the mixture and place in smaller saucepan.
Add oregano and cumin to the smaller saucepan cook for 2 mins, then add 1/3 of the tinned tomato and add 1/2 cup water.
In the big pot, add the spicy spices, cook 2 mins, add remaining tinned tomato and 3/4 cup water.
Cook both sauces over low to medium heat until they have reduced and thickened, about 20 mins.
Heat the taco shells in the oven according to packet instructions.
Add a generous squeeze of lime or lemon juice to both pots just before serving.
Stir the coriander through the ‘grown-up’ version and the kidlet version if you so fancy (my kids won’t eat fresh coriander….)
Serve with taco shells, tomatoes, grated cheese and shredded lettuce.
We usually have some leftovers for the next day. Yum.

A Cheergerm recipe

In our house there is a division as to whether the cheese goes into the taco shell before the bean mix or last, after the bean mix. Anyone with an ounce of common sense knows it’s last. Right?


You say frittata I say…

You say tomato I say tomato
I eat potato you eat potato
Tomato tomato potato potato
Let’s call the whole thing off

Never could resist a Gershwin tune. There ain’t no denying that sometimes, differences in relationships, can leave you feeling a little bit like ‘let’s call the whole thing off’.

Particularly when you are married to (and cooking for) a coeliac vegetarian.

Some nights, dinner feels, a little, well…….difficult. So, a fridge scrounge is in order.

Some say frittata, some say Spanish omelette, some say …..chuck whatever bloody vegetables you can find into a frypan and turn them into a delicious dinner for for a Silly Yak and tired Cheergerm.

All you gotta do is let your fridge, imagination and taste buds dictate what you pop into your fritatta. (Within reason of course.) Try red onion, zuchinni and asparagus. Sometimes, I will throw in a tablespoon of either smoked or sweet paprika into the veggies and cook the mixture out for a minute before I add the eggs.

Delectable herb combinations include mint with peas and zuchinni, coriander and chilli for a slight Asian twist and if you are feeling extravagant (and are not a vegetarian) throw in a wee bit of smoked salmon and finely chopped fresh dill in with the beaten egg mixture.

ZUCHINNI, POTATO AND BASIL FRITTATA

1 onion, sliced
1 small red capsicum, diced into 1 cm dice
2 small Desiree potatoes. (Or 1 large), cubed and par cooked until just tender.
2 small zuchinini cubed
1/2 tsp red chilli flakes
Salt , pepper
Garlic oil and olive oil, 2 tbls each
1/2 cup frozen peas
6 eggs
3 tbls milk
3 tbl grated Parmesan
3 tbls basil, chopped

Preheat oven to 170 degrees Celsius.
Using an ovenproof frypan, sauté onion and red capsicum in the oils for a few minutes. Add chilli flakes and cook for 1 minute.
Add zuchinini, sauté on medium heat for 5 mins.
Add potato and cook for a further few minutes until they start to turn golden.
Beat eggs and milk until combined.
Add Parmesan, black pepper, a pinch of sea salt and basil. Stir gently.
Add peas to the vegetable mixture. Stir to combine.
Add the egg mixture and quickly stir.
Cook the frittata for a few minutes without further stirring then transfer to the oven for 30 mins until golden and puffy.
Serve with a slice of your favourite buttered toast or crackers.

Depending on your appetite, this feeds two hungry people for dinner or if you ain’t so peckish there may be some leftovers for the next day. (Awesome!)


This little figgy went to market

Oh summer, summer. How do I love thee? Let me count the fruits….nectarines, peaches, mangoes, strawberries and more rarely, fresh figs.

These figs were procured from our local Growers Market. (Hard to reign yourself in whilst perusing all the fantastic produce that abounds). They sat in the fridge, shouting things like ‘eat us now’, and ‘stuff us with Gorgonzola, wrap in prosciutto and bake us!’ Little did they know, I had other plans for those plump little purple beauties.

One of my fave lazy dinner party desserts perchances to be baked figs. Peaches and nectarines are also delicious when given this same treatment.

It’s a lovely light ending to a dinner party and one that can be prepared earlier in the day. Just refrigerate until you are ready to bake.

When it comes to the liqueur, go wild. My usual choice is a liqueur muscat or tokay. In lieu of that tonight, I chose a cheeky Smoked Malt Whisky Tawny. An amazing port made in the same barrel that once housed a famous malt whiskey. If you choose to go alcohol free, you can drizzle some freshly squeezed orange juice over the figs.

No dinner party guests in the Cheergerm and Yak household tonight, just a greedy mama and papa chowing down on a Saturday night dessert that feels slightly decadent. There was a slight ‘peatyness’ from the port which went beautifully with the natural woody sweetness of the figs.

Now, if I was a food stylist or something more than a very amateur photographer, I am sure I could have made the final baked fig dish look gorgeous. All I can say is, they taste bloody beautiful. In real life they look earthy and delicious, despite the average photo below that scarily resembles something from John Wyndham’s The Triffids.

BAKED FIGGY FIGS

8 – 10 fresh figs (usually 4 – 5 figs per person)
50g butter
1-2 tsps coconut sugar or brown sugar
A dram of your fave liqueur

Place enough foil on a tray to hold and enclose the figs.
Slice a cross vertically into each fig without cutting through the whole fig.
Divide the butter into small pieces, pop a piece into the cut in each fig.
Sprinkle the sugar on top of each fig.
Pour a wee bit of liqueur over each fig, not too much, just a dribble.
Close the foil into a parcel around the figs.
Bake at 180C for 20 minutes until the figs are soft and starting to collapse.
Serve the figs, sharing out any leftover juices over the figs.
I served this with Greek breakfast yoghurt, it’s equally delish with honeyed marscarpone or double cream.

Note: don’t ever leave foil parcels on an induction cooking top when you are using it. Just saying is all…..


Something yummy for a post school tummy

My memories of growing up in the outskirts of Melbourne invariably included weather extremes. 40 degree hot days that turned your eyeballs inside out and icy cold wind that made you question which hemisphere you actually lived in.

No matter what the weather, one consistent memory was coming home to Mum’s pikelets. Light, airy and always delicious.

These are not those pikelets.

No matter what I do, whenever I tried to replicate her recipe, they never quite tasted the same. Only bitterness and self loathing ensued.

A few months ago, whilst perusing the internet, I found a neat wee recipe on a blog called Cupcakes and Cauldrons. I have tinkered with it a tad (yes, I am on a buckwheat spree) and these pikelets now pop up on the afternoon tea menu at least once a week. The lads scoff them down every time they are placed before them. A tad of butter and a smear of jam and all is once again, right with the world.

The ulimate praise from The Kids has been ‘They are almost as good as Nana’s.’

I can live with that.

WHOLEMEAL AND BUCKWHEAT PIKELETS

YOU NEED
1 1/4 cup wholemeal flour
3/4 cup buckwheat flour
3 tsps baking powder
1/4 tsp salt
3/4 cup buttermilk
1/4 cup milk
2 eggs
1 tbl coconut sugar (or raw, rapadura, caster)
2 tbl butter, melted

METHOD
Beat eggs, buttermilk and milk.
Sift flours, sugar, baking powder and salt.
Make a well in the middle of the flour and gradually add the milk mixture. (I sometimes use an electric hand beater to do this.)
Add the melted butter. (If the mixture is a little stiff, add a tad more milk.)
Let the batter rest for 30 minutes to an hour.
Heat a non-stick pan, grease lightly.
Place spoonfuls of the batter on the pan. When bubbles begin to form on the surface, turn over and cook on the other side.

Go here for the original recipe: http://cauldronsandcupcakes.com/2012/09/22/nanas-pikelet-recipe-and-a-few-good-yarns/


Gluten free lime slice and what the heck is teff flour?

MORNING
It’s Saturday morning, I am lying abed…reading, sipping tea and pondering the real meaning of life. (In other words, procrastinating the inevitable getting up and starting the day.) I have a vanilla soy candle burning and all is quiet and still….until…two small boys come bounding into the bedroom like Labrador puppies. Arms and legs flailing, falling over one another. ‘What’s that delicious smell?’ they cry. ‘We can smell it through out the whole house,’ ‘Is it something good to eat?’

‘Fraid not me laddies. It’s just the delightful scent of the candle you gave me for Chrissy, smells great hey?’ Disappointment radiates from every inch of their wiry beings. The sproglets gallop around the room once or twice. Any sadness at the lack of good things to eat is somewhat tempered by Kid 1 snarfling the TV remotes and taking off downstairs, I presume to watch something enlightening and educational on the Cartoon Network. 

Thoughts of this day now encroach. Yes, vanilla pervades my senses but I remember the big bag of luminous limes in the fridge. Lime slice with a hint of vanilla methinks. Gluten free, with buckwheat, teff flour…butter, now you are talking.

WHAT THE HECK IS TEFF FLOUR?
A brief ramble regarding teff flour, if I may. This gluten free ancient grain is teeny tiny but chock full of nutrition. Native to Ethiopia, it is believed that teff originated between 4000 BC and 1000 BC. I have used brown teff flour which is higher in protein than wheat and has a high concentration of nutrients such as calcium, thiamin and iron. Research has shown that the iron from teff is easily absorbed into the body. It is high in fibre and can help control blood sugar levels.

The only downer is that here in Australia, it hasn’t been easy to get. My last bag was Bob’s Red Mill Teff Flour from a local health food store and they have been out of stock for a few months now. Only a tiny bit remains, so this great hunter will soon set off once again to track down the teff. Will keep you posted on it’s whereabouts.

Overridingly this slice is all about the lime, with a touch of vanilla. (This post may give a small insight into the intricate, um, cough, workings of a Cheergerm mind.) The Yak says it has a caramel flavour, possibly from the coconut sugar. The slice is a little crunchy on the outer edge but more tender in the middle. Being a citrus lover, it’s my cup of tea. And that is exactly how it was enjoyed by The Yak and myself, alongside a cup of good, strong brew.

YOU NEED
Slice Base
150g buckwheat flour
50 g teff flour (or brown rice flour, millet flour or plain GF flour)
1 tsp baking powder
100g coconut sugar (feel free to use rapadura or raw caster sugar)
115 g butter
1 heaped tbl lime zest (3 small limes lost their zest to aid this recipe)
1/2 tsp vanilla paste

Icing
40 g butter
2 tbl lime juice
60g pure icing sugar, sifted

METHOD
Preheat the oven to 180 C and line a shallow 30cm x 21cm tin with baking paper.
Put the dry ingredients into a food processor and pulse briefly to combine.
Pop in the butter, lime zest and vanilla paste, process until the mixture resembles fine sand.
Tip the mixture into the tin, spreading out evenly and pressing down firmly with your fingers. It may seem crumbly but don’t freak out. It will all stick together once it’s baked.
Bake for 20-25 minutes until the mixture is golden brown.
Whilst the slice is in the oven, put the butter and lime juice into a saucepan and stir over low heat. Once the mixture is melted, add the icing sugar and mix. It will be a runny consistency.
When the base is removed from the oven, pour the icing over and spread it out evenly. Let it sit for a few minutes.
Cut the mixture into squares and leave to cool. You can break it apart once it has cooled completely and store in an airtight container. Makes 12 largish square pieces.

A Cheergerm recipe


Gluten free rhubarb and berry bumble

Kid 1 is a crumble maniac, it all started at an early age. Back when he was a wee lad, he was unable to say ‘crumble’, instead it came out as ‘bumble’. His fave combo’s are rhubarb and apple or rhubarb and pear. However, he won’t say nay to the odd berry mix either. Usually I make two different crumble topping mixtures. One containing oats for Kid 1 and myself and a gluten free topping for the Yak.

Gluten free bumble toppings in the past have contained various combinations of buckwheat flour, brown rice flour, tapioca flour, almond meal, quinoa flour (gag) and teff flour (yum but hard to get.) It’s always a bit of ‘let’s see what happens this time’ scenario.

Anyhoo, today was a day of ‘I can’t be, ummmm…bothered with two different toppings’. So I went hardcore on just the one gluten free bumble. I was curious to see if Kid 1 missed the texture that the oats provide.

Turned out to be a happy experiment, yes indeedy. This tart rhubarb and raspberry bumble, combined with the earthy buckwheat and almond flours, the crunch of the nuts and the warmth of the spices is bloody delicious.

The only sound heard from Kid 1’s direction was that of a 9 year old boy eating with his mouth open. Chomp, chomp, gobble, swallow. ‘More please Mum?’. This mean old mumma said ‘No sorry, not tonight’. The kid replied with ‘Go on, its not gluten free, so only you and I can eat it anyway.’

Oh, you poor misinformed and cheated wee bairn. Mission accomplished, sorry kiddo but it is GF and the Yak will probably fight you to the death for the leftovers.

We take our bumble seriously in this household.

YOU NEED

1 bunch rhubarb, chopped into 2cm lengths
2 tbls coconut sugar
1/4 tsp vanilla bean paste
1 cup raspberries (frozen or fresh, blueberries are yummy too)
Crumble topping:
100g buckwheat flour
50g almond meal/flour
60g cold butter, chopped into small pieces
1/3 cup coconut sugar
1 tsp baking powder
1 tsp cinnamon
1/2 tsp ginger
1/2 tsp mixed spice
1/4 cup walnuts or pecans, finely chopped

METHOD
Preheat the oven to 180 C.
Place the rhubarb, coconut sugar and vanilla paste in a medium size saucepan, add a few splashes of water. Cook on low to medium heat for about 20 minutes, until the rhubarb starts to collapse. Stir regularly to avoid the rhubarb sticking. Add a bit more water if needed.
Once the rhubarb is cooked, stir in the raspberries and place into a buttered 1 litre ovenproof dish.
Mix the buckwheat flour and almond meal in a medium size bowl.
Rub the butter through the flour mixture with your fingertips until the mixture resembles pea sized chunks.
Mix the coconut sugar, baking powder, spices and walnuts in a small bowl.
Add the sugar mixture to the flour mixture, stir and sprinkle over the fruit.
Bake for 25-30 minutes until golden brown.
Serve with a big dollop of yoghurt, ice-cream or cream. This also makes a great breakfast dish served with yoghurt.

An original Cheergerm recipe


Nuts about coconut flour cupcakes

I’ve got a luvverly bunch of coconuts…..ahh, coconut flour. A great gluten free flour and a healthy alternative to wheat flour for those of you who aren’t in the GF Camp. (Not a camp many would visit willingly to begin with. But it’s better than the alternative.)

Coconut flour comes from the dried meat of coconuts, which is then ground into flour. Health benefits abound for this super little flour. To list a few:
Gluten free (thanks said the Yak).
High in fibre, gives you that full feeling for longer and aids digestion. Due to its fibrous nature, coconut flour does suck up a lot of liquid so it behaves quite differently to other flours you may have used.
High in protein. (Gotta love that).
High in manganese (is that a dog breed?) and lauric acid. Whoopee you cry! In cheergerm terms, these help to promote a healthy immune system and assist in thyroid function.

These little light and bouncy chocolate cupcakes are one of my regular ‘go to’ recipes. Snarfled from a fab blog called Elana’s Pantry, they are great for little and big kids lunchboxes and are also nut free. They are not overly sweet, yet Kid 1 and 2 still devour them like the bottomless pits they are.

Before you go to the recipe, here are a few cheergerm adjustments:
For this batch I used natural cocoa powder not cacao powder. (The difference between the two is too detailed to go into here.) A good quality Dutch cocoa will also be fine.
I used organic raw honey instead of agave in this batch, maple syrup works as well.
I always double this recipe to make 12 cupcakes.
Added 1/4 tsp vanilla bean paste.
I had no grapeseed oil so I substituted rice bran oil and have also used macadamia nut oil in the past. (I don’t use nut oil when sending them to school).
Sometimes, to add a bit of mummy kiddy excitement, I add a large handful of dark chocolate chips.
I have iced/frosted them for special occasions as well.

Go here for this neat wee recipe:

Chocolate Cupcakes


A spot of holiday reading

A little while ago I purchased the book Kitchen Table Memoirs. Only now, in the quiet aftermath of Christmas have I been able to sit and finally read it. The last two days have found me scurrying away to quiet corners (it would be easier to find a unicorn in this household) to voraciously devour this wee gem of a book. Not only is it a fine collection of Aussie writers personal kitchen table memories, but every book purchased helps Foodbank’s fight to end hunger.

These stories made me both giggle and guffaw out loud. They touched my heart and tantalised my taste buds. After finishing and experiencing the ‘great book post blues’, I plonk myself down at our own kitchen table. Hands placed atop, I look good and hard at an object that I have always loved but maybe have taken for granted.

It is a solid piece of wooden furniture that seats 6-8 comfortably but can magically accommodate more when required. Already an antique when my parents purchased it back in the 70’s, it is made of Western Australian hardwood and has stood the test of time.

Our childhood memories are engrained onto its surface. Hours of art and craft, happy times, the darker times and the varying foods that our adventurous mumma placed upon there. Back then, Mum was a member of a health food co-op and as such, our table saw homemade bread, yoghurt made from scratch, wholemeal pizza bases and other hippy based Moosewood style dishes. (And no, I did not eat all of it, crying in disgust ‘I just want normal shop bought white bread like other kids get!’).

At other times, more exotic dishes were laid to rest on the glitter speckled wood. Italian style cannelloni made with paper thin crepes and Indian style green beans come foremost to mind. I remember the cannelloni being made for those crazy 70’s dinner parties, replete with bearded men and women in flowing embroidered blouses. I am sure the table saw it’s fair share of red wine stains from wine that my father and his hairy cohorts had bottled themselves.

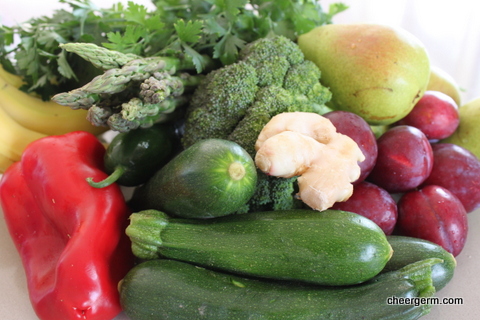
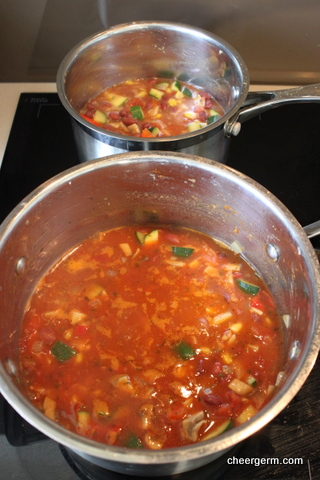
And always the more steady food of Mum’s upbringing. Irish stews, scones, vegetable soups and many delicious baked slices such as Belgian slice and the super yummy Weetbix based Scott’s Farewell Slice. Being an orchadist’s daughter, there was always an abundance of fresh fruit and veg. An hereditary condition methinks.

Our ma has always been emphatic that she was not a great cook but her 4 daughters beg to differ and I am sure if the table could speak, it would agree with us.

The table is now regularly laden with our lads Lego, various game pieces, homework, colouring pencils and paper. And of course the many meals lovingly (and at times begrudgingly) placed upon it. The patina of our life is now being written into it’s beloved wooden surface.

It speaks of the funny (?) time I arrived home after a weekend away and how The Yak (with a loving heart) had sanded it down and re-stained it a hideous yellowy varnish that shone like a bloody beacon in the night. Tears did fall that day.

Our extended family now gather around it. We are not little girls anymore but grown women with careers, families, joys and troubles of our own. This table joins us, even when we are disconnected.

It speaks of friends who have joined us and the many words and feelings that have sunk into this receptacle of our lives.

This table reminds me that we are not only what we eat. We are also where we eat and who we choose to eat with. Of the importance that food plays in the fabric of our daily lives, not only as sustenance but in the making of memories. After reading Kitchen Table Memoirs, I don’t think I shall ever take our table for granted again.

For further details on this wonderful book and on Foodbank, go here:

http://www.foodbank.org.au/2013/04/11/kitchen-table-memoirs/


Frozen cheesecake anyone?

Two weeks ago, whilst searching for a gluten free cheesecake recipe, I came across this little beauty on a great blog, The Gluten Free Scallywag. Now, being immensely fond of the word scallywag, it just had to be tried.

Too much citrus is never enough for this cheergerm, so I added a tad more lemon juice than the recipe said. As a result, when the springform pan was undone, it was a bit too melty to serve. To the freezer I cried! After an hour of nervous nail biting (or completely forgetting it was there due to the odd champers or two) we discovered, a frozen cheesecake! A delicious accident.

Kid 1 and The Yak loved it so much, I churned out another one for a Christmas get together the other night. Frozen cheesecake, that’s how we roll now baby. Before serving, I tumbled some blueberries atop in a very Nigella type manner.

My wee changes:
Grated the zest of one lemon and lime, halved it, added half to the base mixture and half to the cheese mixture.
Not having baked The Gluten Free Scallywags GF graham crackers, I used half GF arrowroot and half GF rice coconut biscuits.
I added 2 tablespoons of lime juice in the cheese mixture and sneaked in 1/4 teaspoon of vanilla paste as well.
Big cheesecake tip,always bring the cheese to room temperature before mixing.
I put the cheesecake in the fridge overnight then popped it in the freezer a few hours befor serving. Make sure you pull it out for about 15 minutes or so to ensure you can cut it.

Go here for the fantastic recipe!

http://www.glutenfreescallywag.com/2010/02/no-bake-cheesecake-gluten-free.html