This is the pointy part of the year when our ‘busy’ lifestyles become more hectic than usual. Fighting for a carparking space and battling the multitudes at crowded shopping malls is not my idea of a good time. Completing my present purchasing early, allows me to enjoy the process and maintain some semblance of sanity.
When I think of childhood Christmases, certain gifts I received stand out (hello wholesome Sindy doll, no pneumatic Barbie for me.) What I remember most however, is that feeling where the world has slowed down. Of spending it with my crazy beautiful family, of the steadfast family friends who tethered us, of decorated pine trees hauled from the paddock next door fat and laden down with old school tinsel, Dads long walking socks used as Christmas stockings stuffed full of small and thoughtful delights.
I think of all the delicious things we ate; shiny glazed hams studded with cloves, homemade pavlovas crunchy on the outside and gooey in the middle, enough boiled new potatoes to feed an army and freshly shelled green peas – a job shared by all. Of scorching hot days when our bums stuck to vinyl car seats, us kids making whirlpools in above-ground swimming pools and running wild through sprinklers in baggy one-piece swimming cozzies. I hope one day, my own children will look back and remember the traditions created and moments spent together and not the ‘stuff’ that they received.
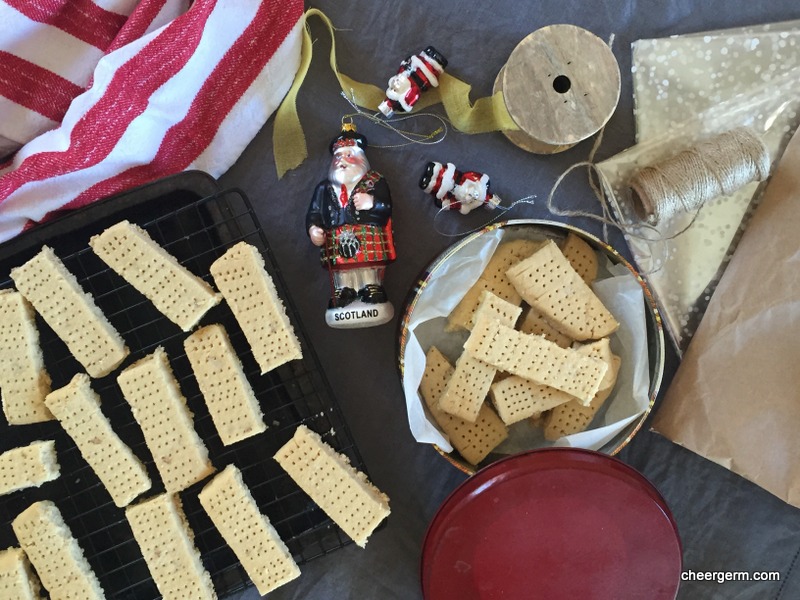
My goal has always been to spend the last week before Christmas away from the shops. Soaking in the festive feeling, spending time with loved ones, enjoying the Christmas lights on our street and of course baking shortbread for Christmas gifts. This year I find myself in the kitchen as the temperatures in our part of Sydney soar into the high thirties and low forties. (Celsius that is.) Working with butter in extreme heat is tricky but is manageable if you work fast. I do admit to turning on the air-conditioning once the oven starts to warm up. Pecan and vanilla is a winning combination and so far, no-one has complained. (They wouldn’t want to, there’s no saying what an overheated possibly perimenopausal baker might do if offended.)
Christmas isn’t always an easy time. Grief, pressure, depression,ill-health, financial woes and difficult family dynamics don’t just disappear because the calendar tells us it’s December. Terrible things happen at any time of the year and not everyone has it good. With that in mind; whatever you do or don’t bake this Christmas and whatever kind of Christmas you are experiencing, I wish you good tidings, peace and love.
GLUTEN FREE PECAN AND VANILLA SHORTBREAD
WHAT YOU NEED
250g butter, room temperature
1/2 cup caster sugar
1/2 tsp vanilla bean paste or 1 tsp vanilla essence
2 3/4 cups plain gluten free flour (for non gluten-free shortbread use the same amount of plain flour)
1/4 cup rice flour
1/4 tsp fine salt
1/2 cup finely chopped pecans
HOW YOU DO IT
Preheat oven to 170C.
Line 2 baking trays with baking paper and sift the flours and salt together into a bowl.
Cream the butter and add the sugar gradually (I used a mixer), beating until the mixture is light and fluffy.
Add the vanilla and mix until evenly dispersed.
Work in the flour gradually until the mixture is just combined.
Add the pecans and give the mixture another quick mix.
Knead the mixture lightly in the bowl for a few minutes to bring it together.
Divide the dough in half, roll each half out to a 3-4 cm log. Wrap in clingwrap and refrigerate for half an hour to an hour.
Slice the logs into 1-2 cm thickness, depending on your fancy, place 10mm apart on a baking tray and prick each piece all over with a fork.
Bake for 20-25 minutes until crisp and straw-coloured. (Regular shortbread will be quicker to bake, probably only 15-20 minutes.)
Cool down on wire racks.
Makes about 20-25 pieces.
A Cheergerm Adaptation of a Margaret Fulton recipe.
Cooking Notes: Gluten free shortbread can be delicate creatures so please handle carefully when rolling and cutting. When adding the flour to the mixture, I pop a teatowel over the mixer to stop the flour ‘floofling’ (an exact culinary term) all over the joint.