Chia pudding pots and granola, gluten free

There was a stirring in my workday breakfast soul, a yearning for something a little different than my usual banana, spelt sourdough toast with smashed avocado and a cup of tea. Something free of gluten that that The Yak could also scoff, before the trek to work was made. Something that could be made the night before, which for this ‘Non-Morning Person,’ is perfect.

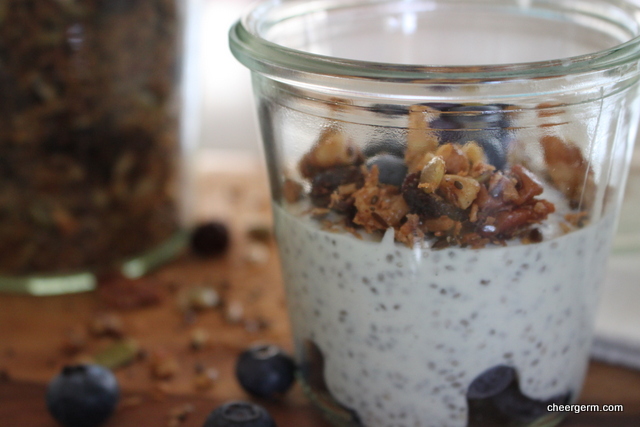
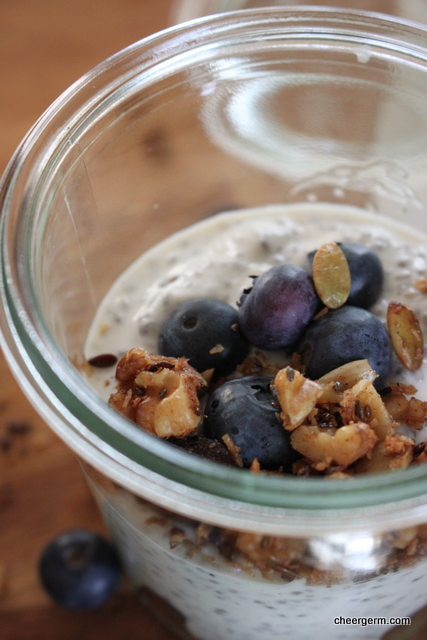
When I first started experimenting with this pudding, doubt ruled supreme as to whether it would be delicious. Currently, these kind of chia concoctions are hipper than hip, too cool for school and this Cheergerm has never enjoyed the textural journey that is sago or tapioca. However, we have become chia pudding converts. Sigh, what followers. After some experimenting with liquid and chia quantities , I found a balance that works for my taste. The gluten free granola is a marvellous combination of crispy, sweet and nutty goodness. It is rather fabulous when strewn on all manners of breakfast foods. Combined with the pudding, it is simultaneously creamy, squishy and crunchy. The blueberries add a lovely fresh tartness that cuts through any richness.

Little black pearls of chia seeds
I appreciate popping you into a biscuit batter
Or this nice little breakfast pudding
Even though
You get stuck between my teeth
I kind of like you
But I kind of don’t
I have read that you are a powerhouse of
Fibre, protein, antioxidants and all that good stuff
You are also free of gluten
Which is greatly appreciated in these here parts
But you are also a little bit weird
And whilst I don’t want to be cruel
I am not quite sure I would say
We are the best of friends quite yet

BLUEBERRY CHIA BREAKFAST PUDDINGS

WHAT YOU NEED
1 1/2 cup yoghurt (I used a thick greek style vanilla bean yoghurt.)
1/2 cup light coconut cream (an oxymoron if I ever heard one)
1/3 cup chia seeds
1/8 tsp Vanilla bean powder or 1/4 tsp vanilla bean essence
2 tbl maple syrup
125g blueberries (reserve 12 for garnishing) (I have used raspberries as well which are also delicious)

HOW YOU DO IT
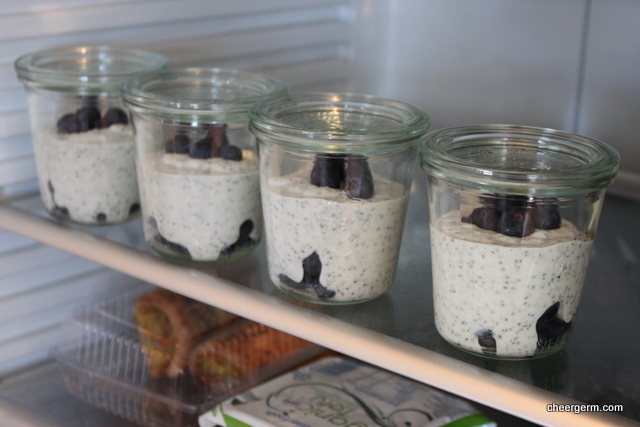
You will need 4 cups or jars to put this mixture into. Whaever takes your fancy. These wee jars were from Wheel and Barrow (no sponsoring or anything tricksy going on here) and I am a little bit in love with them.
Divide the blueberries amongst the jars or cups, leave about 12 for garnishing the top.
Whisk the chia seeds, yoghurt, milk, maple syrup and vanilla in a large bowl.
Divide equally amongst the four containers, pouring the mixture over the berries.
Use the remaining berries to garnish the puddings.
Cover and place in fridge overnight.
If the pudding is too thick for your liking, add a dash of milk or coconut milk to loosen it.
Serve topped with a hearty sprinkling of the granola (recipe follows) and tuck in.

A Cheergerm creation

GLUTEN FREE GRANOLA

WHAT YOU NEED
1 cup walnuts, roughly chopped
1 cup pecans, roughly chopped
1/4 cup sunflower seeds
1/4 cup pumpkin seeds
1 tbl chia seeds
1 tbl flaxseeds
1 tsp cinnamon powder
1/4 tsp vanilla bean powder or 1/2 tsp vanilla bean essence
1/2 tsp sea salt
2 tbls maple syrup
2 tbl grapeseed oil
1/2 cup coconut (I only had desiccated, shredded or flaked would be good too)
1/2 cup chopped dried cranberries (I used whole unsweetened)
1/4 cup sultanas

HOW YOU DO IT
Preheat oven to 160C.
Line a large baking tray with baking paper.
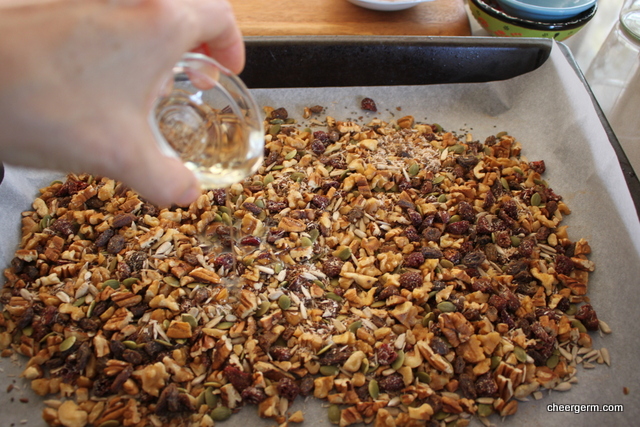
Spread the walnuts, pecans, sunflower seeds, pumpkin seeds, chia, flaxseeds, cinnamon, vanilla and sea salt onto the tray and mix well.
Pour the maple syrup and oil over the granola mixture and mix very well.
Place in the oven for ten minutes, remove tray and add the coconut, cranberries, sultannas and stir. This ensures the fruit doesn’t harden too much and the coconut doesn’t burn. Put the tray back in the oven.
After another ten minutes, remove the tray again and stir.
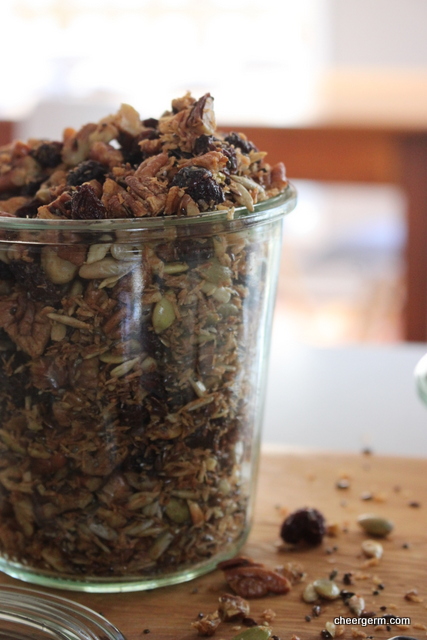
At this point, you will have to decide if it needs another five minutes or not. It will depend, sometimes I give it a few minutes more. You will have to watch it carefully as you want crunchy golden brown granola, not burnt.
Once cooled, place a hearty spoonful on top of your chia puddings. It is also great on yoghurt and other breakfast cereals. Store in an airtight container.

Cooking Notes: Sometimes I add a half cup each of puffed amaranth and puffed millet along with the nuts and seeds at the start. Also delicious. I have also used dried unsweetened cherries instead of cranberries which are fantastic.

A Cheergerm creation


Thanks Mum and Moosewood, bean and tofu casserole

Growing up in the seventies, our Mum was part of a health-food co-operative. She purchased natural food in bulk that wasn’t your average store bought fare. Standout memories from those days include bags of wholemeal flour, copious legumes, lecithin (crazy stuff that), tins of molasses and brown sugar. (To emphasise this was the seventies, I remember Mum wearing a much coveted white peasant blouse embellished with red embroidery.) An orchardist’s daughter, she always stocked a cornucopia of fresh fruit and vegetables in the house.

Mum baked her own bread, made her own tomato sauce, bottled delicious preserves and for a time, a yoghurt maker graced the benches. Out of her kitchen rolled wonderful soups and heartily savoury casseroles. There was always a container holding tempting baked slices and biscuits made using recipes she had memorised from her own Mums wonderful baking. Our mum is not one to toot her own horn but we all feel lucky to have had such a solid grounding in eating and cooking good food.

One of the cookbooks that graced Mums shelves was The Moosewood Cookbook, one of the most iconic and revolutionary cookbooks of that time. This vegetarian recipe book was written by Mollie Katzen, who at the time was a member of The Moosewood Collective. (A natural foods restaurant founded in 1973 in Ithaca, New York.) My copy seems to have gone missing but recent reviews of updated editions state that many recipes are now ‘lighter’ than in the past. I imagine the author cut back on some of the larger quantities of cheese and sour cream. (Ingredients which were possibly the reason why the Moosewood food was so darned delicious!)

I took the inspiration for this dish from memories of the Moosewood Cookbook and the fact that I was housebound and needed to use whatever my pantry and refrigerator had to offer. It is great to soak your own beans but if you can’t, tinned beans are fine. These sort of casseroles are forgiving, so use what you have and experiment to your hearts content. The Yak and I happily scoffed our portions whilst the sproglets did a double take at the tofu. Kid 2 asked ‘what was that white spongy stuff?’ I said tofu. He said he thought it was chicken. (See, everything really does taste like chicken!) There is a good contrast between the crunchy munchy topping and the piquant, Mexican style sauce underneath. If you like your food really spicy, just bump up the chilli.

Peace out and enjoy.

Thanks Mum and Moosewood, bean and tofu casserole

WHAT YOU DO
3 tbl Olive oil
1 onion, diced
1/2 large yellow or red capsicum, diced (or 1 small)
2 carrots, diced
3 small zucchini, diced
200g Mushrooms, diced
1 garlic clove, crushed
1/2 tsp dried chilli flakes
1 tbl ground cumin
1 tbl ground paprika
2 tsps salt
Black pepper to taste
2 tins chopped tomatoes
1 tin red kidney beans, drained
1 tin cannelinni beans, drained
1 tbl molasses
250 hard block tofu cut into 2cm cubes (don’t like the curd of beans? Don’t put it in!)
50g Parmesan, grated
1 cup gluten free breadcrumbs (or regular, try and use wholemeal or wholegrain)
Extra olive oil

HOW YOU DO IT
Preheat oven to 180C.
Oil a casserole dish or if you have an ovenproof casserole dish that you can cook everything in and then transfer directly to the oven, use that. I used my sturdy Le Crueset cast iron pot.
In a large saucepan saute the onions and carrots in the olive oil for a few minutes until they start to soften.
Add the capsicum and zucchini and cook for another few minutes, stirring regularly.
Add the mushrooms and sauté for a few more minutes.
Add garlic cook and for 30 seconds or so then add chilli flakes, cumin, paprika, salt and black pepper. Cook for 1-2 minutes, stirring constantly.
Add the tomato and molasses and stir to combine.
Add the beans and tofu. Bring to the boil.
Adjust the seasoning. If using another baking dish, pour the mixture into it. If you are using the same casserole dish, make sure you wipe the rim so it doesn’t look too messy.
Combine the breadcrumbs, grated Parmesan and a few glugs of olive oil. Season with salt and pepper.
Place the breadcrumb mixture over the bean mixture.
Bake in the oven for 45 minutes until the crust is golden brown and the mixture beneath is bubbling. (Turn the dish half way through cooking to ensure even browning of the crust.)
Serve with a green salad or steamed veggies.

A Cheergerm creation

http://www.moosewoodcooks.com/about/cookbooks/

http://www.molliekatzen.com

http://www.moosewoodcooks.com/about/cookbooks/

http://www.molliekatzen.com


Gluten free dark Jamaican Gingerbread and the bird

Children are a veritable wealth of knowledge.

Kid 1: Did you know that years ago, that angry tennis man John McEnroe flipped the bird at the queen?

Me: Are you sure?

Kid 1: Yes, and the Queen flipped the bird back at him.

Me: Now I know that part didn’t happen.

Kid 1: It did, it did. The Queen flipped the bird.

Me: She did not!

And so it went, did, didn’t, did, didn’t. It turns out he had seen an advertisement for a television ‘mockumentary’ on tennis and at the time, believed it to be a true historical fact.

I for one, imagine that during her illustrious reign, Her Royal Highness must have wanted to flip the bird at least once. (Gesticulating in this manner has certainly crossed my mind once or twice when arguing with Kid 1). This spot of baking hails from the iconic British baker, Delia Smith. This no-nonsense doyenne of English cookery is accredited for teaching two generations of loyal British fans how to cook. Her recipes are reliable and are also easily converted into gluten free options.

In her cookbook Delia’s Cakes, she tells us that this cake was ‘originally from the sugar-and-spice island of Jamaica.’ Darkly treacly, spicy, sticky and chewy. This is almost like a real loaf of bread. It is truly better when wrapped and left for a day and even better (like so many things), when smeared with butter.

Now I just know that Delia would never flip anyone the bird.

GLUTEN FREE DARK JAMAICAN GINGERBREAD

WHAT YOU NEED
180g gf plain flour (130g plain gf flour and 50g sorghum)
1 tbl ground ginger
1 1/2 tsp ground cinnamon
1/8 tsp ground nutmeg (1/4 nutmeg, grated)
1/2 tsp bicarbonate of soda
2 tbl milk
75g black treacle or molasses
75g golden syrup
75g dark brown sugar (I used coconut sugar)
75g butter
75ml water
1 large egg, lightly beaten

WHAT YOU DO
Getting Ready: Preheat the oven to 170C and line a standard loaf tin with baking paper. Delia suggests using a ready made loaf tin liner (which I did not have.) Place the tin of treacle or molasses and golden syrup bottle in hot water to warm them and make it easier to measure them.
Sift the flours and spices into a large bowl.
Mix the bicarbonate of soda into the milk and set it to one side.
Measure the treacle/molasses, golden syrup, sugar and butter into a saucepan with 75ml of water. Heat over a low heat and stir gently until thoroughly melted and blended. Don’t let it come anywhere near the boil and don’t go off and leave it.
Next add the syrup mixture to the flour and spices, beating vigorously with a wooden spoon.
When the mixture is smooth, beat the egg in a little at a time, followed by the bicarbonate of soda and milk.
Now pour the mixture into the prepared tin and bake on a lower shelf, align the the tin with the centre of the oven for 50 minutes to 1 hour until it’s well-risen and firm to the touch.
Remove the cake from the oven and allow it to cool in the tin for 5 minutes before turning out.
If possible, store it in a cake tin in the liner (if you used one) or wrapped in clingfilm for 24 hours before eating. It is delicious smeared with butter.

A Cheergerm adaptation from Delia’s Cakes published by Hodder and Stoughton 2013


For you, a gluten free passionfruit cake

This is for you my friend since we were fifteen year old ingénues
We would share our hopes and dreams in sleepovers silly from lack of sleep
The world spread out before us juicy, ripe and full of hope
Kept apart by distance for many years now
This was baked with Kid 1, in the pretence that it would be placed lovingly into a lemon coloured Tupperware container, tucked into the car, then driven over to your house
To make you a cuppa
To cut us a slice of cake
It’s possible it may have sat there untouched for quite a bit
Whilst we talked it out
This cake is for all the times I wasn’t there to hold your hand or for you to hold mine
To dry your tears
To tell you it was would be ok
Even when it really wasn’t
To kick each other’s arses if it was required
Or to not say much of anything at all
This cake is so you know
You are in my heart if no longer in my neighbourhood

Kid 1 and I baked this tropical fruity delight slowly and happily. The day stretched out immeasurably before us. Carefully learning to crack eggs, he wrapped his small hands around the ovoid object as if it were a Faberge antiquity.

This cake has a light soft crumb with soft vanilla undertones and is best eaten on the day it is made. (Or the day after, but it loses something by the third day. Not sure what, just trust me.) The thin passionfruit glaze with its scattering of dark seeds is just the right balance of sweet and tang. In lieu of sharing a slice of this cake with my friend, we had it for afternoon tea.

GLUTEN FREE PASSIONFRUIT CAKE

WHAT YOU NEED
125g butter, room temperature
2/3 cup raw caster sugar (or white caster sugar)
200g gluten free self raising flour
50 sorghum flour
30g almond meal
1 1/2 tsps baking powder
1/4 tsp salt
1/4 tsp vanilla bean powder or vanilla essence
2 eggs, lightly beaten
1/2 cup milk (room temperature)
4 small passionfruit pulps, (or 2 large.) If you don’t want too many pips in your cake batter, you can sieve the pulp then add some of the pips back into the sieved mixture to add to the cake.

Passionfruit glaze
1/2 cup icing sugar
1/2 tsp butter, melted
1/2 tsp boiling water
passionfruit pulp of 1 small or 1/2 of a large

HOW YOU DO IT
Preheat oven to 180C and line a 22cm springform tin with baking paper.
Cream the butter and sugar together in a mixmaster, with hand beaters or by hand. Make sure it’s light and fluffy and almost white in colour. (Add the vanilla essence if you are using it at this step.)
Whilst the butter and sugar is mixing, sift the self-raising flour, sorghum flour, almond meal, baking powder, salt and vanilla bean powder. Place aside.
Add the eggs to the creamed butter and sugar, mix well.
Starting with the flour, add the sifted flour and milk alternately, one third at a time.
Add the passionfruit and mix well.
Pour the mixture into the tin.
Cook for approximately 40 minutes or until a skewer comes out clean.
Let cool for ten minutes then take out of the tin and cool on a wire rack.
Once completely cool, drizzle with the glaze. (Recipe below.)

Passionfruit glaze
Sift the icing, add the butter, boiling water and passionfruit pulp to the icing.
Mix well, you want a fairly runny consistency, add a dash more hot water if needed.

A Cheergerm adaptation from the Best Recipes website, link below.

http://www.bestrecipes.com.au/recipe/golden-passionfruit-cake-L8274.html


Where did the words go green bean curry

Sometimes adjectives run towards my outstretched hands like small greedy children to a fairground stall laden with fairy floss. Other days, I reach desperately into the hollow of a darkened cave where all the worthy words in the world are wedged into tiny crevices. Begging for them to come forward into the light, they refuse and cling mollusc-like to their safe rocky comfort. Leaving me berefit and wordless.

Ornery little buggers.

That is why I give you a brief description. Aromatic, spicy, zingy, beany. This curry was bloody good and adds a vegetable freshness to an Indian banquet.

GREEN BEAN CURRY

WHAT YOU NEED

1 tbl vegetable oil
1 small onion, diced
1 garlic clove, crushed
15 small dried curry leaves or 5 fresh
1 tbl curry powder (use a good quality one, I used a Herbies Spices blend)
1/2 tsp brown mustard seeds
1/4 tsp chilli powder
1 tsp salt
500g green beans, topped and tailed
1/2 cup coconut milk (I used low fat)
2 tbl lime juice

WHAT YOU DO

Heat the oil in a medium size frypan over a medium heat then fry the onions until they start to turn golden brown.
Add the garlic and curry leaves and cook for 2 minutes, stirring constantly.
Add all the spices and salt and cook for one to two minutes.
Add the green beans, stir to coat in the spices then turn to a low to medium heat and cook until the beans are just al dente. (Meaning they have a bit of resistance when you bite into them.)
Add the coconut milk and cook for five minutes. Check the seasoning.
Remove from the heat and stir in the lime juice.
Serve as part of an Indian banquet.

A Cheergerm adaptation of the recipe listed below.


http://allrecipes.com/recipe/green-bean-curry/


Long walks in the rain and restorative vegetable soup

Hi, my name is Cheergerm, I like long walks in the rain. (This sounds like the introduction to a personal ad on a dating website.) Actually, I was under the impression I liked long walks in the rain.

After a lovely and filling lunch at Mum’s house, a forty minute walk home seemed like a good idea. The offer of an umbrella was denied. ‘No thanks, I have my rain coat, that will do thanks.’ The first five minutes of light drizzle were delightful. I felt alive, exuberant, all English-like and Mary Poppinsy. Trip trapping down the road like one of the Three Billy Goats Gruff, cool mist enveloping me.

Then the rain got heavier. Rain coat zipped up, hood on. This wasn’t going to dampen my spirits, so to speak. Did the intrepid explorer Sir Edmund Hilary turn back when things got a bit hairy climbing Mt Everest? Never! With nothing to protect my face and glasses, large drops began to drip down, obscuring my vision. A pair of teeny tiny windscreen wipers would have been great. This genteel walk was becoming somewhat unpleasant.

The rain deepened, as did my mood. I would not call for help. Captain Scott didn’t call his mummy for help in the Antarctic, did he? (Unfortunately, I had left my mobile phone at home.) The wind started to blow the rain sideways. By now my track suit pants were hugging my legs wetly, not unlike a clingy three year old with a soggy nappy. The odd drip or two was making it way slowly down my back, creeping towards undergarments that one would prefer to keep dry.

I saw a car, my heart lifted, it was the same make and colour as ours. Had the Yak come to rescue me from this foolhardy adventure? Nope, it wasn’t him. Resolutely, I put my head down. Rain was now pouring over the hood of my rain coat and down my nose like a miniature waterfall. Home was only ten minutes away.

My name is Cheergerm, I do not like long walks in the rain.

But I do like this. A marvellous restorative vegetable soup based on the kind of soup that Mum would make on wintery Sunday’s. It is perfect for when you feel wet, poorly, sad, or just in need of a big bowl of soup love. It makes a huge pot but I always freeze some for a rainy day. Mum always used barley but sadly, it is not gluten free. I threw in some lovely red Persian lentils which do not need soaking and keep their shape once cooked. The celery is essential.

RESTORATIVE VEGETABLE SOUP

2 tbl olive oil or grapeseed oil
1 onion, diced
2 large carrots, diced
1 yellow or red capsicum, diced
4 sticks celery, 300g, diced
1 Swede (the vegetable not someone from Sweden), diced
4 cups veggie stock
7 cups of water
1 cup Persian red lentils (or green lentils, or barley if it doesn’t need to be GF), make sure you wash them
Big handful of green beans, chopped
2 medium zucchini, diced
1 tsp Salt and as much black pepper as you desire
1 large handful celery leaves, roughly chopped
(Optional: vegetable stock powder.)

Heat oil in large stockpan and sweat off onion, carrots, pepper, celery and swede for about ten minutes. Do not colour the vegetables.
Add the veggie stock, water, lentils and a few big grinds of black pepper. Bring to the boil then reduce to a simmer.
Cook for about 40 minutes until the carrots are just tender, then add the beans, zucchini and salt and cook for a further 10-15 minutes or until they are just tender. You want to keep some vibrancy in them.
Check for seasoning, add more salt, pepper and a teaspoon of veggie stock powder if needed.
Add the celery leaves and cook for five more minutes. Let the soup sit off the heat for five minutes, scoop off any lentil scum that has come to surface.
Eaten with a slice of spelt sourdough and some manchego cheese.

A Cheergerm recipe

Cooking Notes: I used a store bought veggie stock. I have made my own before (a few years ago now) but I really fancy making the wonderful sounding roast vegetarian stock from the lovely Almost Italian blog. She roasted the vegetables first to obtain some umami depth. I haven’t made it yet but I will. Or maybe you will first. Bless and damn you if that is the case.

https://almostitalian.wordpress.com/2015/06/01/french-onion-soup-with-vegetable-stock-voila/


Gluten free date and ginger slice, minus three points

Kid 1 to our dog: Elvis I love you so much but I minus three points of love because you have no butt cheeks.

Kid 1 is a hard taskmaster. After being begged asked to try this slice, he had a tiny nibble. Letting me down as gently as he was able to, the sproglet informed me that ‘it was not to his taste and he didn’t like the ginger and chocolate together.’ Well, that left a large amount of slice for the taller people in our household. (Kid 2 saw the cornflakes and ran a mile.) Leftover gluten free cornflakes needed to be used up so this recipe was on my ‘to do’ list. The Yak and myself were big fans, as were the other friends that I palmed it off on shared it lovingly with. It is a bit like a poorer cousin of a fancy florentine, but no less delicious.

With a chewy unctuousness, this slice isn’t as sweet as you would imagine and the ginger is a welcome spicy surprise. It would be a wonderful addition to a Christmas celebration or packaged prettily as a festive gift. Containing dates, this concoction must be good for you and being doused in dark chocolate (which science has proven to be rich in important nutrients), it is doubly so.

Kid 1, I love you so much but I minus three points of love for you being such a fussy bugger.

GLUTEN FREE DATE AND GINGER SLICE

WHAT YOU NEED
1 1/2 cups (180g) chopped dates
170g butter
85g sugar
2 tsp ground ginger
3 cups (80g) gluten free cornflakes
170g dark chocolate

HOW YOU DO IT
Put the chopped dates, butter, sugar and ginger into a medium sized saucepan. Place over a low heat and stir with a wooden spoon until the mixture is thoroughly amalgamated. This takes about 5 minutes.
Remove from the heat and mix in the cornflakes.
When everything is well combined, press into a 30 X 21 cm shallow tin until it’s about 1cm thick. My slice was about 26cm long, it depends how thick you make it.
Once the mixture has cooled, put it in the fridge until it is quite firm. This took about 45 minutes.

Finishing
Melt the chocolate carefully and pour it over the chilled slice.
Spread out evenly with a knife or spatula, then score the surface of the chocolate with a fork.
Set aside to cool and cut into small fingers or squares.
Store in the fridge in an airtight container, separating the layers with baking or waxed paper. Makes about 20-25 squares, depending on the size.
Cooking Note: you can use regular cornflakes if you don’t require a gluten free slice.

Recipe from Ladies, A Plate by Alexa Johnston

http://www.theguardian.com/science/2015/jun/16/more-evidence-that-chocolate-may-be-good-for-the-heart-say-researchers#img-1


King of the vegetables and a potato and Comte galette

The Yak was crapping on orating upon the delight of the humble potato, his favourite vegetable over all others. We could say in fact, that in his view, it is The King of the Vegetables. As he plainly stated, there isn’t much that you cannot do with the tatie. Bake it, boil it, steam it, mash it, grate it, fry it, smash it, dumpling it. Perhaps The Yak has a point? What he was really trying to say was, could we please have potatoes for dinner?

The pantry was laden with potatoes, I also had some delicious looking Comte cheese that I had purchased at the cheese shop. I suffer from an insidious illness that I would not wish upon anyone, it is called ‘Cheeseyearningitis’. It entails standing in front of a cheese counter, looking longingly at cheeses that one wishes to try but one also knows, that one is of an age where one can no longer eat every cheese that ones hankers after. This is due to a waistline thickening on a daily basis and a propensity towards high cholesterol. ‘Cheeseyearningitis’. Look it up, it really exists.

Comte is a semi-hard French cheese made from unpasteurised milk obtained from cows that have only been freshly and naturally fed. It is very similar to Gruyere but a Comte cheese can only be called thus if it adheres to a whole bunch of strict Frenchy regulations. God Bless the French.

I was thinking of a good old potato bake but a googlebumble led me to this delightful concoction, a Comte and potato galette. (Galette meaning a flat pancake and this dish is intrinsically that, a pancake like concoction of cheese and potato.)

The smell of this simple dish baking caused dribble to surreptitiously slide out of the corners of my mouth. Luckily, no one was watching. How best to explain the odour of this cheese baking? I imagine that it is the smell of the meadows in the French alps, of the sweet grass and alpine flowers that blissfully happy European cows chow down upon.

This cheese and potato dish was nutty, sharp, crunchy and almost caramelised around the edges. Unfortunately, all the children present loved it so there were barely any leftovers. Which really sucked. As a French cow would say, ‘Le Moo, Le Sucky.’

POTATO AND COMTE GALETTE

2 tbl unsalted butter (30g)
1 kilo potatoes, peeled and coarsely shredded. I used Desiree because it’s all I had, the recipe called for Yukon Gold. I shredded them in my food processor, oh yeah. Squeeze the potatoes well to get rid of as much liquid as you can.
200g Comte cheese, grated
1 1/2 tsps sea salt
1/4 tsp ground nutmeg
Black pepper

Preheat oven to 180C.
Preheat a medium size frypan, add half the butter and melt it.
Place 1/3 of the shredded potatoes into the frypan, sprinkle half a teaspoon of salt, some grinds of black pepper and sprinkle some nutmeg evenly across.
Sprinkle 1/3 of the cheese over the potato.
Place another 1/3 of the potatoes on top, season with salt, pepper and nutmeg and add another 1/3 of the cheese.
Add the last 1/3 of potatoes, drizzle the remaining butter on top then press the mixture down with the back of a spatula. Season with salt, pepper and nutmeg then sprinkle the remaining cheese on top.
Over a medium heat, cook the potatoes for about 10-15 minutes until the potato on the bottom starts to sizzle.
Transfer the frying pan into the oven and cook for about 25-35 minutes until golden brown and the potatoes pierce easily with a knife. (Meaning they are cooked.)
Eat it down quickly before the children do.

Recipe knicked from the website listed below, only a minor change was made to it.

http://www.oliversmarket.com/index.php/413

http://en.m.wikipedia.org/wiki/Comté_cheese


Green lentil dal, a curry, not the author

How could I not use this recipe as an excuse to wax a wee bit lyrical about one of my favourite authors, Roald Dahl?

Easily, you may say but then, that is how I roll. Expect the unexpected, I never promised you a rose garden and all that. (Whatever the hell that means, seriously, what does it mean?)

As a child, my fervent reading habit encompassed the works of Roald Dahl. His books were devoured as readily as any white bread that I was able to get my mitts on. (Back in the day, Mum baked homemade bread or we ate brown bread. This once painfully fussy eater hankered after a slice of white bread something fierce.)

Favourite Dahl tomes included the hippy trippy delicious adventures of Charlie and the Chocolate Factory, closely followed by Charlie and the Great Glass Elevator and of course, James and the Giant Peach. These books were read cover to cover and more than once. They were then followed by the rest of his children’s novels and poetry. In my later teenage years, I encountered his more grown up ‘Tales of the Unexpected’ in which a story about screaming plants was inked indelibly onto my mind and psyche. To read Dahl is to go on an adventure and end up in a place you never thought you would go.

Indian food is a little like a Roald Dahl tale, an exciting and exotic journey into a diverse world of spice and many varying ingredients. Each bite can reveal a different flavour and aroma. Every spice brings something new to the party. This curry consisting of deep green legumes is gently earthy, with a delicate creamy blend of heat and richness. It is a wonderful addition to an Indian banquet or just as pleasantly, scoffed alone with a heft serving of basmati rice.

On that note, I leave you with my one of my favourite Roald Dahl quotes. (And of course, the recipe.)

‘And above all, watch with glittering eyes the whole world around you because the greatest secrets are always hidden in the most unlikely places. Those who don’t believe in magic will never find it.’

GREEN LENTIL DAL

WHAT YOU NEED
250g green lentils, washed
1 onion, roughly chopped
2 garlic clove, roughly chopped
5 cm ginger, roughly chopped
1/4 cup oil
1 tbl ground cumin
1 1/2 tsps ground coriander
2 tsps salt
1/4 tsp chilli powder
2 tbl garam masala
1/4 cup cream

HOW YOU DO IT
Put the lentils in a large saucepan and add 6 cups of water and bring to the boil. Reduce the heat to a simmer and cook for about 45 minutes to one hour or until the dal feels soft.The lentils will start to split a little and that is fine.
Drain and reserve the cooking liquid.
Blend the onion, garlic and ginger in a food processor to form a paste or finely chop them together with a knife.
Heat the oil in a medium size saucepan and fry the onion mixture over a high heat, stirring constantly until golden brown.
Add the cumin and coriander and fry for two minutes.
Add the lentils and stir in the salt, chilli powder and garam masala.
Pour 310ml (1 1/4 cup) of the reserved lentil liquid into the pan, bring to the boil, then reduce the heat to medium and simmer for ten minutes.
Just before serving, check for salt then stir in the cream and simmer for another 2 minutes to heat through.
Serve alone with steamed basmati rice or as part of a feast.

A Cheergerm adaptation from the The Food of India: A journey for food lovers by Murdoch Books. Recipes by Priya Wickramasingh and Carol Selva Rajah.


Minecraft and a gluten free lemon drizzle cake

When my two lads talk to me about Minecraft, the computer game, this is what I hear:

Minecraft blah blah blah

Enderman blah blah blah

Diamonds, pigs, blah blah blah

Villagers blah blah blah

Me: Oh really, That’s great!

I could feel really bad but then I remember that this is what they hear when I speak to them:

What did you do today blah blah blah

Homework blah blah blah

Shut the door blah blah blah

Wash your hands blah blah blah

Tidy your room blah blah blah

So we are even.

Parenting can be a battlefield but we all need to eat. Every living creature in our house loves this cake. I mean, they really love it. Gluten is not missed and every bite is moist, sweet, tangy and tender. Just like life itself.

GLUTEN FREE LEMON DRIZZLE CAKE

WHAT YOU NEED
125g butter, room temperature
130g caster sugar
Zest of one large or two small lemons
2 large eggs
65 ml milk
1/4 tsp vanilla bean powder (or 1/4 tsp vanilla bean paste or essence)
100g gluten free self-raising flour
50g sorghum flour
30g almond meal
2 tsps gf baking powder
1/4 tsp salt

Lemon Syrup
2 tbl sugar
Juice of the zested lemon

HOW YOU DO IT
Preheat the oven 180 degrees or 170 fan forced, then prepare and line a loaf tin.
Cream the butter and sugar in the food processor.
Add the lemon rind and pulse.
Add the rest of the ingredients and blend until nice and smooth.
(If you do not have a food processor, use a stand mixer, electric hand beater or go old school and use a hand whisk!)
Bake the cake for about 40 minutes or until a skewer comes out clean.
For the lemon syrup, whilst the cake is baking, heat the sugar and juice of the lemon until the sugar has dissolved. Set it aside until you need it.
Whilst the cake is still in the tin, place it on a cooling rack.
Pierce the cake all over with a skewer then spoon over the lemon syrup. Use it all, the cake will soak up the syrup as it cools.
Let the cake cool completely in the tin before serving.
Slice and eat it. We did.

A Cheergerm adaptation from the UK Telegraph website. The link is provided below.


http://www.telegraph.co.uk/foodanddrink/recipes/8059974/Classic-lemon-drizzle-cake-recipe.html

A wee thanks for the ‘Sunshine’ blog award nomination to Windy Mama who blogs at Wuthering Bites. Go and have a read of her clever award acceptance post.

https://wutherornot.wordpress.com/2015/05/28/the-plays-the-thing/comment-page-1/#comment-575