Thanks Mum and Moosewood, bean and tofu casserole

Growing up in the seventies, our Mum was part of a health-food co-operative. She purchased natural food in bulk that wasn’t your average store bought fare. Standout memories from those days include bags of wholemeal flour, copious legumes, lecithin (crazy stuff that), tins of molasses and brown sugar. (To emphasise this was the seventies, I remember Mum wearing a much coveted white peasant blouse embellished with red embroidery.) An orchardist’s daughter, she always stocked a cornucopia of fresh fruit and vegetables in the house.

Mum baked her own bread, made her own tomato sauce, bottled delicious preserves and for a time, a yoghurt maker graced the benches. Out of her kitchen rolled wonderful soups and heartily savoury casseroles. There was always a container holding tempting baked slices and biscuits made using recipes she had memorised from her own Mums wonderful baking. Our mum is not one to toot her own horn but we all feel lucky to have had such a solid grounding in eating and cooking good food.

One of the cookbooks that graced Mums shelves was The Moosewood Cookbook, one of the most iconic and revolutionary cookbooks of that time. This vegetarian recipe book was written by Mollie Katzen, who at the time was a member of The Moosewood Collective. (A natural foods restaurant founded in 1973 in Ithaca, New York.) My copy seems to have gone missing but recent reviews of updated editions state that many recipes are now ‘lighter’ than in the past. I imagine the author cut back on some of the larger quantities of cheese and sour cream. (Ingredients which were possibly the reason why the Moosewood food was so darned delicious!)

I took the inspiration for this dish from memories of the Moosewood Cookbook and the fact that I was housebound and needed to use whatever my pantry and refrigerator had to offer. It is great to soak your own beans but if you can’t, tinned beans are fine. These sort of casseroles are forgiving, so use what you have and experiment to your hearts content. The Yak and I happily scoffed our portions whilst the sproglets did a double take at the tofu. Kid 2 asked ‘what was that white spongy stuff?’ I said tofu. He said he thought it was chicken. (See, everything really does taste like chicken!) There is a good contrast between the crunchy munchy topping and the piquant, Mexican style sauce underneath. If you like your food really spicy, just bump up the chilli.

Peace out and enjoy.

Thanks Mum and Moosewood, bean and tofu casserole

WHAT YOU DO
3 tbl Olive oil
1 onion, diced
1/2 large yellow or red capsicum, diced (or 1 small)
2 carrots, diced
3 small zucchini, diced
200g Mushrooms, diced
1 garlic clove, crushed
1/2 tsp dried chilli flakes
1 tbl ground cumin
1 tbl ground paprika
2 tsps salt
Black pepper to taste
2 tins chopped tomatoes
1 tin red kidney beans, drained
1 tin cannelinni beans, drained
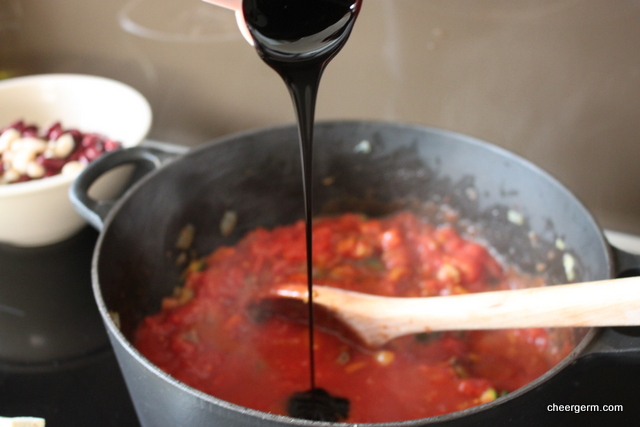
1 tbl molasses
250 hard block tofu cut into 2cm cubes (don’t like the curd of beans? Don’t put it in!)
50g Parmesan, grated
1 cup gluten free breadcrumbs (or regular, try and use wholemeal or wholegrain)
Extra olive oil

HOW YOU DO IT
Preheat oven to 180C.
Oil a casserole dish or if you have an ovenproof casserole dish that you can cook everything in and then transfer directly to the oven, use that. I used my sturdy Le Crueset cast iron pot.
In a large saucepan saute the onions and carrots in the olive oil for a few minutes until they start to soften.
Add the capsicum and zucchini and cook for another few minutes, stirring regularly.
Add the mushrooms and sauté for a few more minutes.
Add garlic cook and for 30 seconds or so then add chilli flakes, cumin, paprika, salt and black pepper. Cook for 1-2 minutes, stirring constantly.
Add the tomato and molasses and stir to combine.
Add the beans and tofu. Bring to the boil.
Adjust the seasoning. If using another baking dish, pour the mixture into it. If you are using the same casserole dish, make sure you wipe the rim so it doesn’t look too messy.
Combine the breadcrumbs, grated Parmesan and a few glugs of olive oil. Season with salt and pepper.
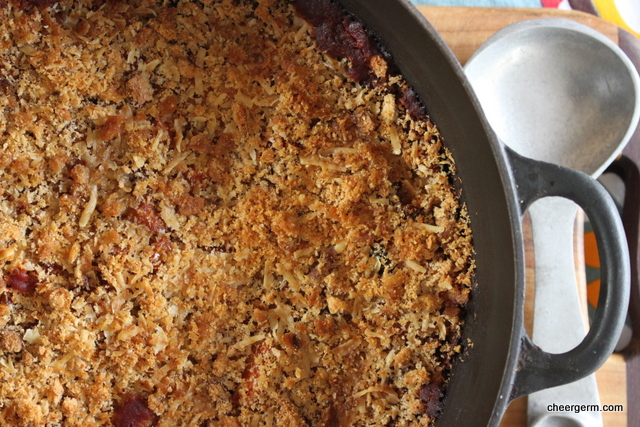
Place the breadcrumb mixture over the bean mixture.
Bake in the oven for 45 minutes until the crust is golden brown and the mixture beneath is bubbling. (Turn the dish half way through cooking to ensure even browning of the crust.)
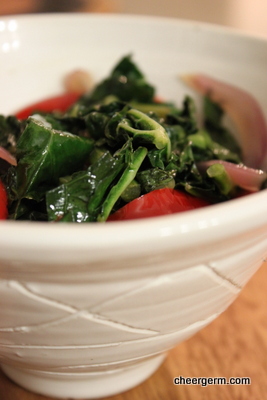
Serve with a green salad or steamed veggies.

A Cheergerm creation

http://www.moosewoodcooks.com/about/cookbooks/

http://www.molliekatzen.com

http://www.moosewoodcooks.com/about/cookbooks/

http://www.molliekatzen.com


Ginger Kisses and 80’s Rock Stars

80’s rock stars, how I loved your imperfect teeth, your curly hair, your baggy pants and billowing white pirate shirts. Your castaway on a desert island looks, your exuberance and subtle sexuality.

No overt flaunting of your nibbles and nobbles, be you lady or man. Just a luscious and gorgeous sensuality in the way you moved and dressed.

I am talking about you; David Bowie, Michael Hutchence and all of INXS. Yes, you Sting, the strangely sexy Prince, The Police, U2, The Church and The Cure. Yes; you Split Enz, Crowded House, Pat Benatar, Blondie and Siouxsie and the Banshees. Don’t worry, I haven’t forgotten Duran Duran, Tears For Fears, Icehouse, Depeche Mode and New Order.

If I could, I would give you all a big Ginger Kiss. Rest assured, I am not smothering my lips in ginger sauce and going in for the pash. (Not that I wouldn’t mind giving a few of the above a smooch or two.) I am talking about that delightful New Zealand cake like biscuit, sandwiched with a buttery, mock cream type icing.

My childhood is embedded with memories of my paternal grandmother Nana J opening a packet of these wee puffy clouds from heaven. The spicy smell of them would waft towards you and your mouth watered with great expectation. Mr Bagpipes has memories of his mum baking them from scratch back in the day but by the time us grandkids had come along, Nana was busy running the business side of things for their trucking business. So, opening a packet of these ginger kisses was quicker by far. Nana still baked and cooked, her pavlova roll was legendary.

Baking these has been on the old ‘to do’ list for a while and I was very happy with the result. Warming, gingery and sweet. They were a real treat. Sure they weren’t quite as puffy as the store purchased ones, as I used a wholemeal flour but they had more substance. Try using the same amount of plain flour if you want an even lighter result.

GINGER KISSES

WHAT YOU NEED
115g butter, softened
85g caster sugar
1 egg, room temperature
2 tsp golden syrup, placed in a small dish and warmed slightly
125g/1 cup wholemeal flour
1/2 tsp baking powder
1 tsp ginger
1 tsp cinnamon
1/2 tsp baking soda
1 tbsp hot water

Filling
30g butter
120g icing sugar, sifted
1/2 tsp vanilla essence or 1/4 tsp vanilla powder
2 tbsp boiling water
1 tsp ginger or 1 tbsp preserved ginger

HOW YOU DO IT
Preheat oven to 180C or 170C non-fan forced oven, line two baking trays with baking paper.
Cream the butter and sugar until light and fluffy, then beat in the egg, followed by the golden syrup.
Sift together the flour, baking powder and spices.
Fold the sifted dry ingredients into the butter mixture and lastly, stir in the baking soda, dissolved in the hot water.
Put the mixture in small teaspoonfuls (I did large teaspoonfuls and they spread quite a bit) on the trays, or use a piping bag with a 1cm/1/2 inch opening. (I am not a fan of the intricate art of piping so I didn’t.)
Bake for about ten minutes, then remove to a cooling rack.

Finishing
Making the filling by beating the butter, icing sugar and vanilla together. Slowly add the boiling water a little at a time and continue to beat until the mixture is very light and creamy. Once the icing looks light and fluffy enough, stop adding the water as you may not need all of it. (I added too much water too quickly and had to add extra icing sugar, so my filling was a little heavier than it should have been.)
Pair up the Ginger Kisses, matching the sizes, smear a small amount of filling on each lower half and stick them together.
Store airtight, this made about 12 very large Ginger Kisses, next time I will make them a tad smaller.

Recipe from Ladies A Plate, Traditional Home Baking by Alexa Johnston. Published by Penguin Books 2008


Kale, red onion and a splash of verjuice

Dear snotty lady in the overpriced posh food shop many years ago,

Four score and twenty years ago, I came in to your store and asked for some verjuice. I pronounced it exactly as it was spelt. Saying ‘ver’, then ‘juice’ as in ‘orange juice’. You looked down your elongated nose and pronounced in your very best plum in the mouth, lower northshore accent. ‘Surely dear, you mean ver-jus’. (Your pronunciation of the ‘juice’ as in the French pronuciation of the word jus…rhyming with zhoo..like ach-choo but softer).

Yes, you did make me feel ten cm tall (and I am barely taller than that anyway). I slunk away that day, clutching my bottle of unripe grape juice to my slightly wounded pride.

I write today to happily inform you that your elitist attitude didn’t deter me from continuing on my food journey. Some of the foodie jobs I have held did consist of educating others. I truly hope I have never contributed towards making anyone feel as small I as felt, when I left your shop that day.

This big, wide wonderful world of food is a never ending journey of exciting discoveries. Learning new things everyday rocks my very being.

Yours delightfully,

Cheergerm

PS Get stuffed.

KALE AND RED ONION with a splash of verjuice!

WHAT YOU NEED
2 tbl garlic infused olive oil or regular olive oil
1 medium red/Spanish onion, sliced
1 red capsicum, sliced
1/2 tsp salt
1/4 tsp chilli flakes
1 bunch kale washed and chopped into 2-3cm strips
Splash of verjuice or squeeze of lemon

HOW YOU DO IT
In a large frypan, sauté the onion, capsicum, salt and chilli over low to medium heat until they are soft and starting to caramelise, about 15 -20 minutes.
Add the kale, stir and cook for 10 – 15 minutes until it starts to soften.
Add a large splash of verjuice (or lemon) and stir to mix through until the verjuice starts to sizzle.
Season with extra salt and pepper to taste.

This dish is great by itself as a light lunch or dinner. Also as a side to eggs, grilled meats, casseroles, tofu dishes, anything your wee heart desires really.

This is also good with a couple of cloves of crushed garlic, added just before you pop in the kale. Due to the Yak having to talk to people all day, sometimes we have to dial back on the garlic during the week.

A cheergerm recipe

What the heck is verjuice anyhoo?

Made from unripe grapes, it was used in the Middle Ages as a condiment in sauces or to deglaze particular dishes. It is a alternative to vinegar. One of my food heroes, Maggie Beer, was at the forefront of bringing verjuice back into popularity by being the first (her claim) in the world to produce it commercially.

The mild acidity of verjuice is a real bonus. It isn’t as ‘in yo face’ as lemon juice or vinegar and is great in dishes where you want a gentler acidic alternative. You should be able to find it in good delis and in some supermarkets.

I love it as an alternative to vinegar and lemon in dressings, tossed over sautéed veggies and also to deglaze the pan juices of meat, cheese and other veggies dishes.

Please note the beautiful white pottery bowl I popped the kale in. Made by one of my fabulous New Zealand aunts who is a very talented potter.

http://www.maggiebeer.com.au/products/verjuice?gclid=CKeWzL_cp74CFYWXvQodxWEA1g


Hot cross buns, a love letter to mum

Growing up, our mum baked bread. The aromas of rising yeast and mouthwatering smells of fresh loaves, speak to me of childhood. The warm crust slathered with butter and homemade jam was the best bit. These memories transport me back to our paddock surrounded ‘Billenya’ house in Holloway Road.

Of course, the bread was mostly wholemeal. My plea of ‘Mum, can’t I just have store bought white bread?’, must have driven her nuts. Rarely do my own sproglets have white bread. My, we really do turn into our mothers.

Mum also made her own hot cross buns. Having children of my own, helped me to truly appreciate what our own mother did for us. Not everyone is lucky enough to have mothers as emotionally and physically present as she was. (Even when things were less than idyllic.) As time has passed, some friends have sadly lost their mums. I am feeling very thankful for mum today.

Apart from pizza, yeast based products have never been my forte. That is about to change. On this slightly cloudy and drizzly day, with Easter on the horizon, something in me longs for the aromas of mums kitchen. These hot cross buns are a homage to her. In every knead of the dough, I pour in gratitude for all of her hard work, commitment and for always feeding her four girls so well and healthily.

No matter how much we may have moaned about it.

Hot cross buns

Light, airy with a lovely warmth from the spices, these were absolutely delicious, scoffed down with a cup of tea. Ambrosia.

I have slightly adapted an SBS website recipe by halving it, adding a touch of spelt flour and using less fruit. I have also provided the full recipe quantities if you would like to make about 20 buns. (See after the recipe.) I made 9 out of this quantity.

I only added sultanas as the kidlets don’t like a lot of dried fruit, but feel free to add some chopped apricots and currants if you like. (Maybe 50g or so.) Keep in mind the 1 hour and 45 minutes resting time.

YOU NEED
200 ml milk
60g butter
2 cups bread (high protein ) flour
1/2 cup wholemeal spelt flour
40g raw caster sugar (or regular)
1 x 7g yeast sachet
120g sultanas
2 tsps cinnamon
1 tsp mixed spice
1/2 tsp salt
Zest one lemon
1/2 beaten egg

Cross paste (this makes too much for 9, its the full amount for 20 buns)
1/2 cup plain flour
75 ml sunflower oil (I used rice bran oil)
65ml water

Spice glaze
1/4 tsp mixed spice
70g raw caster sugar
50ml water

HOW YOU DO IT
Place the milk and butter in a small saucepan over low to medium heat and stir until combined. Let cool slightly.
Place the sugar, yeast, flours, sultanas, cinnamon, mixed spice, salt and lemon zest into the bowl of an electric mixer fitted with a dough hook. Stir to combine.
Stir in the egg, then the milk mixture.
Knead for 9 minutes or until the mixture is smooth and elastic.
Turn the dough into an oiled bowl, cover with clingfilm and please in a warm and draught free spot for 1 hour or until doubled in size. (This process is called ‘proving’.)
Knock back the dough and divide into 9 or 10 equal pieces. Knead each piece for 1 minute until it is a smooth ball.
Place in rows on an oven tray lined with baking paper. Cover with a tea towel and place in a warm, draught free spot for 45 minutes or until dough doubles in size.

Preheat oven to 220C (conventional, 200C fan forced)
To make paste for the cross, place flour, oil and water in a bowl and stir to a smooth paste. Place into a piping bag with a small nozzle (or a small ziplock plastic bag with the tip cut off) and pipe a cross shape onto each dough ball.
Bake for 10 minutes at 220C (conventional, or 200C fan forced) for 10 minutes, reduce heat to 200C (or 180C fan forced) and bake for a further 9 minutes or until golden.

Make spice glaze while buns are baking, put mixed spice, sugar and water in a small saucepan over medium heat and bring to a simmer, dissolving sugar. Remove from heat and cool slightly.
Brush buns generously with glaze. Serve warm or at room temperature with butter.

A tip from one of my lovely sissies: If your house is draughty, try proving in the microwave! (Just don’t turn it on).

To make 20 buns:
400 ml milk, 120g butter, 4 cups bread (high protein ) flour, 1 cup wholemeal spelt flour, 75g raw caster sugar (or regular), 2 x 7g yeast sachet, 240g sultannas, 3 1/2 tsps cinnamon, 1 tsp mixed spice, 1 tsp salt, zest one lemon, 1 beaten egg.
The paste recipe is the same, for the glaze, use 1/2 tsp mixed spice and 125 g caster sugar.

Go here for the original recipe: http://www.sbs.com.au/food/recipes/hot-cross-buns-0


Something yummy for a post school tummy

My memories of growing up in the outskirts of Melbourne invariably included weather extremes. 40 degree hot days that turned your eyeballs inside out and icy cold wind that made you question which hemisphere you actually lived in.

No matter what the weather, one consistent memory was coming home to Mum’s pikelets. Light, airy and always delicious.

These are not those pikelets.

No matter what I do, whenever I tried to replicate her recipe, they never quite tasted the same. Only bitterness and self loathing ensued.

A few months ago, whilst perusing the internet, I found a neat wee recipe on a blog called Cupcakes and Cauldrons. I have tinkered with it a tad (yes, I am on a buckwheat spree) and these pikelets now pop up on the afternoon tea menu at least once a week. The lads scoff them down every time they are placed before them. A tad of butter and a smear of jam and all is once again, right with the world.

The ulimate praise from The Kids has been ‘They are almost as good as Nana’s.’

I can live with that.

WHOLEMEAL AND BUCKWHEAT PIKELETS

YOU NEED
1 1/4 cup wholemeal flour
3/4 cup buckwheat flour
3 tsps baking powder
1/4 tsp salt
3/4 cup buttermilk
1/4 cup milk
2 eggs
1 tbl coconut sugar (or raw, rapadura, caster)
2 tbl butter, melted

METHOD
Beat eggs, buttermilk and milk.
Sift flours, sugar, baking powder and salt.
Make a well in the middle of the flour and gradually add the milk mixture. (I sometimes use an electric hand beater to do this.)
Add the melted butter. (If the mixture is a little stiff, add a tad more milk.)
Let the batter rest for 30 minutes to an hour.
Heat a non-stick pan, grease lightly.
Place spoonfuls of the batter on the pan. When bubbles begin to form on the surface, turn over and cook on the other side.

Go here for the original recipe: http://cauldronsandcupcakes.com/2012/09/22/nanas-pikelet-recipe-and-a-few-good-yarns/


A spot of holiday reading

A little while ago I purchased the book Kitchen Table Memoirs. Only now, in the quiet aftermath of Christmas have I been able to sit and finally read it. The last two days have found me scurrying away to quiet corners (it would be easier to find a unicorn in this household) to voraciously devour this wee gem of a book. Not only is it a fine collection of Aussie writers personal kitchen table memories, but every book purchased helps Foodbank’s fight to end hunger.

These stories made me both giggle and guffaw out loud. They touched my heart and tantalised my taste buds. After finishing and experiencing the ‘great book post blues’, I plonk myself down at our own kitchen table. Hands placed atop, I look good and hard at an object that I have always loved but maybe have taken for granted.

It is a solid piece of wooden furniture that seats 6-8 comfortably but can magically accommodate more when required. Already an antique when my parents purchased it back in the 70’s, it is made of Western Australian hardwood and has stood the test of time.

Our childhood memories are engrained onto its surface. Hours of art and craft, happy times, the darker times and the varying foods that our adventurous mumma placed upon there. Back then, Mum was a member of a health food co-op and as such, our table saw homemade bread, yoghurt made from scratch, wholemeal pizza bases and other hippy based Moosewood style dishes. (And no, I did not eat all of it, crying in disgust ‘I just want normal shop bought white bread like other kids get!’).

At other times, more exotic dishes were laid to rest on the glitter speckled wood. Italian style cannelloni made with paper thin crepes and Indian style green beans come foremost to mind. I remember the cannelloni being made for those crazy 70’s dinner parties, replete with bearded men and women in flowing embroidered blouses. I am sure the table saw it’s fair share of red wine stains from wine that my father and his hairy cohorts had bottled themselves.

And always the more steady food of Mum’s upbringing. Irish stews, scones, vegetable soups and many delicious baked slices such as Belgian slice and the super yummy Weetbix based Scott’s Farewell Slice. Being an orchadist’s daughter, there was always an abundance of fresh fruit and veg. An hereditary condition methinks.

Our ma has always been emphatic that she was not a great cook but her 4 daughters beg to differ and I am sure if the table could speak, it would agree with us.

The table is now regularly laden with our lads Lego, various game pieces, homework, colouring pencils and paper. And of course the many meals lovingly (and at times begrudgingly) placed upon it. The patina of our life is now being written into it’s beloved wooden surface.

It speaks of the funny (?) time I arrived home after a weekend away and how The Yak (with a loving heart) had sanded it down and re-stained it a hideous yellowy varnish that shone like a bloody beacon in the night. Tears did fall that day.

Our extended family now gather around it. We are not little girls anymore but grown women with careers, families, joys and troubles of our own. This table joins us, even when we are disconnected.

It speaks of friends who have joined us and the many words and feelings that have sunk into this receptacle of our lives.

This table reminds me that we are not only what we eat. We are also where we eat and who we choose to eat with. Of the importance that food plays in the fabric of our daily lives, not only as sustenance but in the making of memories. After reading Kitchen Table Memoirs, I don’t think I shall ever take our table for granted again.

For further details on this wonderful book and on Foodbank, go here:

http://www.foodbank.org.au/2013/04/11/kitchen-table-memoirs/


Shortbread for Christmas

To me, Christmas is shortbread and shortbread is Christmas.

It’s the only time I make it. Batch after batch is baked, packed in various ways and given as a tasty holiday treat. This gives me the opportunity to delve into my collection of vintage kitchenware and present it on quaint china plates or quirky glass bowls. (A great way of justifying my hoarding tendencies).

I never try new recipes for my Christmas giveaway. After years of perfecting this recipe, I would hate to disappoint the yearly recipients. I assure you it’s not due to laziness. Or is it?

In my extended family, we could start Shortbread Wars (like Star Wars but more delicious.) Our family is full of shortbread bakers. Nana Dorothy used to bake shortbread, my mum bakes it, as do two of my sisters. (The baby of the family has gone renegade and has so far resisted this hereditary primal urge..I give her another year…).

This shortbread is short (like myself), light, with a hint of crispness and not overly sweet. I have used the iconic Margaret Fulton’s recipe for the past few years and find that adding the 1/4 cup of rice flour adds that textural bite and lightness that makes me want to sing.

A piece of this shortbread with a cup of tea is ambrosia.

The smell makes little lads salivate and hang round the oven door.

In our house, its mandatory for Santa to be left a piece with the obligatory glass of milk.

This recipe is not gluten free which makes The Yak very sad. My mission (if I so choose to accept it) for the next few days, is to perfect a gluten free version. Fingers crossed.

Shortbread hints and tips: Knead the dough with a lightness of hand for about 3-5 minutes until its smooth and buttery. Do not attempt this on a very hot day unless you have airconditioning or you will end up with buttery mush! I use my trusty KitchenAid mixmaster but I have also used a handbeater. Or use your a wooden spoon and arm power if you feel like a workout!

YOU NEED
250g butter, unsalted
1/2 cup caster sugar
2 3/4 cup plain flour
1/4 cup rice flour

METHOD
Preheat oven to 180C.
Line 2 baking trays with baking paper and sift the flours into a bowl.
Cream the butter and add the sugar gradually, beating until the mixture is light and fluffy. (I used a mixer for this.)
Work in the flour gradually and with a light hand, knead to form a dough. (I do this in the bowl.)
Divide the dough in half, roll each half out to a 3-4 cm log. Wrap in clingwrap and refrigerate for half an hour.
Slice the logs into 1-2 cm thickness, depending on your fancy, place 10mm apart on a baking tray and prick each piece all over with a fork.
Bake for 10-15 minutes until crisp and straw-coloured.
Makes about 20-25 pieces.
The Margaret Fulton Cookbook