Pandemic Apple Slice

IMG_7974


Ahh, the pandemic. What to say when so much has already been said? During lockdown, like so many others, I veered between being happily ensconced in the safety of home, only to find myself the next day, pacing the house like a caged lion. Wistfully remembering happier days involving family, friends, cafes, restaurants and someone else’s cooking. Good days were spent helping kids with schoolwork, baking, cooking, cleaning, tidying, sorting, exercising, playing games with family and watching movies. (Other days that were ‘less good’, were spent watching too much Tiger King on Netflix, drinking too much wine and freaking out…just a wee bit.) There is no ‘upside’ in a pandemic but with the Yak working from home, we got to spend precious time as a family that we had never experienced before.

Personally, the major downer in all of this, has been missing seeing Mum. No more Thursday morning market visits, dinners and especially, no hugs since March. Being over that ‘certain age’ and in the process of sorting out a pre-existing lung condition, meant strict self-isolation for our Mum. And whilst phone conversations and brief chats from the end of her driveway may have grown tiresome, (especially for her), it was a constant reminder of how important it is that we all did the right thing. And that we all still continue to do the right thing, ensuring that we protect those who are most vulnerable and ourselves.

This is not a whinge, I was very grateful to see her, even from a distance. My husband is unable to go back to the UK to see his Mum and as she is medically vulnerable, God knows when he will see her again. Other friends are in the same situation as him, with family in far away countries that they cannot go home to and visit. So many jobs lost, so many struggling and my heart breaks for all of those who were unable to and still cannot, visit family in aged care. Let alone and even more so, for those have lost loved ones forever, to this damn virus.

In Sydney and NSW Australia, we are currently hovering in a strange place, Covid wise. Kids are back at school here but sadly, Melbourne and parts of Victoria are back in lockdown with infection rates and deaths growing scarily by the day. In NSW, Covid clusters are occurring but at a slower rate. Some restrictions have just came back into place regarding numbers at restaurants and at social gatherings. We are on tenterhooks, waiting for the next shoe to drop. Hoping that we can all make sensible choices and keep one another safe.

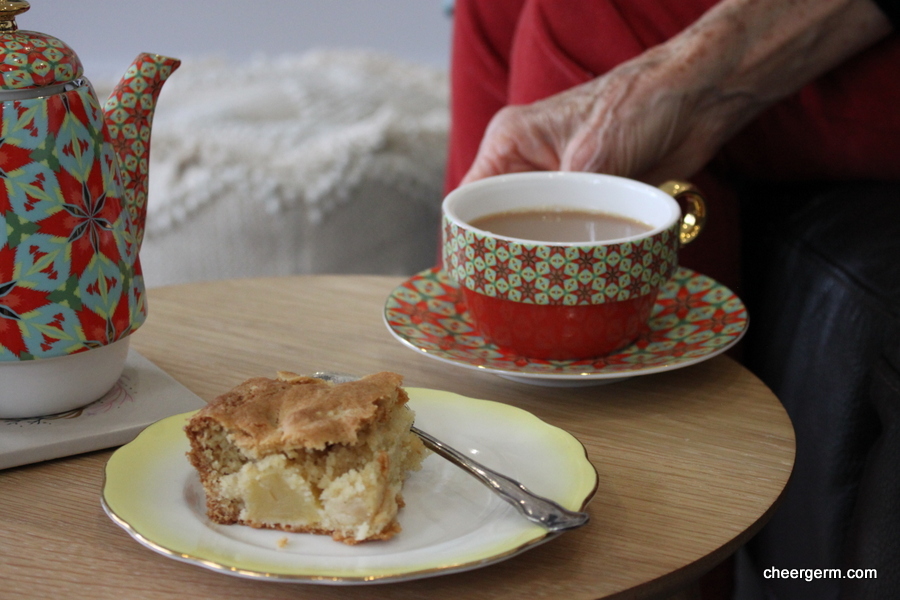
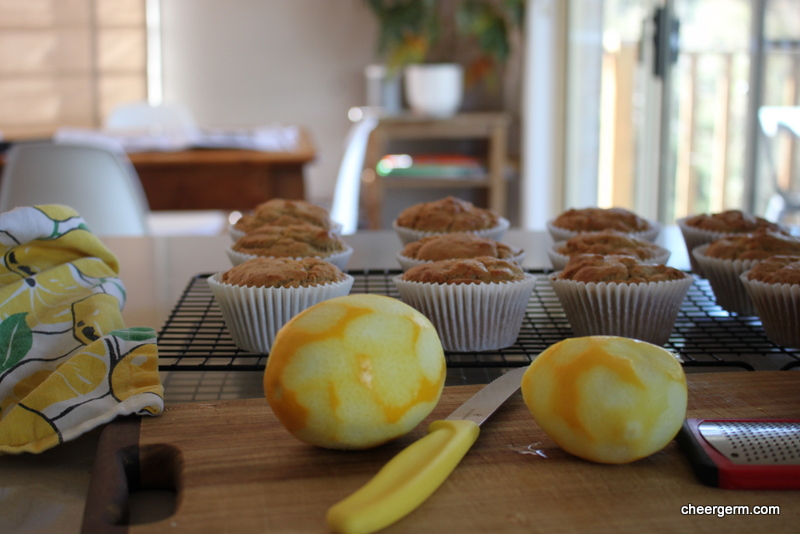
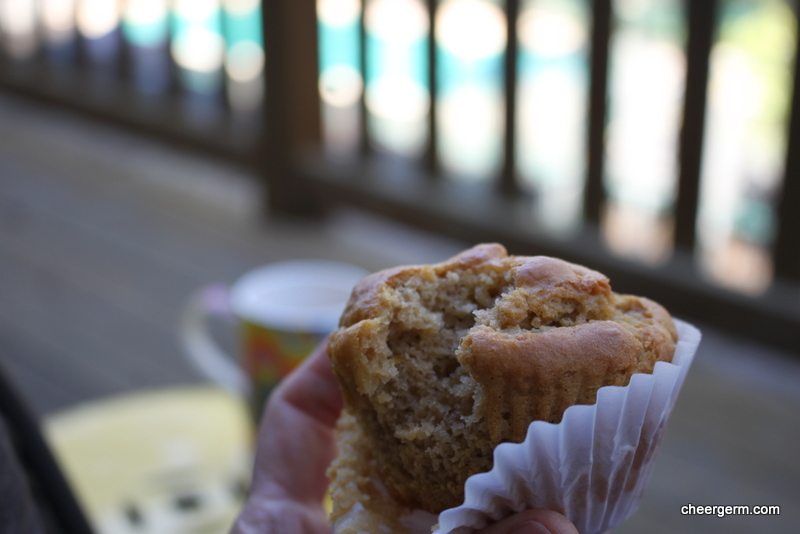
Recently and cautiously we have seen a little more of Mum. (Although that may have to go back on hold considering the last few days of community infection rates.) Her condition is now under treatment and we have enjoyed carefully curated coffee catch ups outside and one or two short, socially distanced visits from one faraway couch to another. Baking this apple slice for afternoon tea on one of these visits, was my way of letting her know how very much I love, miss and appreciate her. There are no guarantees of a tomorrow for any of us and time is so very precious. This delicious slice was a recipe that she passed along to me and has become a firm family favourite. It is simple, quick and delicious. Give it a whirl, it’s a food hug you can give when you can’t give a proper hug.

PANDEMIC APPLE SLICE

WHAT YOU NEED
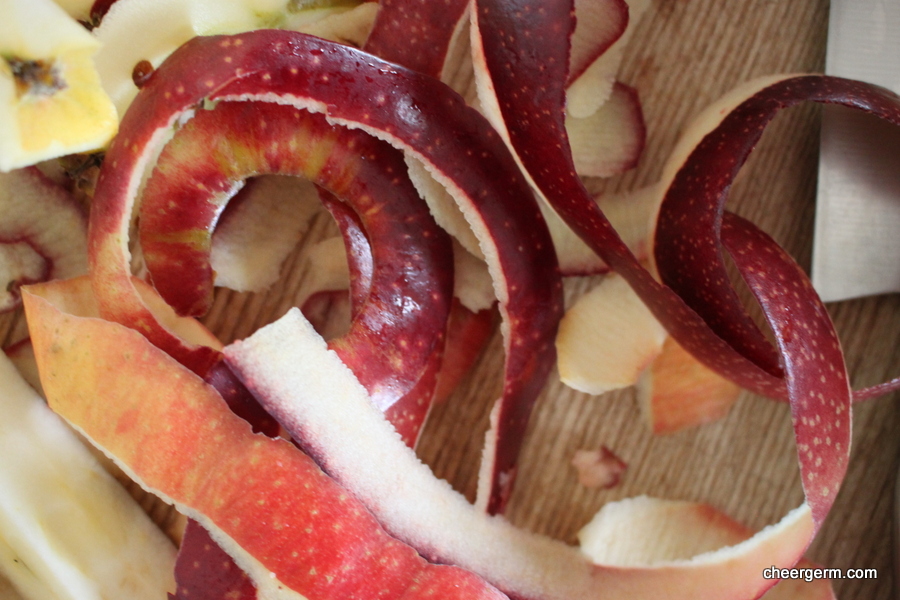
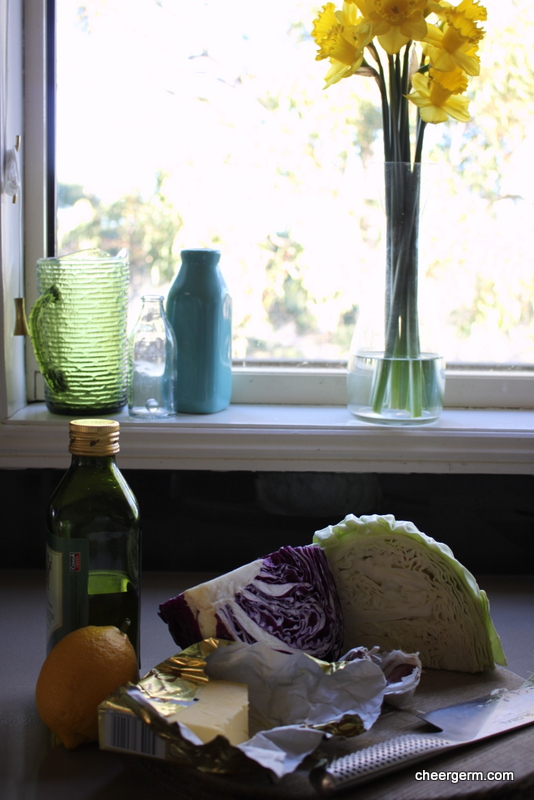
3 apples, peeled, cored and diced (1 cm)
1 tbl lemon juice
1 tsp vanilla bean paste
280g self raising gf flour
(Or 280g plain gf flour with 4 tsps baking powder and a 1/4 tsp salt.)
1 cup caster sugar
125g butter
1 egg, lightly beaten
1/4 cup milk

HOW YOU DO IT
Preheat the oven to 180C.
Toss the prepared apples in the lemon juice to ensure they don’t go brown, add vanilla and stir through.
Combine the flour and sugar in a large mixing bowl then add the apples and stir through.
Melt the butter in a small saucepan or in a small bowl in the microwave.
Pour the cooled butter, beaten egg and milk into the flour and apple mixture and stir until combined.
Tip the mixture into a lined tin and bake for 35-40 minutes until the top is golden brown and a skewer inserted into the middle comes out clean.
Can keep up to 3 days.

Cooking Notes: If you don’t require this slice to be gluten free, substitute for 2 cups regular self-raising flour. I sometimes add a teaspoon of cinnamon depending on my mood.

Original non-tweaked and non gluten-free recipe found here:

Apple slice


IMG_7939

IMG_7978


IMG_7981


Gluten free macadamia and lemon shortbread

Christmas baking. Those of us who reside in this sunburnt country love nothing more than turning on our ovens in thirty plus degrees heat and ninety plus humidity. If you can’t ‘hack’ it, stay out of the kitchen us hardcore bakers would say. Every year I try a new spin on the classic shortbread and this Yuletide season, I decided it was time for a little bit of Australiana. A dash of ‘yeah mate’, a teaspoon of ‘good on ya’ and a sprinkling of ‘g’day.’

The macadamia nut is indigenous to Australia (sorry Hawaii, it was ours first) with a mild flavour and creamy, buttery texture. These ovoid tree-grown kernels pair beautifully with citrus. I would have loved to used the wonderfully zingy lemon myrtle, another native ingredient but sadly, I hadn’t ordered it in time. Hence, good old lemon rind had to suffice.

By all accounts this is a ‘little ripper’ of a combination and one that I am sure any good ‘sheila or bloke’ would be happy to find in their Christmas stocking. Have a ‘beaut’ Christmas and a ‘bloody’ Happy New Year.

MACADAMIA AND LEMON SHORTBREAD

WHAT YOU NEED
250g butter, room temperature
2 tsps finely grated lemon zest (approx the zest of 2 medium sized lemons)
1/2 cup caster sugar
2 3/4 cups plain gluten free flour (for non gluten-free shortbread use the same amount of plain flour)
1/4 cup rice flour
1/4 tsp fine salt
60g macadamias, very finely chopped

HOW YOU DO IT
Preheat oven to 170C.
Line 2 baking trays with baking paper and sift the flours and salt together into a bowl.
Cream the butter, lemon zest and add the sugar gradually (I used a mixer), beating until the mixture is light and fluffy.
Work in the flour gradually until the mixture is just combined.
Add the macadamias and give the mixture another quick mix.
Knead the mixture lightly in the bowl for a few minutes to bring it together.
Divide the dough in half, roll each half out to a 3-4 cm log. Wrap in clingwrap and refrigerate for half an hour to an hour.
Slice the logs into 1-2 cm thickness, depending on your fancy, place 10mm apart on a baking tray and prick each piece all over with a fork.
Bake for 20-25 minutes until crisp and straw-coloured. (Regular shortbread will be quicker to bake, probably only 15-20 minutes.)
Cool down on wire racks. Store in an airtight container.
Makes about 20-25 pieces.

A Cheergerm Adaptation of a Margaret Fulton recipe.

Cooking Notes: Gluten free shortbread can be delicate creatures so please handle carefully when rolling and cutting. When adding the flour to the mixture, I pop a teatowel over the mixer to stop the flour ‘floofling’ (an exact culinary term) all over the joint.

Go here for some other Christmas shortbread variations:
Ginger shortbread
Cardamom, cinnamon and brown sugar shortbread
Pecan and vanilla shortbread
Cranberry chocolate and pistachio shortbread


Ginger and almond slice, gluten free

Kid 1: Do you want a hug Mum?
Me: (Suspiciously) … um why?
Kid 1: Are you having a bit of a hard time at the moment?
Me: Ummmm…why do you ask?
Kid 1: Are you going through some kind of mid life crisis? I saw those tablets in the kitchen and it says that they are for ‘hormonial’ problems.

Explanation: sitting on our kitchen bench top sat an assortment of herbal tablet remedies addressing ‘certain women’s issues’, including that ‘raggedy-arse no good delightful condition of pre-menopause.’

Me: (Despite the exclamation marks in my mind, out loud I calmly said) Well, I guess I kind of am.
Kid 1: Oh, that’s badly timed with you going through a mid-life crisis and me going through teenage years! (Himself now being all of fourteen.)
Me: Yup, we really should have planned that better.
Kid 1: Do you still want a hug?
Me: Yes, yes I do.

Now that was a damned fine hug indeed.

A close runner up to that hug is this buttery innards-warming gingery slice topped with golden brown nutty slivers. The nuggets of crystallised ginger add wee pockets of chewy surprises that both delight and astound. (Ok, astound is taking it too far but they are bloody tasty.) Indeed, it has become Kid 1’s second favourite homemade slice.

ALMOND AND GINGER SLICE, GLUTEN FREE

WHAT YOU NEED
175g unsalted butter, room temperature
1 cup caster sugar
1 egg
225g gluten free plain flour, sifted
2 tbl milk
100g almond meal
1 tsp ground ginger
100g crystallised ginger, uncrystallised or glacé ginger. (It’s up to you!)
70g flaked almonds

WHAT YOU NEED
Preheat oven to 190C degrees conventional (or 180 C fan-forced) and line an 18cm by 28cm baking tin with baking paper.
Beat butter and sugar together using an electric beater until thick, pale and fluffy.
Beat in the egg, then beat in flour alternating with milk.
Stir in the almond meal, ground ginger and crystallised/glacé ginger.
Pat the mixture into the tin and smooth it out evenly and sprinkle with the almonds.
Bake for 35-45 minutes until golden brown and a skewer inserted in the middle comes out clean.
Cool slightly in the pan then lift onto a baking rack to finish cooling. Cut into squares or fingers and eat.

Recipe slightly adapted from the following website:

https://www.taste.com.au/recipes/ginger-almond-slice/0d614e62-250f-45ff-aa4b-c4c161ce186e


Pam’s lemonade scones

Some people are irrevocably part of your childhood fabric, the person who gave me this scone recipe is one of those people. Not long after we moved to Melbourne from New Zealand, over forty years ago now, I made friends with a wee red-headed energetic lass at our local primary school. Her mum’s name was Pamela and as time went on, our Mums became friends and our families became close. In many ways, they were our Australian family. Patching a hole that had been left from leaving loved ones behind in The Land of the Long White Cloud.

Pam’s parents were Dutch, she had beautiful high cheekbones and a European sensibility. She was strong, funny, fierce, kind and possessed a bullshit radar like no other. As well as raising a family, she ran a catering business from home using the classical cooking skills she had acquired in a cordon-bleu cooking course. I remember sitting on tall stools on the other side of her tiled kitchen bench. Shiny copper jelly molds decorated the walls and I watched with quiet amazement as she deftly chopped vegetables with a skill I had never seen before, made pastry or prepared hor’douevres for upcoming catering gigs. (Oysters atop black pumpernickel bread spread with green butter, being one of them. It was the late 70’s.) Alongside my own Mum’s passion for healthy, fresh produce and good home cooking, watching Pam in the kitchen deeply influenced me in a way that I wasn’t aware of until many years later.

I learnt much from Pam and from observing the friendship between her and my mother. She showed me how to clean a bathroom properly and how to use one square of toilet paper if that was all you were left with. (You don’t want to know.) She taught me the pinch test on the back of your hand to see how your skin was ageing. I remember watching with fascination as the skin on our younger hands pinged back quickly but when she pinched her own hand, it went back into place at a much slower pace. Funny the things we remember.

Pam and Mum’s friendship was close and honest. I observed them with equal parts envy, interest and delight. In retrospect as an adult, probably in the hope that I too could emulate this kind of relationship one day. From my perspective, they seemed to stimulate and challenge each other both intellectually and emotionally. It appeared as if the status quo existed only to be questioned. Pam was a stalwart support in some of my family’s darkest times and their friendship taught me that friends don’t always have to see eye-to-eye. That close relationships can move past a disagreement or a hurt into a deeper understanding. Her and Mum are still friends and being divided by distance, talk on the phone, text often and visit when they can.

Pam is a never boring whirlwind of ideas, deep thoughts, rapid-fire at times bewildering conversation that pushes you to keep up. She has an abiding passion for the new, for life, for food, for people, for education and for the intricate workings of the human mind and body. In a recent conversation based around baking, I had told her that my scones were always too heavy, so she promptly emailed me her lemonade scone recipe.

Using the lightest possible hand (as directed), the scones have turned out beautifully light and airy both times I have baked them. They will slip nicely into my standard repertoire and be the basis of some gluten free experimentation in the future. I think I will call them Pam’s Lemonade Scones. Because that’s the very least that she deserves.

Lemonade scones

WHAT YOU NEED

2 cups self-raising flour
1/2 tsp salt
1/4 cup castor sugar
125 ml thick cream
125 ml lemonade
2 tbsp milk

HOW YOU DO IT

Preheat oven to 200C. Line a tray with baking paper.
Sift the flour, salt and caster sugar into a medium sized bowl.
Add the cream, lemonade and milk to the flour mixture quickly. Using a knife or spatula and with a very light touch, bring the mixture together.
Tip onto a floured board and very lightly knead together. (The mixture is quite wet and sticky.)
Pat into a 2cm thick square and cut the mixture into 12 squares. (Or use a cutter but I think this would be a wee bit tricky with a sticky mixture like this.)
Brush the top with any remainding cream.
Bake for 10-15 minutes until risen and lightly golden brown.
Serve with butter, jam, cream. Whatever takes your fancy.

Pam’s Lemonade Scones


More gluten free lemon muffins

Forget finding the meaning of life, running a marathon or even attempting to read an entire book without skipping to the last chapter. My personal Holy Grail (minus the white steed and medieval suit of armour), appears to be an ongoing quest for the perfect gluten free lemon muffin recipe.

Sadly, this is not it. But it ain’t half bad. It is not the fault of the original recipe but merely the curse of using gluten free flour and the tendency for such bakes to dry out quickly. (Especially when the don’t include fruit or some kind of nut flour.) The Yak really enjoyed them and they are certainly at their best on the day of or day after baking. I am most proud of our three bountiful small lemon trees that continue to provide the citrus that is the zingy backdrop to my culinary life.

The search continues but it is good to finally know my true purpose.

GLUTEN FREE LEMON MUFFINS

WHAT YOU NEED
210g gf flour
1 tbl baking powder
1/2 tsp salt
3/4 cup sugar (I used brown sugar for this batch but caster sugar is fine too)
4 eggs
1/3 cup Greek yoghurt
1/2 cup grapeseed or olive oil
2 tbls finely zested lemon rind
1/4 tsp vanilla bean paste or 1/2 tsp vanilla essence
Syrup
2 tbl lemon juice
1 tsp brown sugar

HOW YOU DO IT
Preheat oven to 180C and place muffin papers in a 12 hole muffin tin.
In a small bowl, sift the flour, baking powder and salt and set aside.
In a large bowl, beat together sugar and eggs until pale and smooth, this will take about 2-3 minutes.
Beat in the yoghut then beat in the grapeseed or olive oil along with the lemon zest and vanilla essence.
Add the flour mixture and mix until incorporated.
Spoon the batter into the muffin tins, filling each about 1/3 full.
To make the syrup, place the lemon juice and sugar into a small bowl and microwave for about 30 seconds until the sugar is dissolved.
Bake the muffins for 15-20 minutes until golden or until a cake skewer comes out clean.
Transfer to a rack to cool and then immediately, poke a few holes with the cake skewer into each of the muffins. Drizzle some of the syrup onto each muffin until all the syrup is gone.

Makes 12 small muffins

A gluten free adaptation of the following recipe:

https://www.seriouseats.com/recipes/2012/05/lemon-olive-oil-muffins-recipe.html


Gluten free pecan and vanilla shortbread

This is the pointy part of the year when our ‘busy’ lifestyles become more hectic than usual. Fighting for a carparking space and battling the multitudes at crowded shopping malls is not my idea of a good time. Completing my present purchasing early, allows me to enjoy the process and maintain some semblance of sanity.

When I think of childhood Christmases, certain gifts I received stand out (hello wholesome Sindy doll, no pneumatic Barbie for me.) What I remember most however, is that feeling where the world has slowed down. Of spending it with my crazy beautiful family, of the steadfast family friends who tethered us, of decorated pine trees hauled from the paddock next door fat and laden down with old school tinsel, Dads long walking socks used as Christmas stockings stuffed full of small and thoughtful delights.

I think of all the delicious things we ate; shiny glazed hams studded with cloves, homemade pavlovas crunchy on the outside and gooey in the middle, enough boiled new potatoes to feed an army and freshly shelled green peas – a job shared by all. Of scorching hot days when our bums stuck to vinyl car seats, us kids making whirlpools in above-ground swimming pools and running wild through sprinklers in baggy one-piece swimming cozzies. I hope one day, my own children will look back and remember the traditions created and moments spent together and not the ‘stuff’ that they received.

My goal has always been to spend the last week before Christmas away from the shops. Soaking in the festive feeling, spending time with loved ones, enjoying the Christmas lights on our street and of course baking shortbread for Christmas gifts. This year I find myself in the kitchen as the temperatures in our part of Sydney soar into the high thirties and low forties. (Celsius that is.) Working with butter in extreme heat is tricky but is manageable if you work fast. I do admit to turning on the air-conditioning once the oven starts to warm up. Pecan and vanilla is a winning combination and so far, no-one has complained. (They wouldn’t want to, there’s no saying what an overheated possibly perimenopausal baker might do if offended.)

Christmas isn’t always an easy time. Grief, pressure, depression,ill-health, financial woes and difficult family dynamics don’t just disappear because the calendar tells us it’s December. Terrible things happen at any time of the year and not everyone has it good. With that in mind; whatever you do or don’t bake this Christmas and whatever kind of Christmas you are experiencing, I wish you good tidings, peace and love.

GLUTEN FREE PECAN AND VANILLA SHORTBREAD

WHAT YOU NEED
250g butter, room temperature
1/2 cup caster sugar
1/2 tsp vanilla bean paste or 1 tsp vanilla essence
2 3/4 cups plain gluten free flour (for non gluten-free shortbread use the same amount of plain flour)
1/4 cup rice flour
1/4 tsp fine salt
1/2 cup finely chopped pecans

HOW YOU DO IT
Preheat oven to 170C.
Line 2 baking trays with baking paper and sift the flours and salt together into a bowl.
Cream the butter and add the sugar gradually (I used a mixer), beating until the mixture is light and fluffy.
Add the vanilla and mix until evenly dispersed.
Work in the flour gradually until the mixture is just combined.
Add the pecans and give the mixture another quick mix.
Knead the mixture lightly in the bowl for a few minutes to bring it together.
Divide the dough in half, roll each half out to a 3-4 cm log. Wrap in clingwrap and refrigerate for half an hour to an hour.
Slice the logs into 1-2 cm thickness, depending on your fancy, place 10mm apart on a baking tray and prick each piece all over with a fork.
Bake for 20-25 minutes until crisp and straw-coloured. (Regular shortbread will be quicker to bake, probably only 15-20 minutes.)
Cool down on wire racks.
Makes about 20-25 pieces.

A Cheergerm Adaptation of a Margaret Fulton recipe.

Cooking Notes: Gluten free shortbread can be delicate creatures so please handle carefully when rolling and cutting. When adding the flour to the mixture, I pop a teatowel over the mixer to stop the flour ‘floofling’ (an exact culinary term) all over the joint.


Sautéed cabbage

Cabbage is supposedly the latest ‘it’ vegetable, the suddenly fashionable ‘new kid on the block’. It’s in the zeitgeist and cauliflower has been kicked to the curb and replaced with the humble cabbage.

Dear Cabbage, please know that I have always loved you. When you were the wallflower, the last kid picked for handball and the lonely vegetable left sitting on the veggie stand. Eastern Europe stood by you when so many others shunned you. You are delicious whether eaten raw, cooked, pickled and fermented.

Cabbage, I am happy that you are having your day in the sun. Please know that those of us who have always been your stalwart supporters, will still be here when your fifteen minutes of fame finally ends.

SAUTÉED CABBAGE

WHAT YOU NEED
3 tbls olive oil
50g butter
400g red cabbage, finely sliced
400g white cabbage, finely sliced
1 medium onion, finely sliced
2 cloves garlic, crushed
1/4 cup cold water
Salt and pepper
1/2 small lemon

HOW YOU DO IT
Heat a large frying pan on a medium heat then add the olive oil and butter.
Once the butter has melted, sauté the onion for a few minutes, then add the cabbage and stir until the cabbage is well coated with the butter and oil.
Add the garlic and cook for 1 minute, stirring continuously. Add 1/4 cup of water and bring to the boil then reduce the heat and cook, stirring occasionally for around 30 minutes until the cabbage is soft, tender and starts to caramelise. (If you want crunchier cabbage, just cook it for less time.)
Squeeze the half a lemon over the dish and season to taste with salt and pepper and serve alongside whatever your heart desires.

Cooking Notes:
I sometimes add 1/2 tsp caraway seeds with the garlic if I have them.
My hard taskmaster erstwhile editor (aka The Yak) wants me to explain the terminology ‘sauté’. Sauté means to cook quickly in a small amount of fat in a sauté pan or fry pan, over a medium to high heat for a short time.

A Cheergerm version of a dish that has been around a very long time


Turmeric, garlic and sumac potatoes

Our home is an eclectic mix of the old and the new. Vintage pieces have either been collected or handed down. Our artwork tells the story of where we have been, who we once were, where we came from and perhaps where we are headed. The sentimental and the functional work alongside a healthy mix of Lego, too many books to count and endless drawers stuffed full of ‘God Knows What.’ Furniture is chosen for both comfort and design and in some cases, passed down or handed over.

I am drawn towards textural fabrics that provide warmth and please my eye. Our abode is a continual work in progress and our list of ‘things to do’ grows bigger by the day. We are not the greatest of ‘handypeople’ and we work at a snails pace that would (and probably does) frustrate those faster moving people out there. Our home doesn’t suit everybody but then nobody should really ever have to justify ‘home’ to anyone. (Except maybe those of you still married to the 80’s grey and pink decor theme but then, who am I to judge?)

This winter, it feels as if my heartbeat and mind have slowed. I notice the small things. A new crack in a wall, a particularly lovely leaf on an indoor plant or the iridescent glaze on a piece of pottery. The way the light moves throughout the house during the day, alighting on a painting or a section of wooden flooring. I have found great peace and comfort in my surroundings.

Today’s recipe is more of a delicious idea than a recipe. Mum gave me a turmeric plant a little while ago and I excitedly harvested it the other day. I peeled and grated a bulb then threw it into the dinner potatoes alongside some olive oil, crushed garlic, sumac and sea salt then baked them until golden brown. Earthy, slightly tangy with a garlicky hit, the lads loved this little twist on a regular side dish.

strong>TURMERIC, GARLIC AND SUMAC POTATOES

WHAT YOU NEED
1 kilo Pontiac or Desiree potatoes, cut into 3-4 cm chunks
2-3 tbls olive oil
7-10cm fresh turmeric bulb, grated
2 large cloves garlic, crushed
1 tsp sumac
1 tsp sea salt

HOW YOU DO IT
Preheat the oven to 180C and line a baking tray with baking paper.
Toss the potatoes in the olive oil, turmeric, garlic, sumac and salt.
Place on the tray and bake until golden brown and tender.
Serve with whatever takes your fancy.

A Cheergerm creation


Roasted cauliflower, fennel and pumpkin soup

Mothers Day came and went in the place we live. For us, it was a low key day. My three sisters and I had recently returned from New Zealand where we farewelled our beautiful cousin Simon. He was a kind, funny, free-thinking, non-accepting of the status quo, shining beacon of a man. His battle with Fredreich’s Ataxia had worn him down and so, he took his leave of us. We are left heartsick and numb but I like to think he has shaken off the earthly chains of his embattled body and spirit and is perhaps dancing somewhere, to the Rolling Stones, on a warm tropical beach. He has a frangipani tucked behind his fine thatch of fiery, strawberry-blond hair and the requisite seaside cocktail in hand. Vale Simon.

So, as exhaustion overtook us, Mothers Day was gentle and unassuming. My boys were sweetly honest with heartfelt gifts, words and cards. In the spirit of honouring Mothers everywhere, I give a shoutout to my own Mum, whose patient, deep abiding love has been an invisible prop against my back in the hardest of times. I give a shoutout to my sisters who are mothers, how I admire their patience, far greater than mine. For another sister who is a step mum (a tough gig at times), I give her a shoutout as a steady and wise presence in the life her stepchild. For our Aunty Lyn, one of the strongest of women who has lost far more than any mother should ever have to but still loves, lives and not simply exists. For my friends who are Mums of all kinds, whether they have children, fur-babies or even plant-babies. These are women I admire, lean on, talk to and share this crazy life journey with in a real, unaffected, lack of bullshit kind of way. You know who you are.

Mum and her hubby did pop over for a simple Mothers Day lunch. We had bowls of this filling, thick and earthily spicy soup followed by a luscious gluten free custard-like apple cake that Mum had made. (Something I will certainly be baking and blogging soon.) Happy Mothers Day, yes it’s belated but no less heartfelt.

ROASTED CAULIFLOWER, FENNEL AND PUMPKIN SOUP

WHAT YOU NEED
1/2 cauliflower (600g)
1 large fennel bulb
300g pumpkin
1 1/2 tsps cumin seeds
1 1/2 tsps dried oregano
1/2 – 1 tsp dried chilli (depending on your tolerance for heat)
Salt
Olive oil or grapeseed oil
2 medium size potatoes
1 litre veggie stock
1 litre water
Pepper

HOW YOU DO IT
Preheat oven to 180C and line two trays with baking paper .
Cut the cauliflower into florets, chop the fennel bulb into 2 cm chunks and the pumpkin also into 2 cm chunks.
Put the cauliflower on one tray and the fennel and pumpkin on the other, drizzle with oil and divide the oregano, chilli, cumin seeds and a tiny bit of salt between the two trays and stir to coat the veggies. (Go easy on the stock as it depends on how salty your veggie stock is.)
Roast for one hour until the vegetables are tender and slightly caramelised. Remove from the oven.
In the meantime, add the stock and water to a large saucepan, add the thinly sliced potatoes and cook until tender.
Add the roasted vegetables to the stock mixture and cook for a further 20 minutes .
Blend with a hand stick blender until creamy and smooth and add salt to taste and pepper if you so fancy it. Pour into a bowl of your choice and serve with good bread, toast, cracker or nowt.

A Cheergerm creation

https://fara.org.au


Pecan pesto sauce

A traditional Italian pesto from Genoa contains pine nuts so in a way, this is a charlatans version of a much beloved Italian sauce. My recipe, through misadventure, contains pecans. The pecan derives from a species of the hickory tree, a deciduous tree native to Mexico and parts of southern USA. It is technically not a nut but a ‘drupe’ which is actually a fruit containing a single stone or pit and an outer husk. Pecans are high in monounsaturated fats and are buttery, rich and sweet.

It was another overtly hot Sydney day and we were on the verge of ‘hanger’. My kitchen possessed the majority of the requisite pesto ingredients. A massive bunch of basil that needed to be used, a wedge of Parmesan cheese, garlic, a bottle of olive oil but not a darned pine nut in sight. My kingdom for a pine nut! All that could be found were two big bags of pecans doing time in my pantry. (A pretty darned tough place to hang out, well, so all the other nuts out on parole tell me). In the past, walnuts, coriander and mint have been tossed into pesto sauces whereas pecans have been used for granolas and sweet baked goodies. Popping them into my pesto felt strangely wrong.

However, wilting and weakened and in the spirit of the Deep South from whence the pecan originated, I declared in my best southern accent, that I just didn’t give a damn. (In other words, there would be no running to the shops in a last minute manner.) Pecans were thrown in and all was well. We stirred the pesto through pasta and it was herbaceous, nutty, vibrant and just the ticket for a quick simple meal.

PECAN PESTO SAUCE

WHAT YOU NEED
1 big bunch basil (this was 3 cups of basil leaves, I know because I picked them, packed them and I measured them, so there.)
1/2 cup lightly toasted pecans
1/3 cup grated Parmesan
2 cloves garlic, crushed
2/3 cup extra virgin olive oil
Salt
Pepper

HOW YOU DO IT
Pick the basil leaves and wash and dry them.
Add the basil, pecans, Parmesan and garlic to a food processor and process until finely chopped.
Slowly add the oil whilst the blender is going until all the ingredients are well combined.
Taste then season with salt and pepper to your liking.
This sauce is delicious when stirred through pasta, liven up a veggie soup and dollop a blob on top or serve alongside grilled and roasted meats or tofu.
Leftover sauce can be stored in a jar in the fridge for a few days, cover the top with olive oil to stop it spoiling.

A Cheergerm Recipe